Today OmniFocus is expected to release an update that makes their iOS apps universal. The iPhone app, for the first time, will carry with it the capability to view and create custom Perspectives.
There are several upgrade paths, depending on what you’ve already purchased from Omni in the past. (Before the universal update, the iPhone and iPad apps were paid, separate purchases, with only iPad carrying a Pro upgrade version.)
It’s not the easiest upgrade process to understand, but here are two charts from Ken Case (via the Twitter) that will help:
The upgrade paths (click to enlarge)
More Options on the iPhone Version (click to enlarge)
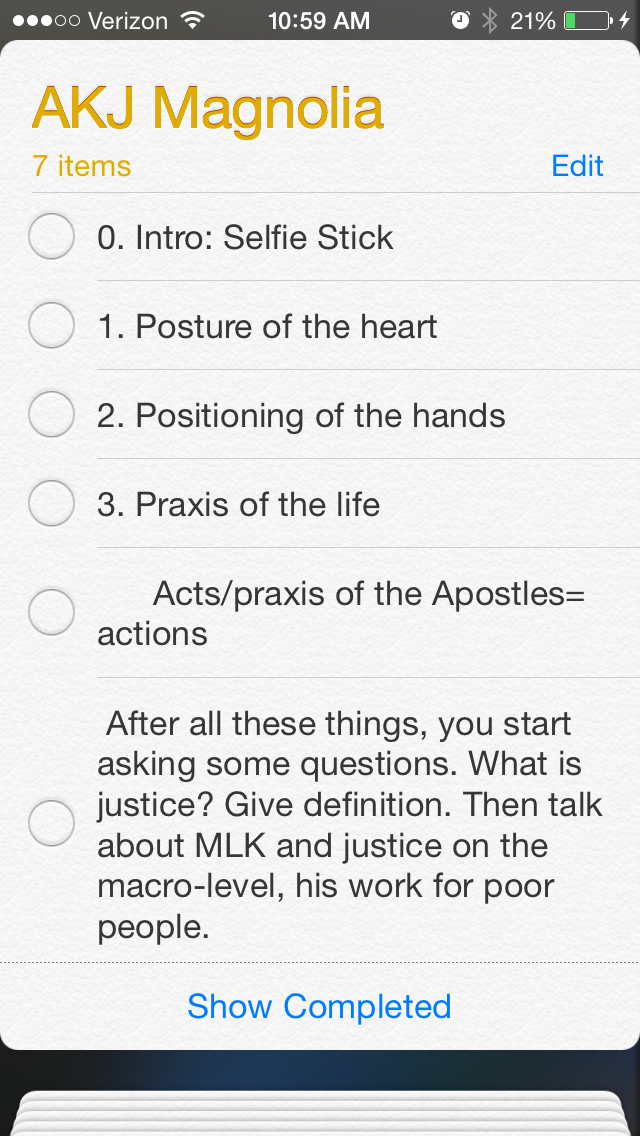
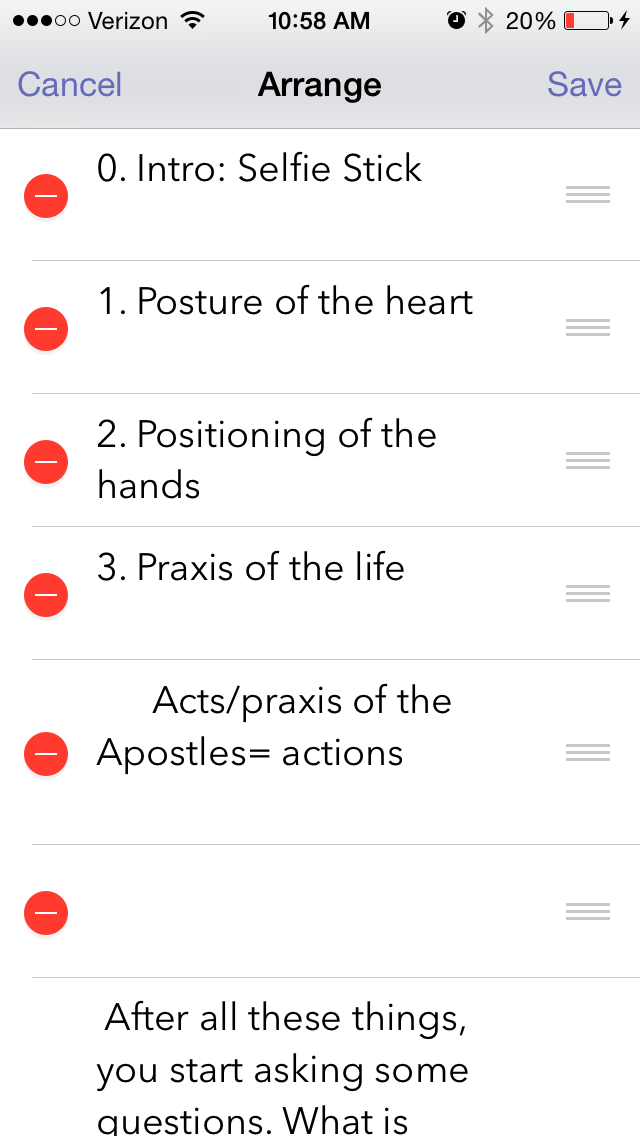
And check out this lovely screenshot from the updated help files. You can now re-arrange your Perspectives on the phone.
Reordering Perspectives in iOS Pro
You can see everything that’s new in iOS 2.1 here. My overly eager and long-winded review of OmniFocus is here.
The best texting app in the iOS App Store is (for the moment) free.
I’m a big fan (and daily user) of Launch Center Pro, which is created by the same developers who make Group Text+.
Group Text+ makes sending texts to a pre-saved group (or individuals) really easy and fast… and it even comes with a bunch of hilarious gifs you can send! (I’ve gotten way more into this last feature than a man my age probably should….)
Provide the easiest and quickest way to get to a blank text entry screen on iPhone and iPad.
Allow you then to send or export that text to as many other apps as possible.
This may sound like one of those apps that developers made just because they could, but I’ve been surprised to find myself increasingly reliant on Drafts 4.
Just the last two days I used it to (a) jot down some stand-up meeting notes (which I then exported to an OmniFocus task) and (b) send an email to someone when I didn’t want to have to be distracted by unread emails in my inbox.
Open the app, and you get a blank screen, into which you can quickly type (or dictate, via Siri) text. I recently was fortunate enough to have inspiration for a sermon outline strike me when I was doing some chores around the house. Not sure what to do with this newly found locus for creativity, I quickly reached for Drafts and jotted my thoughts down:
From here I could access a wealth of sharing options:
This particular draft went into Evernote, where I could easily get it later. I could have exported it some other ways:
Also amazingly cool is that when I exported it to Reminders, Drafts made each separate line into its own task:
This is sweet enough–an app that lets you quickly jot down text and export/share to just about anywhere. But Drafts is built with an eye to detail. You can make your text look nice, too:
Note the option to have a night mode. And all those fonts!
You can even re-arrange your text from within Drafts, just by virtue of having started a new line when you were entering text:
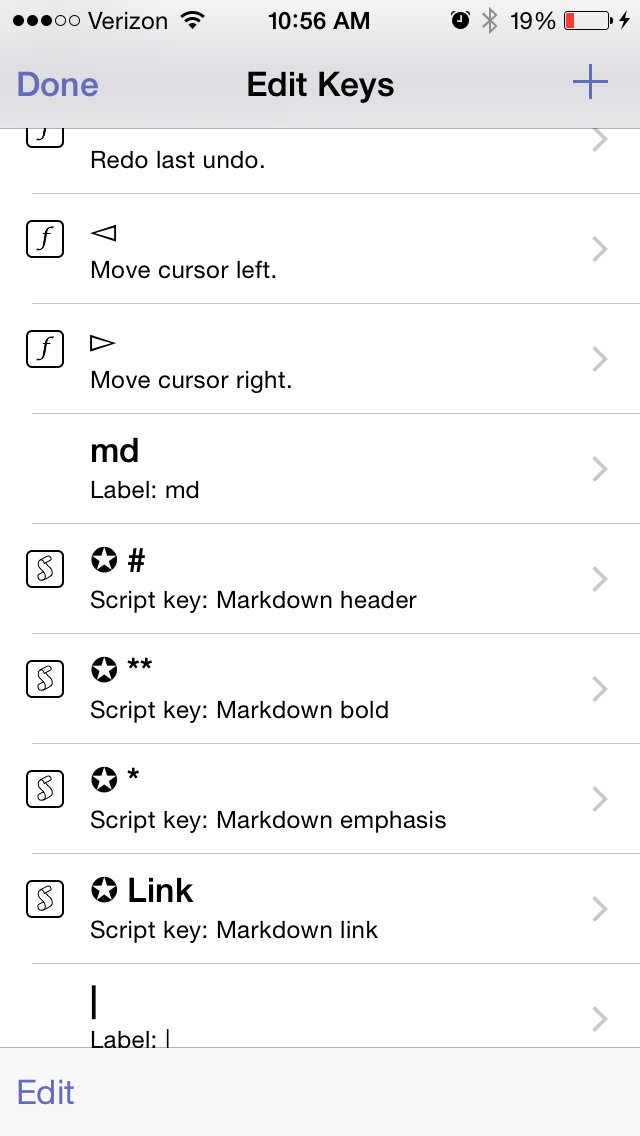
You can edit the keyboard keys that are available to you:
Note, too, the Markdown capabilities
There are quite a few settings you can adjust:
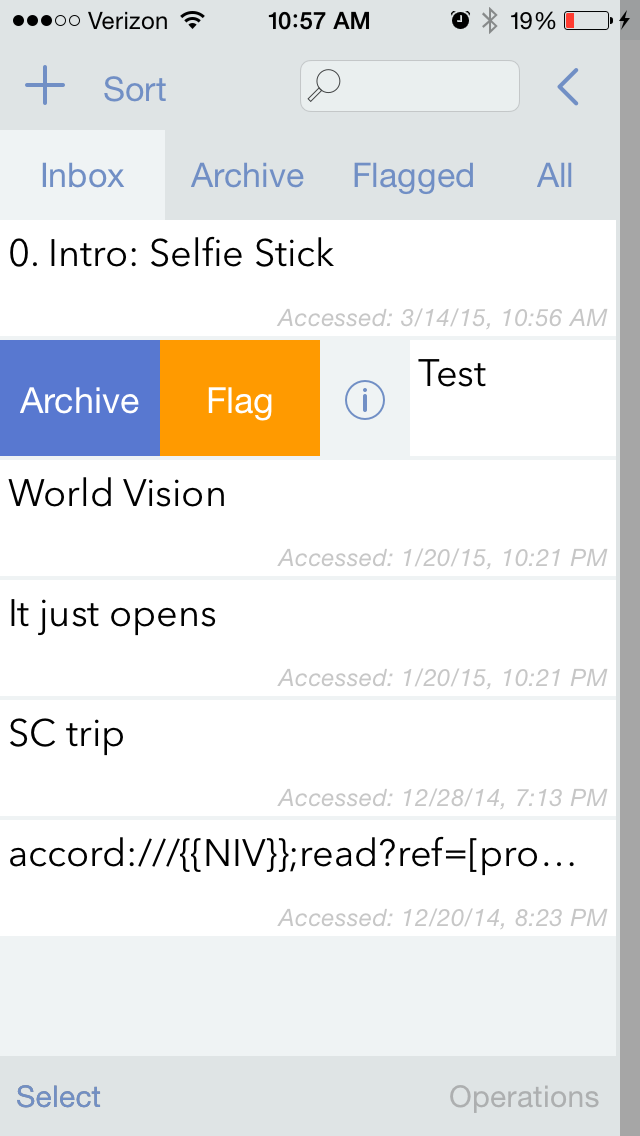
And Drafts can keep everything you enter, regardless of whether you’ve shared or exported it. (Drafts also keeps a record of where you’ve shared/exported your draft.)
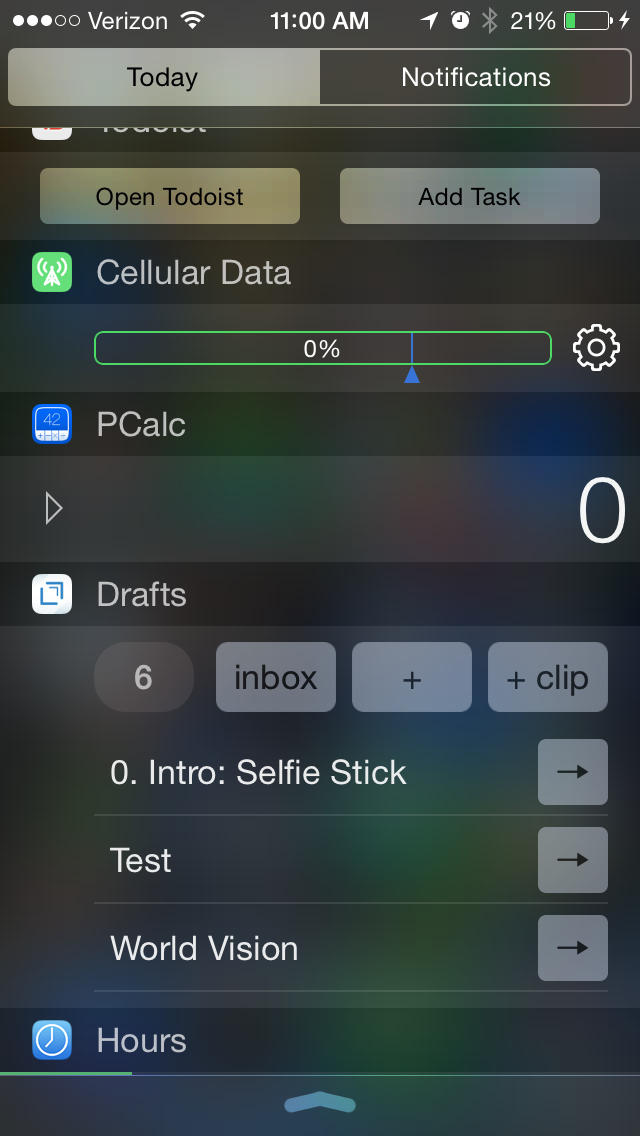
Yes, you guessed it, there’s a Today widget, too:
Drafts 4 is just as awesome on iPad (not pictured here) as it is on iPhone. The only possible downside to this app is that $9.99 is more than most iOS users are used to paying for an app. But it’s easily one of the most carefully developed and detailed apps I’ve used, and robust in its features and capabilities.
It’s well worth checking out, and has found a home in my daily workflow.
Thanks to the fine folks at Agile Tortoise, the makers of Drafts 4, for giving me a download of the app for this review. See my other AppTastic Tuesday reviews here.
You know that creeping suspicion that some of your strangest idiosyncrasies could not possibly be shared by anyone else ever?
You’re usually wrong.
Case in point: it turns out I’m far from the only one who has had about a dozen different to-do apps on his phone in the last couple months. But it’s a bad idea to use multiple apps to organize tasks. All the better if you can track everything through one clearinghouse.
OmniFocus is that place for me. In more than half a year of daily use (exception: techno-Sabbath), I’ve only found one real flaw in the program (sync is not seamless). Otherwise OmniFocus (a.k.a. OF) does everything I want a task management app to do, and many things I didn’t know I would want such an app to do.
First Things First: Learn OmniFocus Language
There’s a lot to OmniFocus. To get a quick overview, check out this video, or this one, which explains the fundamental OF concept of “perspectives,” ways of organizing and accessing your tasks.
Or skip the videos and read this one-paragraph simplification of what you need to know about OF terminology before using it:
Projectshelp you break a bigger endeavor down into its component actions. Projects can be Sequential (you have to do action 1 before you can do action 2) or Parallel (it doesn’t matter in which order you do the individual tasks). For that matter Projects can just have what Omni refers to as loosely-related but not interdependent “Single Actions,” like a grocery shopping list. Contexts allow you to organize actions according to the things/people/environment you need to do them: Office, iPad, Internet, Computer, Car (careful!), etc. The Forecast view shows your tasks chronologically in one place–I spend most of my time in this view. Or you can just make a quick entry in the Inbox, and then decide how to categorize it later.
iPad, showing various perspectives and Inbox (“Blog Posts” is a “custom perspective” available with iPad Pro version)
The Inbox is the starting point–OmniFocus suggests that you take some time to just “brain dump” everything there and then assign Contexts and Projects, due dates and duration times later.
Using OF requires some patience and learning, but is worth the investment of time if you’re serious about project and task management.
Contexts perspective in iPad
OmniFocus is Ubiquitous Across Devices and Apps
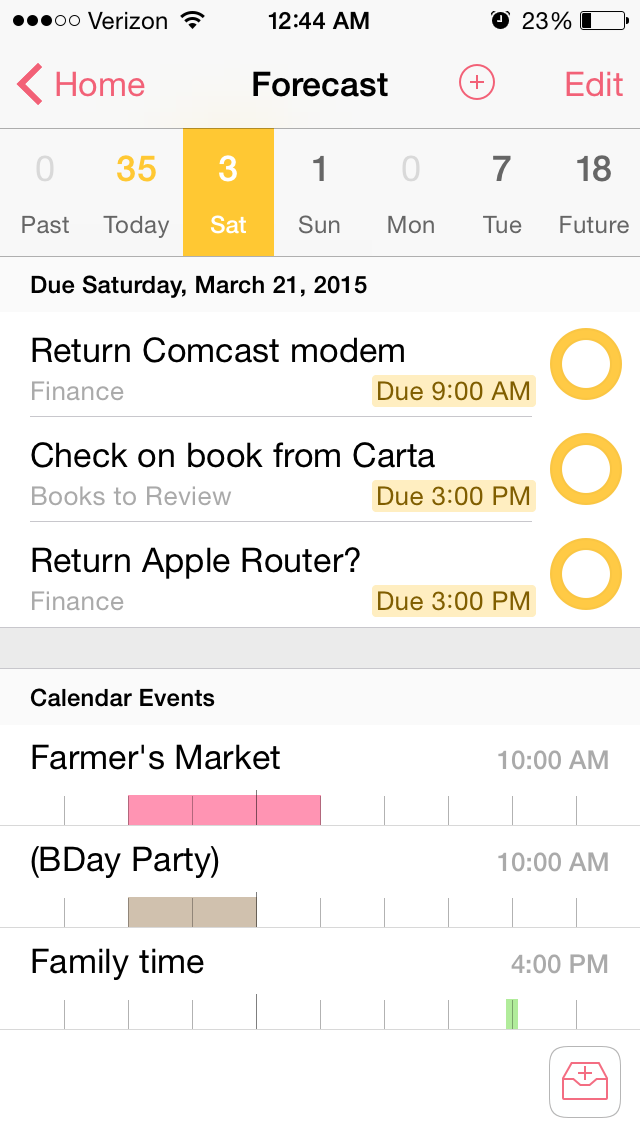
OF syncs automatically across Mac, iPad, and iPhone. When you are in the Forecast perspective, both the iOS apps and the OSX app allow you to see your Calendar Events right next to your actions for the day:
iPhone Forecast perspective
I even figured out, using their Clip-o-Tron 3001, how to turn Mac Mail messages into tasks with a keyboard shortcut. (Email inboxes are not a good place to keep tasks, you realize.)
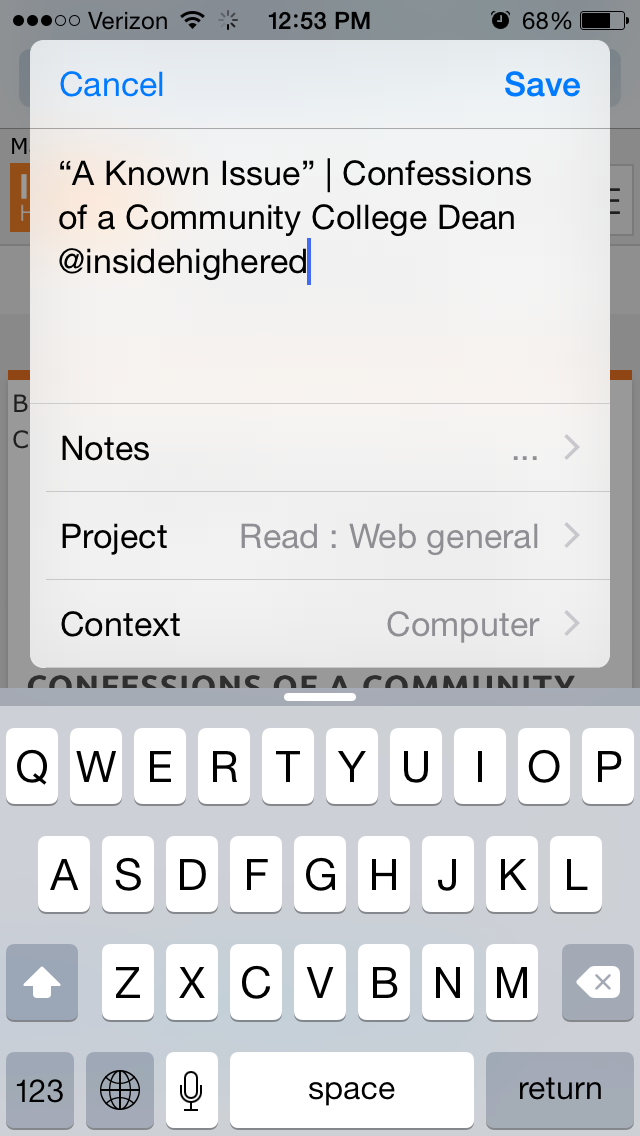
And I love the Share Extension in iOS8. From almost any app I can create an OmniFocus task. I do this regularly. I see something I like, so share to OF:
From Safari, for example, the Note is automatically populated with the article link, and I can set the Project and Context:
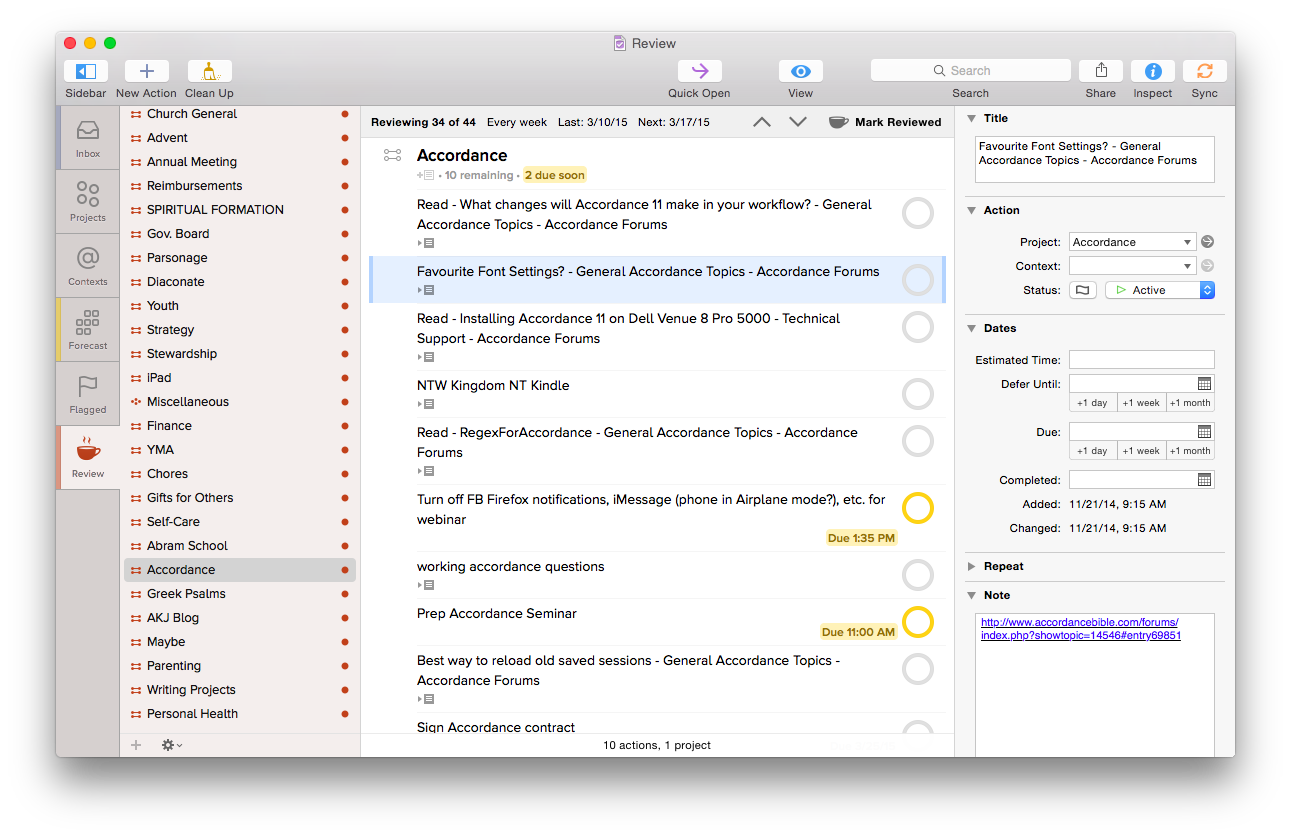
One lack in the Share Extension is the ability to assign a due date from the screen shown above–you have to manually open OmniFocus if you want to do that. However, the more I use OmniFocus, the more convinced I am to only set due dates if absolutely necessary–you can always look through undated tasks in your weekly review, which OF makes really easy with their excellent Review perspective:
OmniFocus for Mac Review perspective
What if you’re on a library computer or PC or purchased OF for Mac only and see something on your phone that needs to become a task?
OmniFocus gives you your own unique email address, to which you can email a task. This “Mail Drop” feature helps get the user close to Inbox Zero on email, too, since you can just forward a Gmail message to OmniFocus, where it will end up in your OF for future processing. In other words, you can input OmniFocus tasks from anywhere.
And TextExpander helps here. That app allows you to type your own abbreviations that then expand into text of your choosing. With TextExpander enabled, I write “.omni” and my OmniFocus task capture email address (which is neither short nor memorable) pops up right away.
Another way you can input tasks? Connect your OmniFocus in iOS to the Reminders app, then you can tell Siri to remind you something, and it goes into OmniFocus. Awesome!
Bonus: It Does Photos and Voice Memos
The iOS OF apps even allow attachments to tasks. If I’m processing paperwork and need to set a reminder to pay a bill, I can just take a picture of the bill from OF and save it to a task. Whenever I pull that task up on my computer or other device, the photo will be there.
You can also tap on the “Attachments” tab to record a voice memo, and save a task that way.
Limitations
There are some limitations to using OmniFocus, though not many, and far fewer than other task management apps. Its sync function, which uses Omni servers, operates with a delay. Though sync is supposed to be seamless, it doesn’t function with the same instantaneous speed as, say, Apple’s native Reminders app. On the ground level this means that if I work through a task list on my computer but don’t have the OF iPhone app open (even though background refresh is on), I will still get outdated task notifications on my phone until the sync properly takes place. This is a daily frustration, even if a minor drawback compared to all the other robust features.
The workaround for this is to manually sync the app each time I update it, to make sure it’s up-to-the-minute. OmniFocus has made improvements here since I started using it, but I hope it will soon match what other apps do by way of syncing speed.
OmniFocus is not cheap–they’re working on making their iOS app universal (very soon), but in the meantime, there is a separate Mac app, iPad app, and iPhone app available for purchase. It’s not on Windows or Droid.
However, if (a) you have a complex set of roles, priorities, and tasks to manage, (b) you don’t feel fully on top of them, and (c) you’re willing to take the time to learn OF, it’s well worth the purchase price. One could probably get by with OF on just one platform, too, though if funds permit, having it on a mobile device and a desktop is an advantage.
Made with Care: Some More Thoughtfully Designed Features
The longer I use OmniFocus, the more I appreciate some little features. Just the other day I noticed for the first time that in your perspectives sidebar on Mac, if there are items in that perspective to process, a little colored bar on the left highlights that perspective.
The image at left tells me I am due my Review, that there are items in the Forecast (i.e., scheduled actions), and that there are some entries in my OmniFocus Inbox needing attention.
There are lots of nice little touches like this–the color of your task circles, for example, varies depending on the status of the task (whether flagged, due soon, overdue, repeated, etc.).
And one of the best intangibles for me has been the ease of accessing the help manuals. Sure, you can get impressive help information from within the app, but OmniFocus has made their iPhone, iPad, and Mac help manuals available as free iBooks downloads so you can annotate them to your heart’s content.
Also, using Control-Option-Space on Mac, you can open a Quick Entry pop-up to enter an Inbox item. As long as OF is open, you can do this from anywhere on your computer.
Two more sweet little features I love about the iPhone version–there’s a little “+” icon for an new Inbox entry on just about any screen within the app, so adding tasks is easy, no matter where you are in the app. And once you add a task in iPhone or iPad, you can not only Save it, but can tap on “Save +” to go right to a new task entry. In other words, you can add a task and not be sent back to your Inbox, but keep adding task after task. I find this feature essential when I’m using OF to track action steps in meetings.
I could go on. Lots of people have! It seems that explaining OmniFocus is its own third-party cottage industry.
TL;DR version? (I know–I am supposed to put that at the top of the post.) OmniFocus is an amazing app, designed with care, and more than any other tool has helped me to greatly improve personal productivity. With a good system in place, I spend less time worrying about what I’m forgetting and more time doing what I know I’m supposed to do.
Thanks to the fine folks at Omni Group, the makers of OmniFocus, for giving me downloads for the Mac and iOS apps for this review. See my other AppTastic Tuesday reviews here.
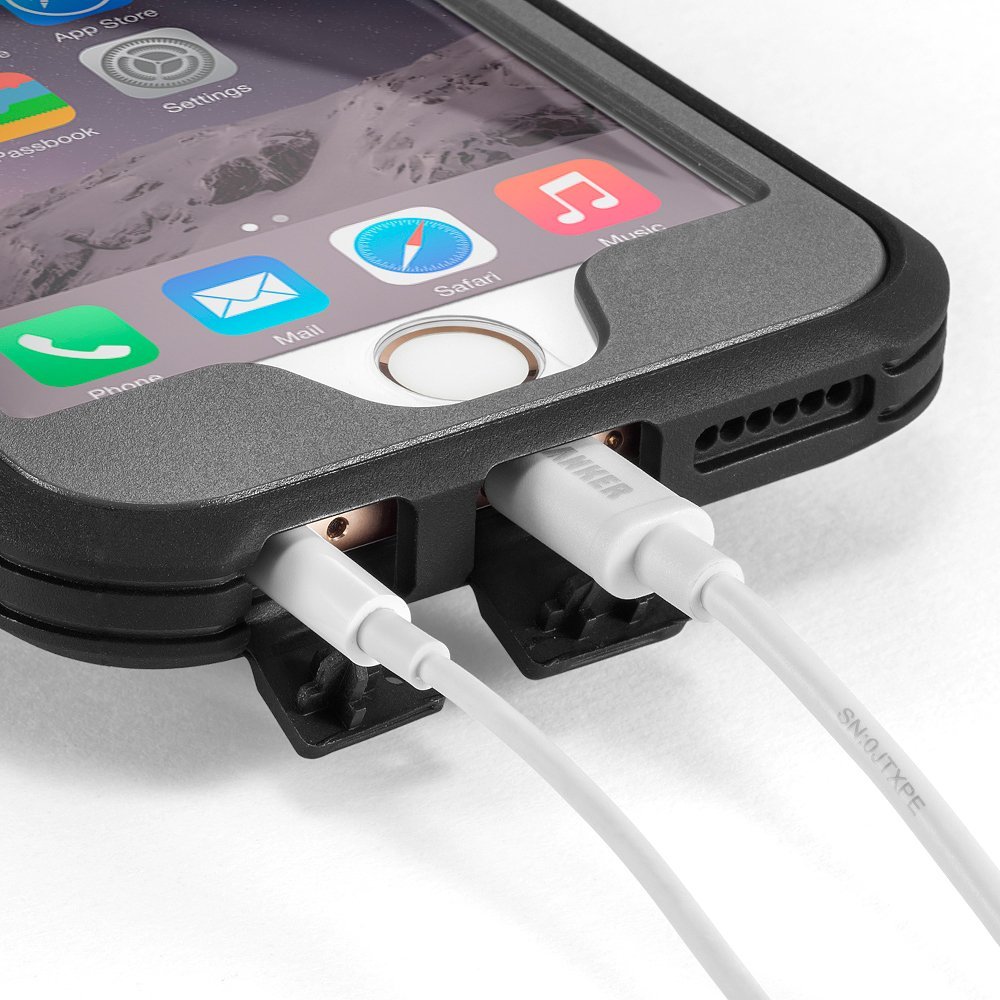
Anker Ultra Protective Case With Built-in Clear Screen Protector for iPhone 6
The iPhone 6 upgrade never happened, but Anker had already sent the review sample of a sweet iPhone 6 case. I told them I’d still post about the thing, reviewing it as best as I could.
The Anker Ultra Protective Case With Built-in Clear Screen Protector for iPhone 6 appears to achieve that rare balance in mobile device cases between lightness and durability. You put its front screen protector and back casing on separately. It’s not a heavy case at all, so I doubt your hand will get sore even after playing too many minutes of games on your encased phone! The case adds only 0.15 inches and 1.6 ounces to the dimensions of the iPhone 6.
The openings for the charger cord and earbuds appear to be cleanly cut:
Image via Amazon/Anker product page
Anker says the case was “drop tested 6 times from 3 feet onto its corners and back on a hard concrete floor without sustaining any damage.” Presumably this test took place with the iPhone 6 in it.
As much as you think you will just be careful and never drop your phone… you WILL drop your phone. This case has some good grip to it, so your phone is unlikely to slip out of your hands, but if so, you may get lucky and still have a working phone after the drop!
PDF Expert 5 by Readdle is on sale for $4.99 (50% off) right now. Here’s my video review from last fall of PDF Expert 5 on an iPhone (make sure you use the settings gear in the embedded video to watch in HD; you can also view full screen). The app is universal, which means you buy it once and then can use it on iPad and iPhone. Go here to find the discounted app.
Our daughter is in the Terrific/Terrible Twos stage.
The terrible: she does things like write on the new kitchen floor in permanent marker. She leaves tons of tiny fingerprints on the MacBook and almost pushes the TV off its stand because she thinks they are both touch screens. She changes her own diaper and *tries* to flush its contents down the toilet herself. (Okay–this last one isn’t all bad–potty training, here we come!)
The terrific: sometimes, when she presses random keys on the laptop keyboard, instead of making the computer freeze, she discovers new tips. (Far more terrific than that, of course, is the fact that she is an amazing and wonderful human being.)
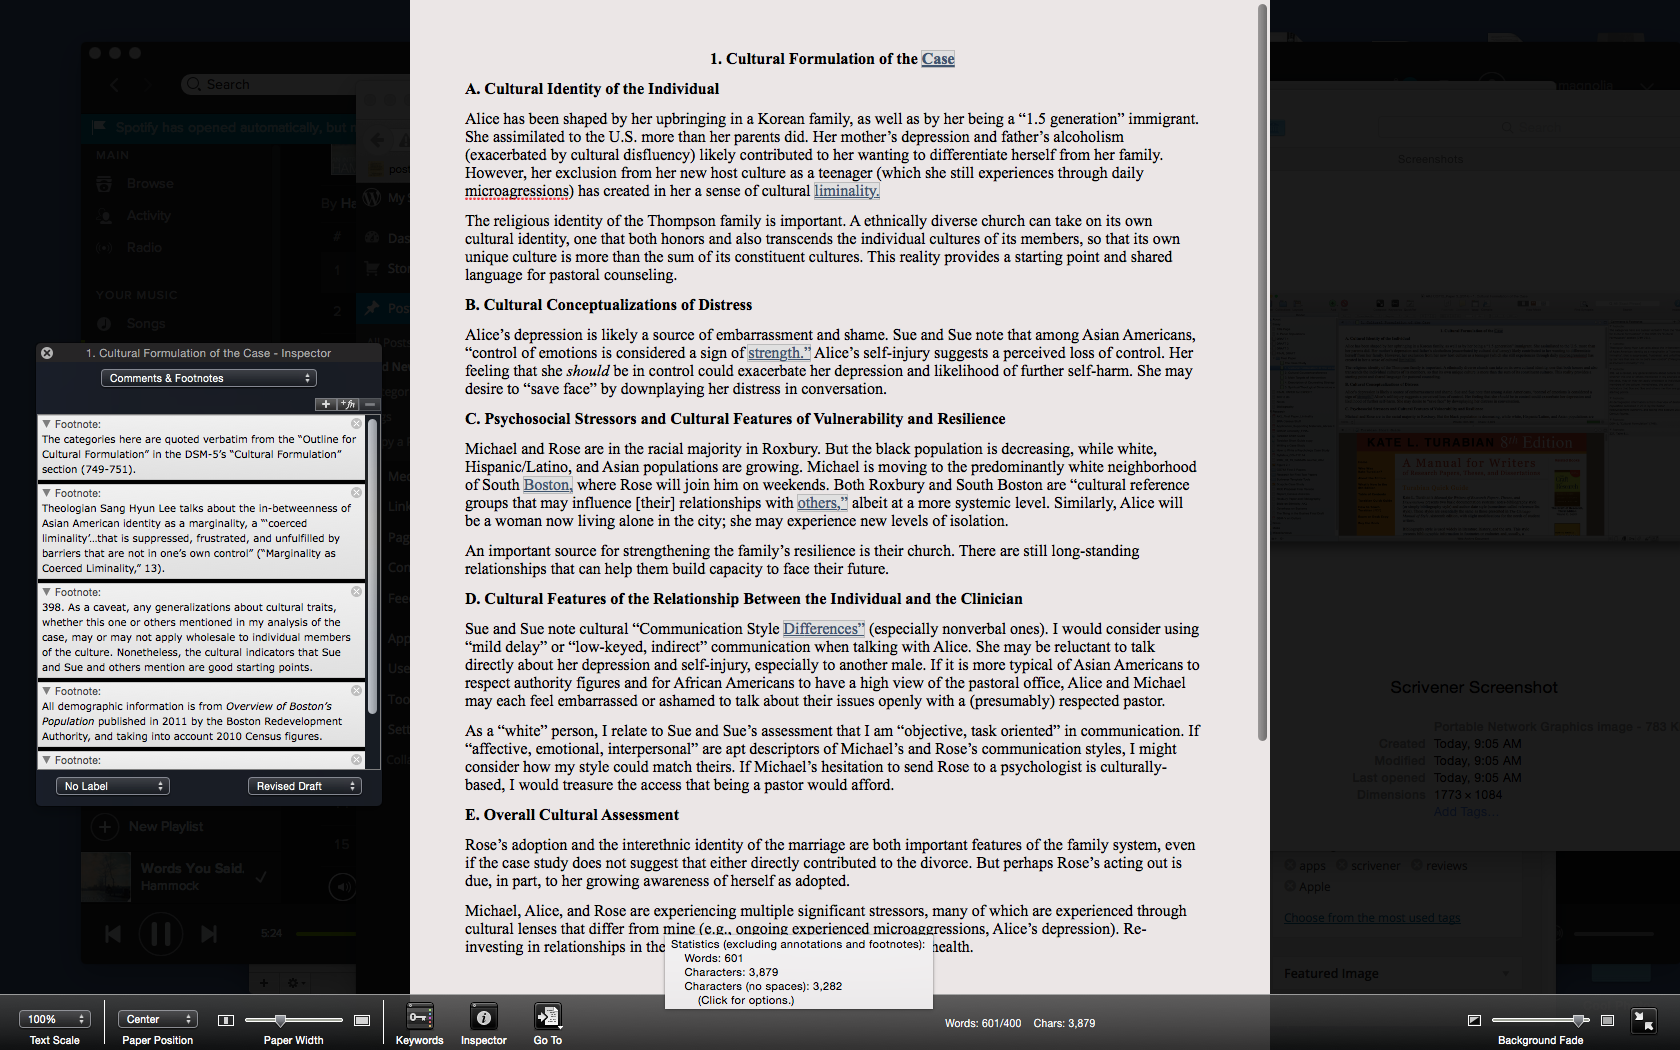
The other day she saw this little guy in the toolbar when I had Scrivener open for some work I was doing:
She tried to tap it (no Scrivener for iPad… but soon, I hear!). Then between the two of us, we clicked it and Scrivener went from this view:
Click or open in new tab to enlarge
to this one:
Click or open in new tab to enlarge
Yes, Scrivener can go into full screen, but this is something a little different–a composition mode where you can just write. You’ll see at the bottom (a toolbar which goes away if you want it to) that I can still pull up essentials like the footnote window on the left. Or I can move all that out and just focus on writing.
I’ve used Scrivener for more than a year now and don’t think I’ve ever clicked on “Compose.”
So… thank you, two-year-old daughter, for helping your dad learn more about a program he uses all week, and for simplifying my workflow!
Want to check Scrivener out? (I recommend it, and offer my thanks to the folks that make it for the review license.) Here you can download a free trial, for Mac or Windows. (It’s a generous trial period, too.) You can read more about Scrivener’s features here.
There are two things that seem to be all the rage in the world of writing and software: (1) Markdown and (2) “distraction-free” writing environments.
I’m more interested in the latter than in the former—I’m actively trying to root out distractions wherever they may be found. But Markdown is easy, everywhere, and seems a good way to explore learning other, more complex coding languages.
Ulysses offers both, and then some, with the goal of eliminating anything that takes the writer away from her or his craft of constructing words, sentences, and stories.
In fact, I’ve written and edited this post in Ulysses, then exported it as html into my WordPress blog.
In this review post and a second follow-up entry soon to follow, I write about:
Getting Text Into Ulysses
Ulysses as a Writing Environment
Getting Text Out of Ulysses
Ulysses as a Writing Experience
1. Getting Text Into Ulysses
Good writers need good tools, so a serious scribe will take time to track down a trustworthy tool, but one does want to be able to just open whatever program and start writing.
Getting to a new Sheet (Ulysses’s more-or-less equivalent of a document) is easy, even with no experience of the app, so one can just start writing in the default three-pane workspace:
The Editor is where the magic happens (i.e., you write the stuff). Using keyboard shortcuts or the menu bar, you can have one, two, or three panes visible. If you’re really hunkering down, you might not need to see your Sheet List, so can go to the Editor Only view.
However many panes you want to see at once (and Ulysses also allows multiple Windows open at once), starting to write in Ulysses is easy.
But what about importing text you’ve already got somewhere else?
Easy (mostly). You can copy-paste, even preserving formatting, or you can import a file wholesale by dragging it from a Finder window into the Ulysses sidebar, if it’s of the kind Ulysses will recognize. (My .zrtf Nisus Writer Pro tests did not work, but Ulysses did accept a sample .rtf file and even a Microsoft Word .docx file.)
2. Ulysses as a Writing Environment
So you can get writing right away in Ulysses, either from scratch or from pre-existing projects in (some) other formats. That’s a plus.
Writing in Ulysses itself has been a very positive—even a focusing and relaxing—experience. More on that in the next post. Ulysses as a writing environment requires some effort to learn.
For example, there’s the terminology (Sheets, Groups, Filters), though that’s pretty easy to pick up right away. And there’s the three-pane layout—though Mac Mail and other apps have prepped users for that. There’s also the lack of tie-in to the Mac Finder and files with file names.
That has taken some getting used to, but it’s not cumbersome by any means. In fact, Ulysses’s powerful search option (⌘-O) has meant I can always find anything I am looking for—quickly.
One nice touch in the app is that there are three Groups full of explanatory Sheets that tell you just about all you need to get started:
First Steps
Finer Details
Shortcuts And Other Tips
Here’s what they look like (in the easy-on-the-eyes Dark Mode with Dark Theme):
They’re like help files, only more fun and experiential.
Note also the fourth pane at far right, where I have added some Keywords (“I read this”—I have used that as a label to track my progress through the help Sheets) as well as a Note. Via this Attachments Bar you can also add an image or set a word count writing goal for yourself.
And the app can do some pretty sweet stuff. Here’s a sampling:
You can select a couple of Sheets and “glue them together” using ⌘J, which is good for putting chapters or sections together
You can split a Sheet into two Sheets, which is what I’ve done with this blog post that started as one and now will be in two parts
From the Editor (the pane where you do the writing) you can go up and down your various Sheets using the ⌥⌘↓/↑ keyboard shortcuts
The Show Markup option (keyboard shortcut= ⌘-9) is really helpful, especially to folks like me who are new to Markup
Did I mention how easy on the eyes the Dark Theme/Dark Mode option is for nighttime writing?
You can make comments to yourself using Markup that will show in the Editor pane but won’t export when you’re ready to publish
The few things that at first seemed like limitations in Ulysses were, in fact, easy to pull off by selecting the right menu item.
I haven’t been able to find anything like navigation arrows in the toolbar—having these readily visible would easily allow one to move between Sheets and search results without having to have two app windows open at once, but there may be a solution I just haven’t found yet.
So far, though Ulysses has required some adjustment to my workflow, I’ve really been enjoying writing in it.
My Ulysses Statistics are telling me this post has exceeded 900 words, so I’ll write more next time about (3) Getting Text Out of Ulysses (i.e., export functions) and (4) Ulysses as a Writing Experience.
Thanks to The Soulmen Gbr, developers of Ulysses, for giving me a download for the review. See my other AppTastic Tuesday reviews here.
I’ll be presenting an online training webinar–Sermon Preparation in Action–twice for Accordance Bible Software in the coming weeks.
The webinar is free, and you can register here. The one-page outline of what I’ll cover is here.
The first session is this coming Monday, March 9, at 2:00 p.m. EST. Those registrations are almost full, so you can also register for the second session (the content is the same) on Monday, March 23 at the same link.
Accordance has quite a few other online trainings coming up. Check them all out.
Back in the days before Facebook and iPhones, I walked around my college campus with a mini-cassette recorder to capture my freshman year pontificating about all aspects of life. It’s amazing how lengthy and involved some of those reflections were.
After a while I started holding forth verbally less and rocking out musically more, using the recorder to get all my songwriting ideas down right away.
For as advanced as the iPhone is–and it includes a built-in voice memo recording app–it wasn’t until I started using the app Say & Go that I started treating the phone as a suitable replacement for that Sony tiny tape recorder.
First, let me show you how I use the app, then I’ll show you a few of the under-the-hood settings you can tweak.
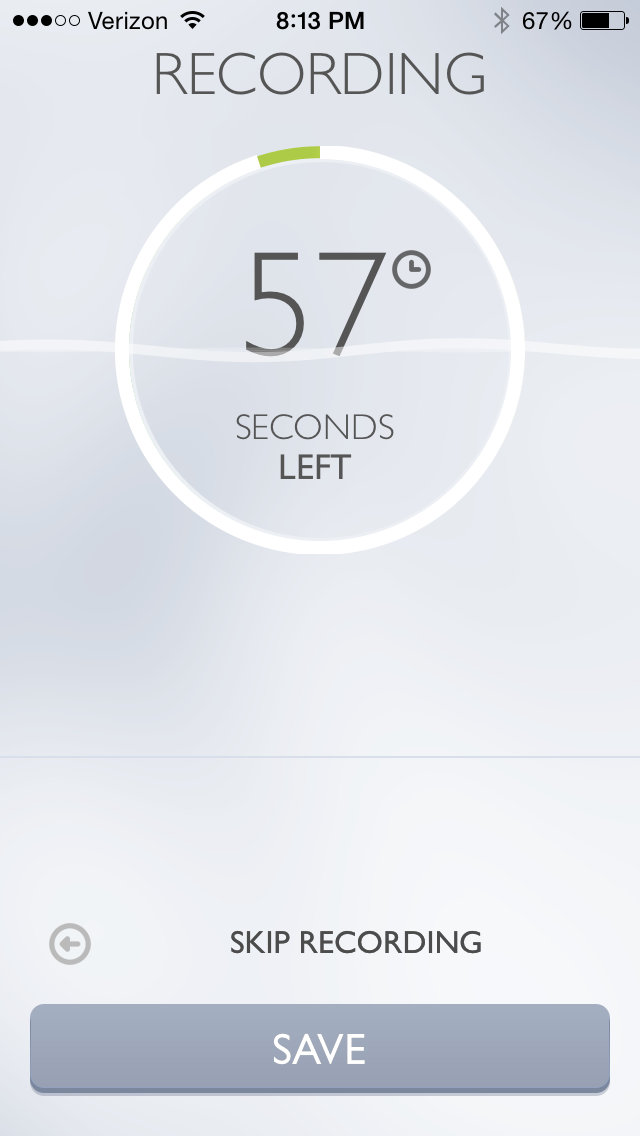
A brilliant idea comes my way, I grab my phone, and launch Say & Go:
Because of how I have the app configured, the second I tap the app icon, it starts recording:
The app intentionally limits recording length to anywhere between 4 and 15 seconds. I find 9 seconds is a good amount of time to get most ideas down. But what if I want to record a song snippet?
I can simply swipe right or tap on “Longer Recording” in the image above to get a minute-long option:
As if this isn’t sleek enough (and what a sweet, elegant layout this app has), the best part of the app is what’s next: I can now send my recording to an email address of my choosing, or set the app to save the recording to my Dropbox or… wait for it… to Evernote.
All I had to do was enter my Evernote email-to address in the “Default E-mail Recipient” line above. Now, after a single tap on the icon on my home screen, all my recordings go straight into Evernote as soon as the recording time runs out. Impressive.
There are a few other customizable settings. In the short workflow described above, I have “Autostart” enabled, but you don’t have to:
And here are some of the other settings you can adjust:
It’s a brilliantly designed and useful app. Read more about it here.
Thanks to Dawid Pietrala, the developer of Say & Go, for giving me a download for the review. Check out the app’s iOS page here. See my other AppTastic Tuesday reviews here.
 Today OmniFocus is expected to release an update that makes their iOS apps universal. The iPhone app, for the first time, will carry with it the capability to view and create custom Perspectives.