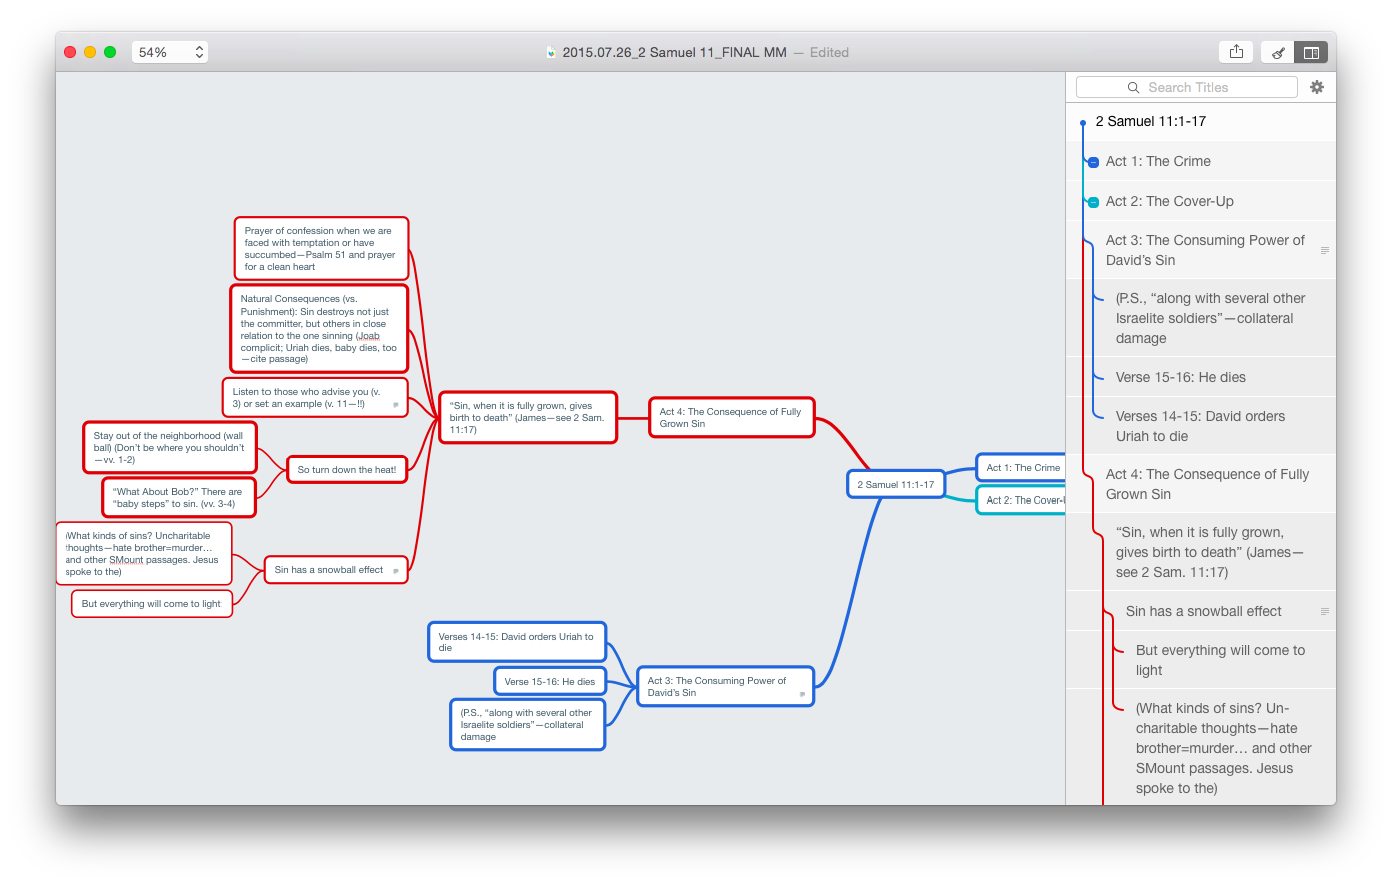
All of a sudden I’m hooked on mind mapping. It’s been a really productive way for me to make sense of the texts I speak on each week. Here’s how I’ve made structural sense of the David and Bathsheba account:

(If that image doesn’t work well for you, click here to see a zoomable version.)
(Next up: trying to outline thought processes in other parts of my life using mind mapping.)
I’m not at the point of being able to write a whole sermon via mind map (and may never go that route), so my next step is exporting to text.
MindNode makes that exceedingly easy, as I mentioned here. In MindNode 2.0 for Mac, you can always view a text outline of your map right next to all those nodes, sub-nodes, and connecting lines:
By the way–that’s a lot to look at on one screen. MindNode has a lovely “Fit to Mind Map” zoom selection, so you can have your mind map fill the application screen. For large and multi-noded apps, that’s a great setting.
Now exporting the map to multiple options is easy. Last week I exported to .rtf, dumped the text into Scrivener, and worked from there. Export options are robust in MindNode, as are import options. I could even easily import some random thoughts from Scrivener’s cousin, Scapple, right to MindNode.
This week, however, I wanted to live dangerously. I.e., I wanted to try OmniOutliner for fleshing out my outline, once I had the content figured out in MindNode. So I exported my mind map from MindNode as .opml and opened in OmniOutliner:

Awesome!! All right there, as it should be. All the points and sub-points are in order. The text outline that was already in MindNode is now in OmniOutliner, with everything in its right place. Even the notes popovers in MindNode (sweet new 2.0 for Mac feature) come in to OmniOutliner as notes (the grey font next to the notebook icon, in the image above).
At this point I can work from the outline in OmniOutliner. You’ll see in the image above that I’ve added a “RESEARCH” section to allow me to do just that.
OmniOutliner has similarly robust export options. I can make a couple tweaks to fine-tune the formatting in my export, and then open the finalized, annotated outline in a word processor of choice. Very nice!
I’ve been experimenting with workflow for sermon preparation lately, a little more than usual. I’ll still do my research with Accordance as my primary hub. But for the initial outlining process and the final writing process, MindNode and OmniOutliner seem to be making a great team.
One other huge bonus that both apps have in common: they are fully cross-platform across Mac, iPad, and iPhone, so I can jot down ideas wherever and whenever inspiration strikes.
Thanks to the good people of IdeasonCanvas, for giving me a download of MindNode for iOS and OSX for review purposes. And thanks to The Omni Group for OmniOutliner Pro, also for review purposes (more to come). See my other AppTastic Tuesday reviews here.


I’ve been using OmniOutliner as part of my sermon prep for the past few months, I’m finding it really helpful in forcing me to think about the overview/structure and to think about how the bits fit together than before.
And the other week I also went down the MindNode->OmniOutliner route. I was finding myself really stuck in exegesis – but the mind map helped me to get it all ‘out there’. And then once I finally got my head around choosing the right theme, I pulled the OPML file straight into OO and away it went.
Daniel: awesome! Really glad to make contact with someone trying the same thing. Agreed about mind maps and getting unstuck–a very cool tool.
I haven’t done much (yet) with OmniOutliner, though that’s what I’ll be trying out these next few weeks. What does your workflow look like once you’re in OO?
So currently I’m making one OO file per sermon series. For each sermon I copy in a list of headings like title, passage, key verse, big idea… and then I put the outline below that.
In the outline I’ll put in headings/subheadings and under each of these I’ll have rows to note illustrations, how to hinge from one point to the next etc.
Something I’m still playing with is the different between a row and a note. So should as I’m thinking about little points to raise, or turns of phrase, or small illustrations – should they be in a row or in a note. Since I don’t use notes too often I’m finding that sometimes I can’t easily see whether something is a heading of a point or an idea that I jotted down.
I also havne’t had much luck of automating outline->word processor (Pages). So I still retype the headings of the outline into Pages and then keep the OO document on a second screen as I write to reference the notes.
Thanks! That’s really helpful–sounds a lot like what I’m doing, too, except I was going to do a single file for every sermon. Doing a file for every sermon *series* makes more sense.
I haven’t done much exporting from OO yet–we’ll see how it goes. Totally agreed with you about not being sure how to deal with rows vs. notes.
P.S. What theme(s) are you using in MindNode?
Thanks for writing the article. I’ve been wondering out to export MindNode to OmniOutliner. this helps
You’re welcome!