Tomorrow I am leading a brand new Accordance Bible Software webinar: Studying the Septuagint with Accordance.
The session will cover as many of these topics as we’ll have time for in an hour:
• Septuagint resources in Accordance
• Setting up an LXX and Greek NT Workspace
• The New Testament’s use of the Old Testament
• LXX Reading for vocabulary acquisition
• Reading the Septuagint with Göttingen editions
• Advanced: Hebrew-Greek translation equivalents and the MERGE search (as time permits)
I’m looking forward to this one. Sign up info is here.
Thanks to Accordance for access to the Interpretation modules shown in this screencast review. See my other Accordance posts (there are many) gathered here. I recorded the tutorial using the app Capto.
One of my favorite and most-used apps–MindNode–is free in the iOS App Store this week. After thinking mind mapping wasn’t for me, I tried it just over a year ago and loved it. Now it’s a regular part of my brainstorming and writing workflow.
Here‘s the link–download it while you can, for iPhone and iPad. (Regular price is something like $10.)
Bible software nerds, rejoice! Today Logos 7 comes into the world.
I’ve been using Logos (alongside Accordance and BibleWorks) since Logos 4. There hasn’t been a major interface overhaul since that version, but Logos has been steadily adding loads of features since then.
From a few weeks of beta testing, I offer here my initial impressions of Logos 7, as well as a look at its features in action.
Here’s the best of what’s new in Logos 7.
1. Interactives (Again)
The Interactives were my favorite feature in Logos 6. The addition of more Interactives makes it the part I most like about Logos 7.
Here is a screenshot of all the Interactives, which you can pull up from your library with the search: “type:interactive”.
Logos 7 Interactives
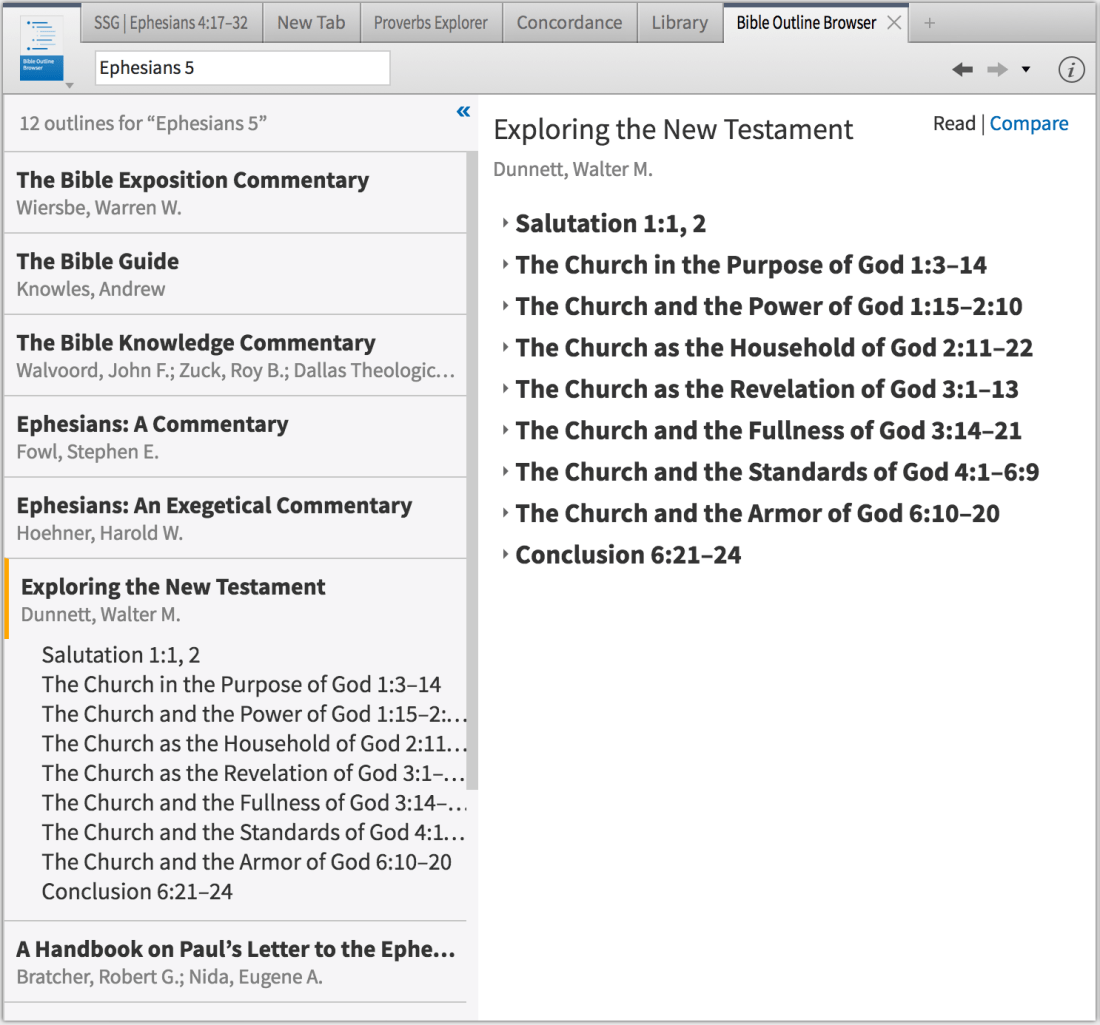
Some of those were in Logos 6, like the Bible Outline Browser, which shows you all the Bible text outlines you have in your library for the passage you’re considering.
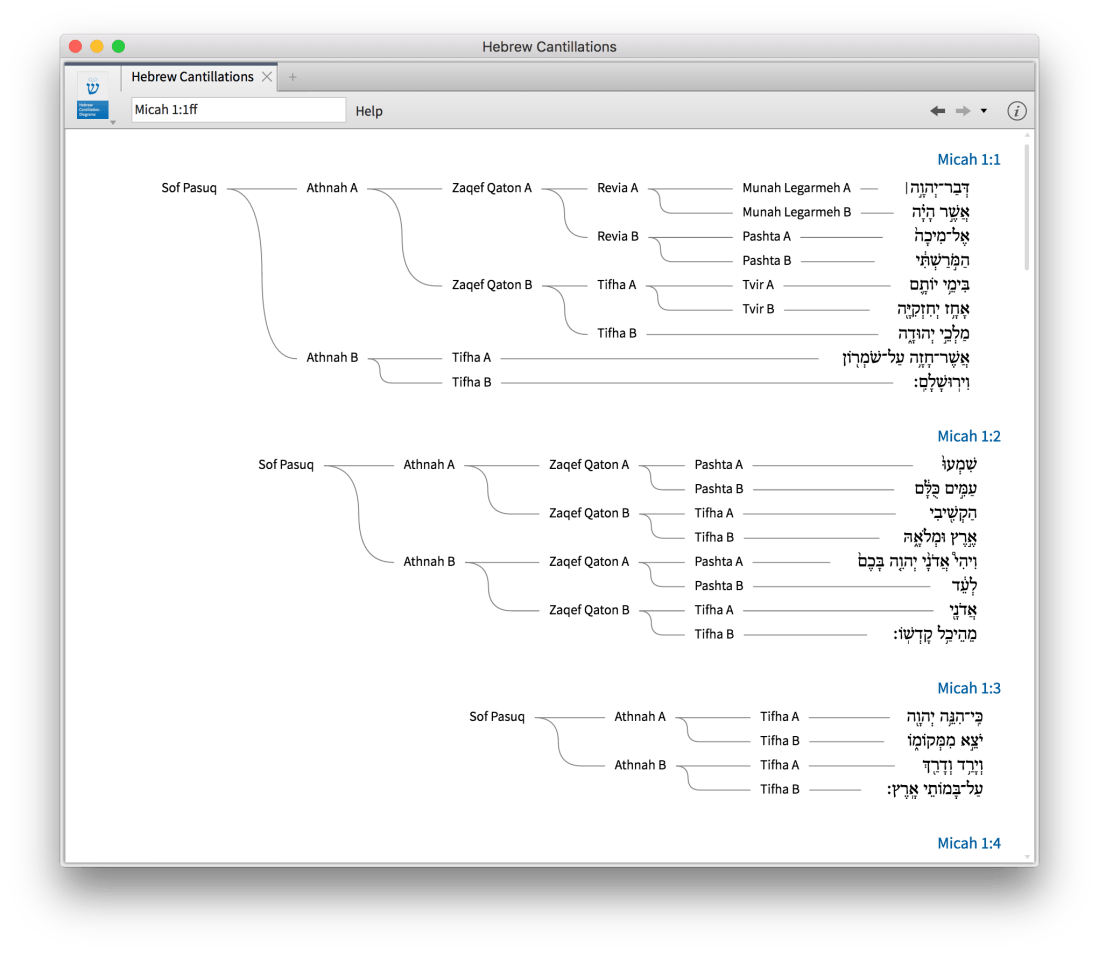
The Hebrew Cantillations Interactive in Logos 7 has seen improvement since its release in Logos 6 (it wasn’t ready for prime time initially):
Logos 7 adds the Septuagint Manuscript Explorer, which students of the Göttingen editions will especially appreciate:
We’ve cataloged information about Septuagint manuscripts, including contents, date, language, holding institute, and more. With this interactive, discover the earliest Septuagint manuscripts see how many contain the book of Psalms, and even view scanned images of many fragments, like Codex Sinaiticus.
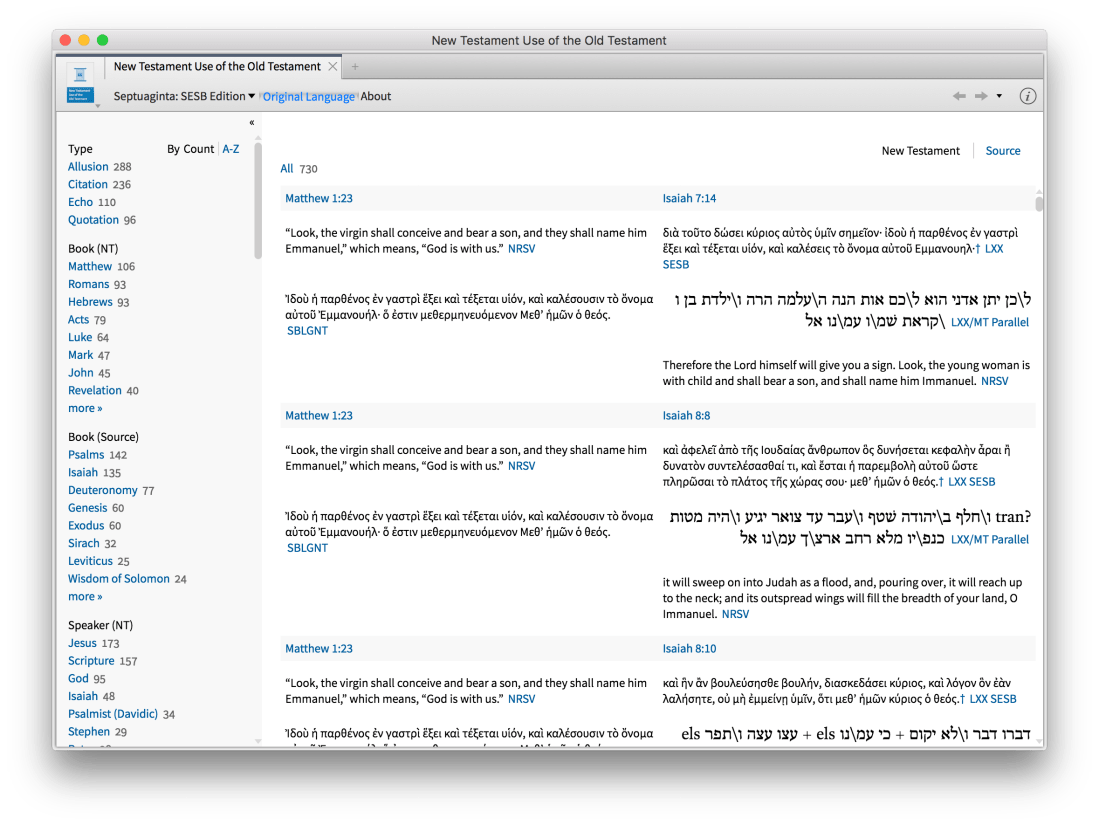
My most used Interactive at the moment is the New Testament Use of the Old Testament. I would have made great use of it when I took a seminary course by that name. There are lots of ways to get access to what OT passages the NT is using (commentaries, Bible text footnotes, words searches), but this Interactive consolidates and sorts the data in a highly convenient way.
You can sort by allusion, quotation, echo, and citation. I always thought allusion and echo were more or less the same—though the use of terminology is itself at issue in the field! At any rate, the authors of the Interactive define their terms:
• Citation: An explicit reference to scripture with a citation formula (e.g. “It is written,” or “the Lord says,” or “the prophet says”).
• Quotation: A direct reference to scripture, largely matching the verbatim wording of the source but without a quotation formula
• Allusion: An indirect but intentional reference to scripture, likely intended to invoke memory of the scripture.
• Echo: A verbal parallel evokes or recalls a scripture (or series of scriptures) to the reader, but likely without authorial intention to reproduce exact words.
This Interactive probably deserves its own post. You can change what versions it displays, and even set it so that the English NT and OT passages are displaying alongside Greek (NT) and Greek and Hebrew (OT). (Getting this part set up was not really intuitive to me.) You can even hover over Greek and it cross-highlights the corresponding English, and vice versa:
If software programs had Pulitzers, the NT Use of the OT should win one for best feature. Here’s what it looks like, including the sidebar, which allows you to focus your study using a ton of criteria. You could easily find, for example, all the times Matthew cites or alludes to an OT passage with Jesus in mind.
2. Sermon Editor
I have worked hard to get a sermon writing workflow I really like. (Detailed article at CTPastors.com forthcoming!) So I doubt I will use the new Sermon Editor much, but it looks pretty awesome, if you want to use Logos for sermon writing. In the image below, the Sermon Starter Guide (introduced in Logos 5) is next to the Sermon Editor.
Not only does the Sermon Editor offer rich text writing and multiple Export options, if you mark your Headers, it automatically generates a Powerpoint slide show for your text. It’s also got a Handout option, which allows you to easily generate a one-pager to accompany your sermon, as well as to automatically set up a handout with blanks to fill in.
AND… if you type in a Scripture reference, the Sermon Editor automatically creates a slide with the text of that Scripture, even fitting text to multiple slides if necessary. Watch:
You can also save a step and have the slides auto-generate with just a keyboard shortcut, after typing in the reference. Amazing.
3. QuickStart Layouts
This is not a ground-breaking feature, per se, but it is a time-saving addition. Now the Layouts option in the Logos toolbar offers access to “QuickStart” saved layouts that get a user up and running for various tasks.
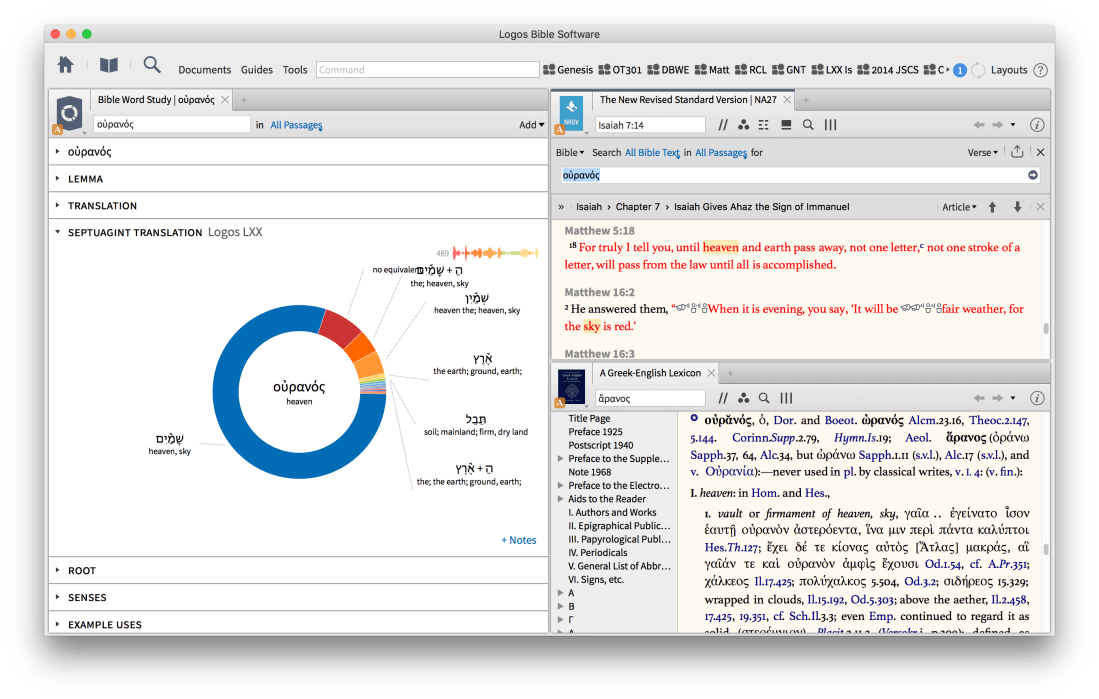
The Greek Word Study layout, for example, is nicely executed:
4. Systematic Theologies in the Passage Guide
The Passage Guide has been around a while, but Logos keeps adding to it. Logos 7 features a Systematic Theologies guide, an admittedly subjective but still helpful aggregator of theology resources in your library, keyed to the verse you’re studying. You can sort it by theology subject (Christology, pneumatology, etc.) or by denomination.
5. Everything Is (Still) Hyperlinked
The hyperlinking seems to have improved since I was last using Logos regularly when Logos 6 launched. (Only now with a recent laptop upgrade does Logos run well on my Mac.) Of course the Scripture verses are hyperlinked, but commentaries are also hyperlinked to previous sections they mention. As here:
Improvements That Weren’t
Logos 7 is cutting-edge software, impressive in its innovation and a huge time saver from a task standpoint. The designers and developers clearly created it with real users in mind.
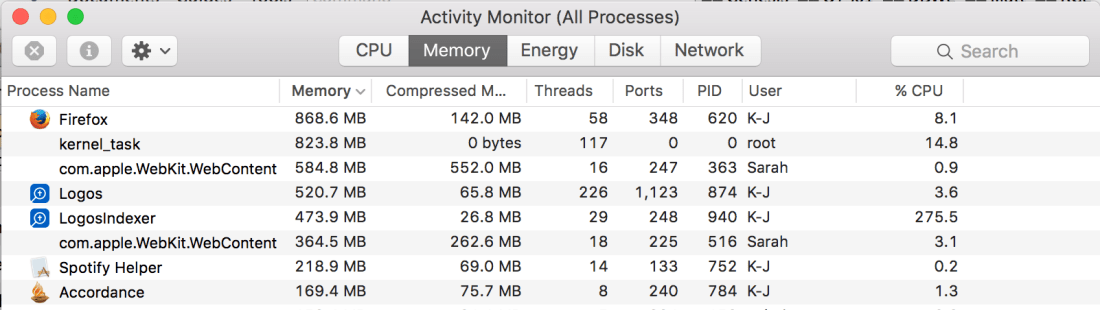
However, even on a new and higher-end Mac, Logos 7 is system resource intensive. It’s a CPU hog, a battery drain, and uses significant energy.
I can always tell if I have Logos open on my laptop because the computer is almost always warm when it is—and almost never warm with any other combination of apps open.
This has been my (and others’) enduring criticism of Logos since at least Logos 4, and I continue to fail to understand why program sluggishness is not Code Red at Faithlife HQ. My slightly educated opinion is that Faithlife (makers of Logos) is “going for more” instead of “sticking to the core” (to quote a Harvard Business Review article). Lots of spin-off apps and ideas and focus on marketing and shipping frequent feature updates have hindered development of the core product—at least where speed is concerned. Wanting to get at the info in the Passage Guide, for instance, can be an exercise in patience (and frustration):
Logos 7 is far more responsive and fast in searching on my newer Mac machine than it was on my previous MacBook (a 2008!). Though, for that matter, both Accordance and BibleWorks ran fast on the 2008—one shouldn’t have to buy a new machine to use Logos well, though I don’t think that stops some users from doing it, especially when they feel they’ve invested a lot of money in building their library.
In Conclusion
Speed and massive CPU usage and battery drainage are the Achilles’ Heel of Logos Bible software. I hope—for their sake and for the sake of their user base—that they shift their development focus back to whatever they need to do with the code to ensure a speedier user experience. The developers I’ve interacted with on the forums seem great—it appears to be an issue of larger company focus and resources.
It’s often not slow. (Though it’s always a CPU and battery drain.) For the couple of hours that I use Logos for sermon prep, I can search and open and highlight individual resources with ease. The feature set and Interactives are innovative and cut out unneeded research steps for users. The app itself is powerful, and does a good job of getting users into even larger libraries to cull the most relevant information for tasks at hand. Their accompanying iOS app is really good, too. Users should just be ready–even with the new Logos 7–to check email while they wait for a Passage Guide or Sermon Starter Guide to return results.
If you’re a happy Logos 6 or 5 user, should you upgrade? Definitely. The so-called data sets and features in Logos 7 are a significant step up. If you are on Windows or if your Mac is handling Logos fine and you want to keep using it, Logos 7 is a creative step in a good direction.
Never used Logos and trying to decide if you should get it? (Especially with other Bible software options available?) Then ask away in the comments below, and I’ll respond there.
Logos 7 launches with a 15% off discount. If you go to Words on the Word’s landing page, you get the discount, and the blog gets a small commission if it’s a first-time purchase. The landing page also includes links to more information about Logos 7.
Thanks to Logos for the chance to beta test and review. I received early access to Logos 7 as well as a package of library resources to test, for the purposes of this review. That did not, however, influence my objectivity…as I expect is clear. 🙂
This week Accordance Bible Software has put their five-volume Ancient Christian Doctrine (IVP) on sale for $129 (normally $199). Ancient Christian Doctrine is a full-blown compendium of early church commentary on the Nicene Creed. I write more about the resource here.
If you’re teaching or preaching on the Creed, this is possibly the best resource to start with. (And, of course, it’s likely available for free in print at your local theological library.)
Here‘s the link to find Ancient Christian Doctrine at Accordance.
This week’s blog sponsor is MailButler, the feature set you always wished your Mac Mail had (and that I’m glad mine does). Find out more about it here or download and try it free here.
I’m pleased to announce that this week Words on the Word is sponsored by the MailButler app from Feingeist.
I reviewed Feingeist’s Evermail app here. It’s an Evernote add-on for Mac Mail. I still use it on my work computer every day that I’m on email.
MailButler includes that add-email-to-Evernote functionality, but also offers a much more robust feature set. Here’s some of how it enhances the Mac Mail program:
Email tracking/read receipts
Conversion of email to Evernote note
Dropbox and Google Drive file integration
Undo Send (with customizable time delay)
Send Later (i.e., schedule when your email will send, so your co-workers don’t know you really wrote them that email at 2:00 a.m.)
This is the full product description from Feingeist:
MailButler is the productivity boosting add-on for Apple Mail. It helps you organize and optimize your email correspondence, and saves you lots of common and annoying mistakes. With MailButler you have to worry about nothing, because it has your back while you’re working with Apple Mail.
Among the great options that MailButler offers is the ability to schedule, track, and undo emails, upload email attachments regardless of size, convert emails to notes, create amazing signatures, and many more. To get access to all of those features, you just need to download and install MailButler, and register a free MailButler account.
The MailButler homepage is here. You can download it directly here. Installation is free, so you can try it out with some of the actions to see what you think. If you scroll down to the bottom of the product page, you’ll see the subscription options.
Word count is by no means the best measure of effective writing, but it’s a useful metric for tracking your progress.
The Mac Word Counter app by Christian Tietze lives in the menu bar and automatically tracks your word count across apps. This is especially helpful for us writers who can’t seem to settle on a single app for writing.
Even when Word Counter is out of site, you can have its menu bar icon display your running word count for the day:
You can specify which apps you want Word Counter to track:
Once you’ve added your apps, just click on the menu bar icon to see a breakdown:
Hovering over the bars gives you an hour-by-hour, app-by-app breakdown of your progress. Very cool!
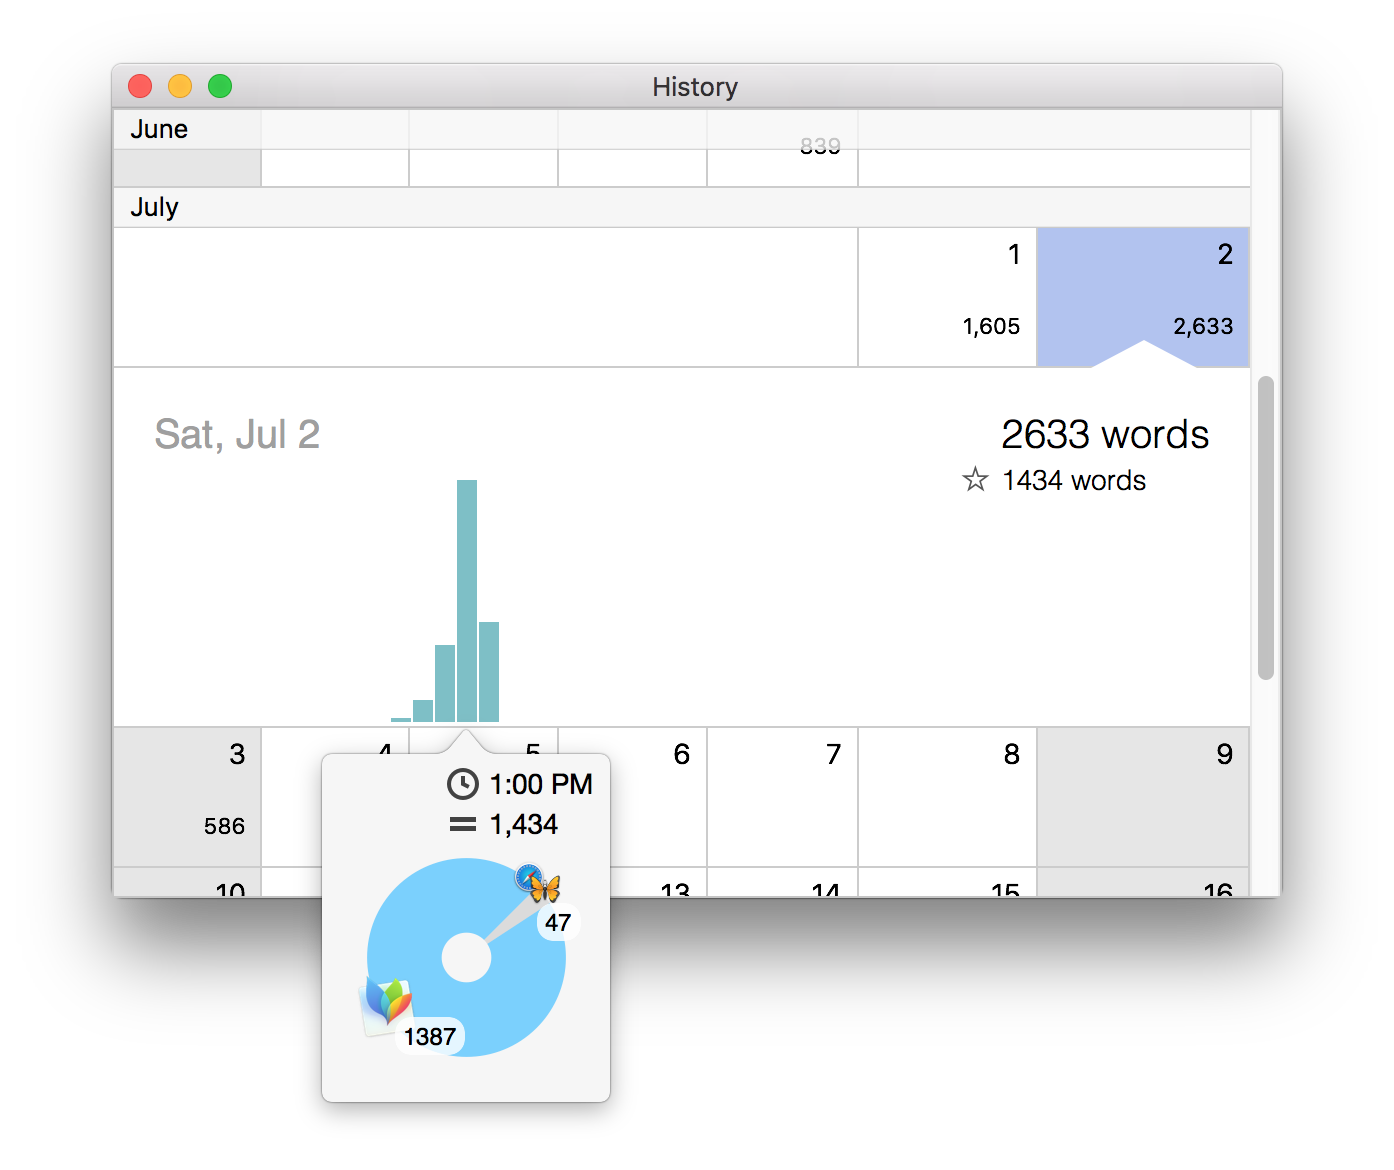
You can look at your day-by-day word count history, which is also impressively sub-divided into hours and apps:
And that’s honestly probably enough for most of us–a detailed word counting tool that is easy to access, updates automatically, and tracks multiple apps.
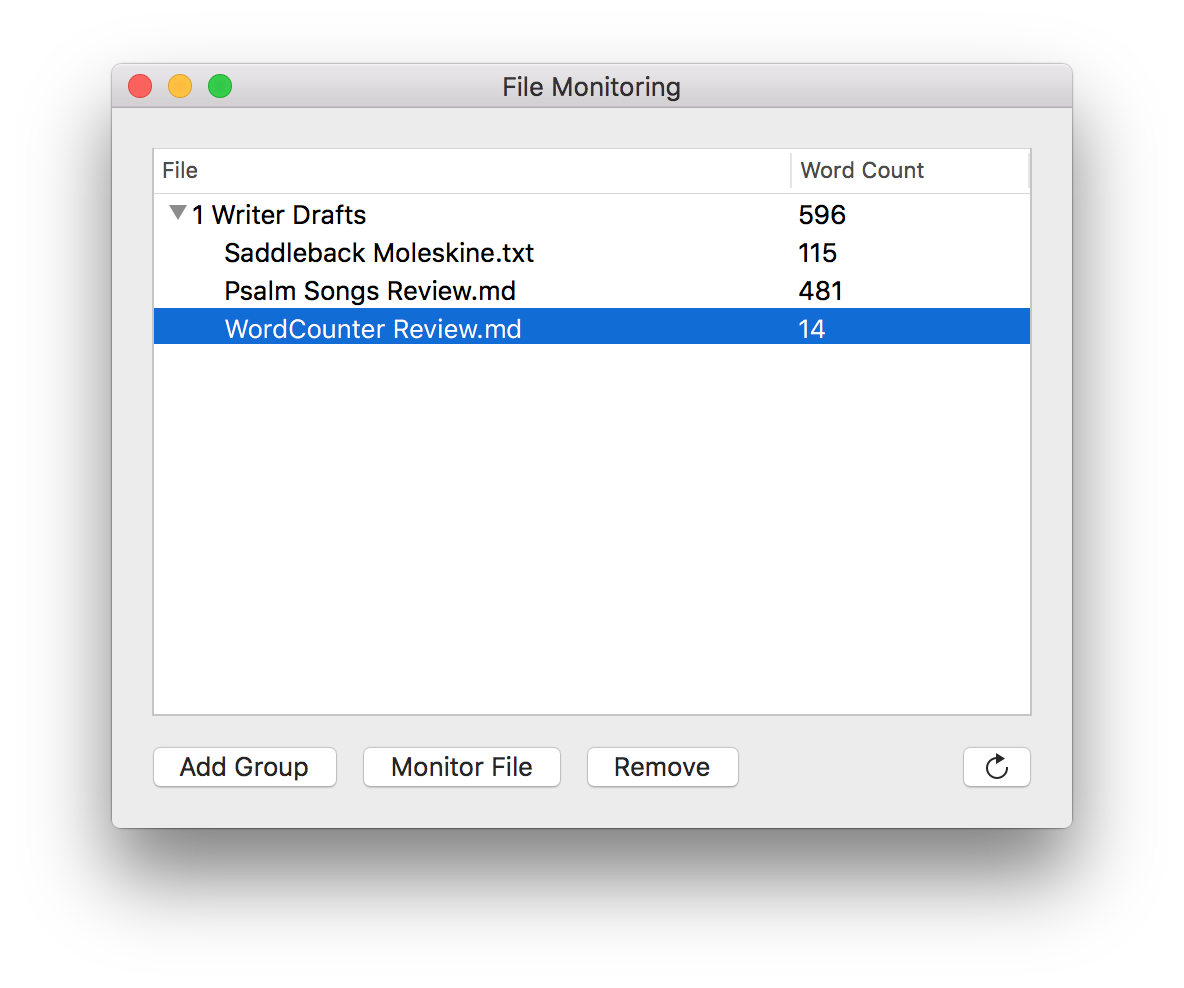
But there is also a nice additional feature of being able to track word counts on individual files. This comes in handy especially for a file you’re working on via Dropbox across multiple machines. Word Counter will track the word count for you via Dropbox, no matter what device you typed the words on.
The only downside to this feature is you have to manually refresh (icon at bottom right hand corner in the image above) to get the word count to update. (UPDATE: I’ve just learned it does refresh on its own every few minutes.)
Word Counter does provide a solution to the as-of-yet-non-existent word count feature in OmniOutliner.
The only other possible area for improvement is that when you add a file for tracking from the File Monitoring window, you have to select “Monitor File” and go find it in Finder, rather than being able to just drag and drop a file from an already-open Finder window. This would be a nice feature for a future update.
The app is easily worth its $9.99, and there’s a free 14-day trial so you can test it out. Find it here.
Thanks to the dev at Word Counter for the promo code so I could review the app.
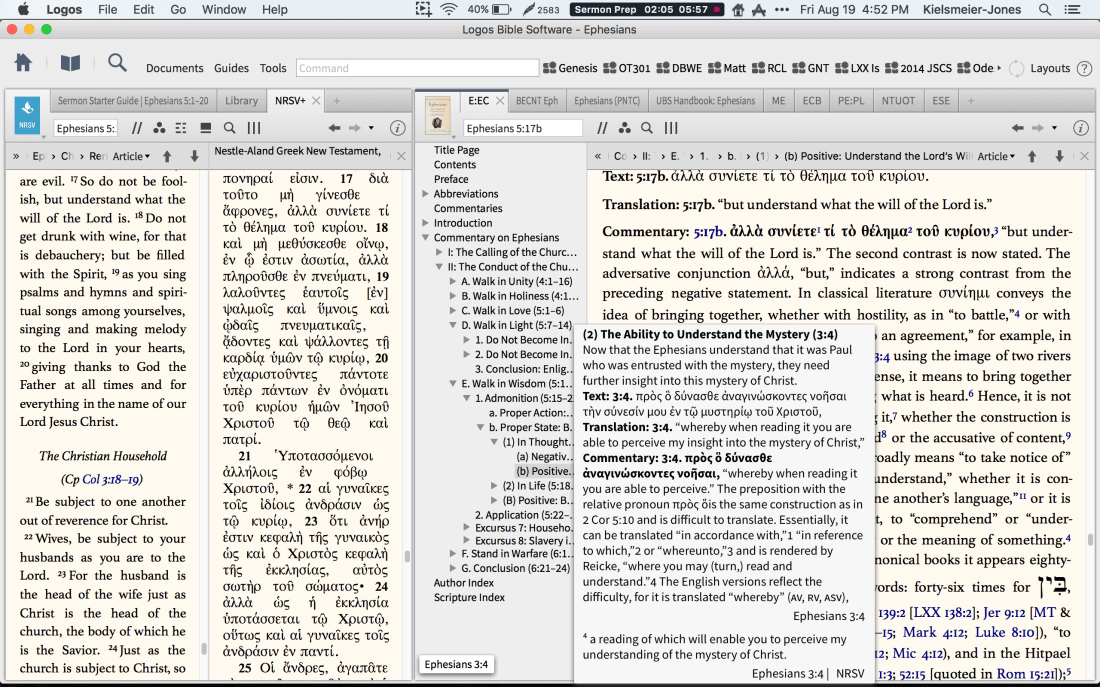
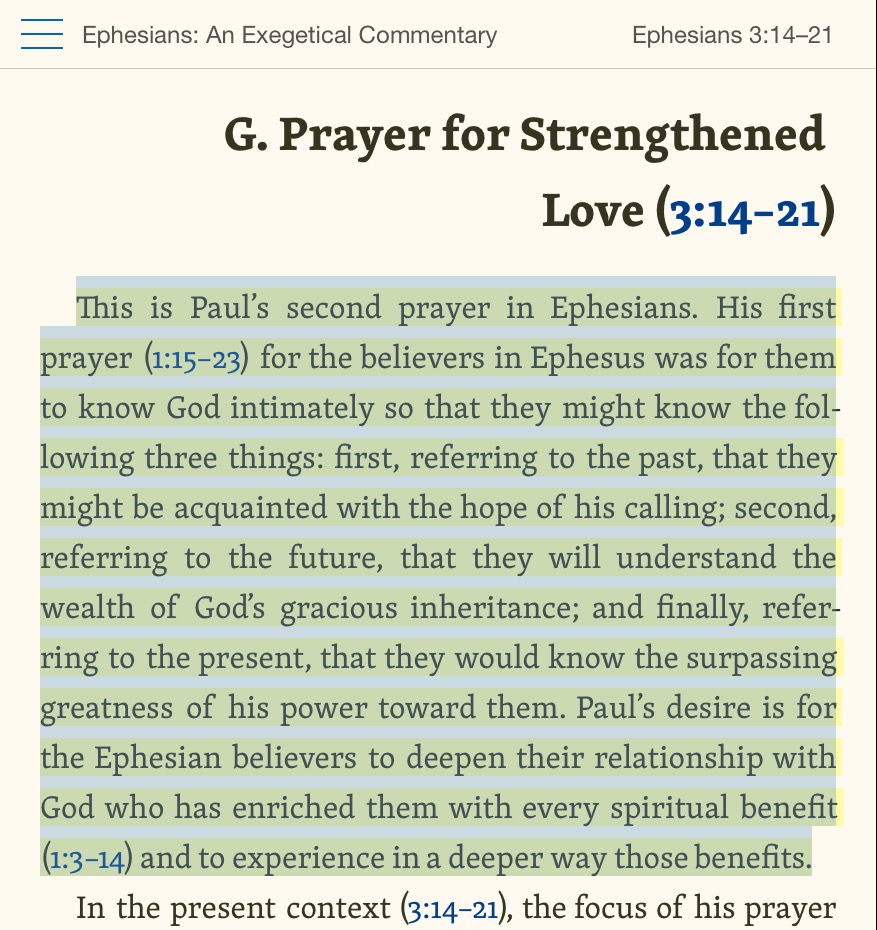
I’ve got a sweet Logos–>Drafts 4 workflow I’ve been using on the iPad for a few months now. (I find Logos’s iOS app to be significantly zippier than its Mac counterpart.) Allow me to demonstrate, using Harold W. Hoehner’s excellent Ephesians commentary.
2. Tap selected text to bring up highlighting and share options.
I’ve got Drafts open with Logos in Split View, just so you can see them together. All these steps work with Drafts not visible, however.
3. Select Drafts in the share option.
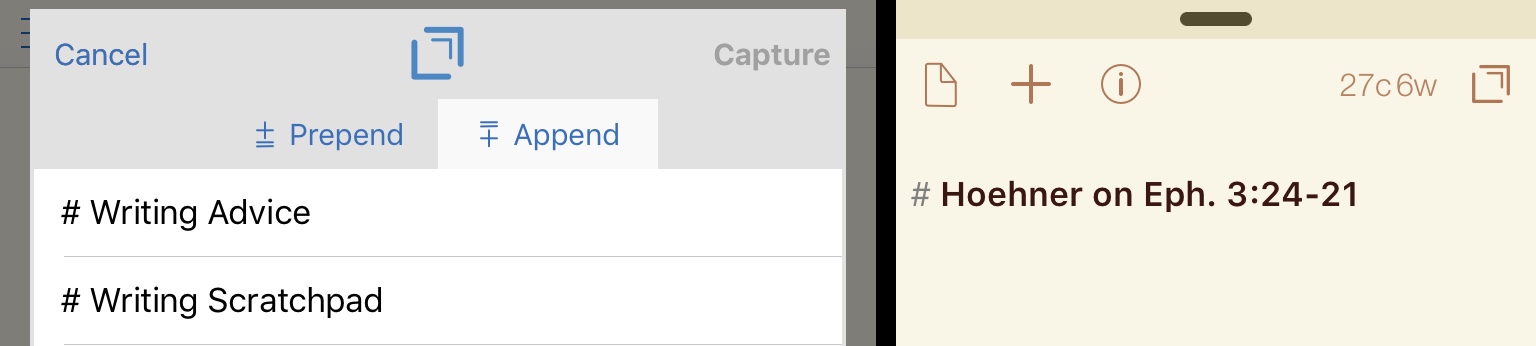
4. Now you can “Capture” to send the selected text right to Drafts OR prepend (add to the beginning) or append (add to the end) to an existing draft. (!)
If you do Prepend or Append, Drafts comes up to let you choose where to put your text.
5. When you’re done repeating this process for as much text as you want to copy, you can merge individual drafts, if needed.
You can even choose your own text or symbol to separate merged drafts:
From here it’s easy export from a single draft to Ulysses or MindNode, and on goes my sermon preparation! Drafts4 has been the most indispensable app in my attempt to do as much sermon preparation as possible on the iPad.
Thanks to Logos for the Hoehner commentary so I could write up the workflow–review of the commentary itself to follow. The Logos mobile apps are free, available here: iOS / Google Play.
The rise of the brilliant app 2Do notwithstanding, I continue to utilize OmniFocus as my task management hub. I was eager, then, to try out The Omni Group’s outlining app, OmniOutliner.
Think of OmniOutliner as a thought structuring app, suitable for both creating and organizing content. You can use it for any of the following scenarios:
making a grocery list
taking notes in class
writing a paper (and re-arranging sections easily)
planning and following through with a project
tracking and categorizing expenses
writing and editing your podcast script
There are multiple other uses for the app–I’ve made good use of it in sermon preparation, as you’ll see below. Right away the Mac and iOS apps take you to a templates screen so you can get started without delay:
On this and all images in the post, click or tap to enlarge
What’s Awesome About OmniOutliner
Getting content into OmniOutliner is fairly easy. It’s not as intuitive as just opening a blank Word document and typing, but it’s simple enough to open an outline and start writing.
Once you’ve gotten your outline going, being able to fold and unfold (collapse and expand) entire parts of the outline is a huge asset. If I’ve broken a book review down into parts, for example, I can just collapse the sections I don’t want to see at the moment:
Then there is the organizing power of OmniOutliner: you can take any node and indent or outdent it. You can drag sections of the outline around to quickly re-order them. And you can make batch edits when selecting multiple parts of your outline.
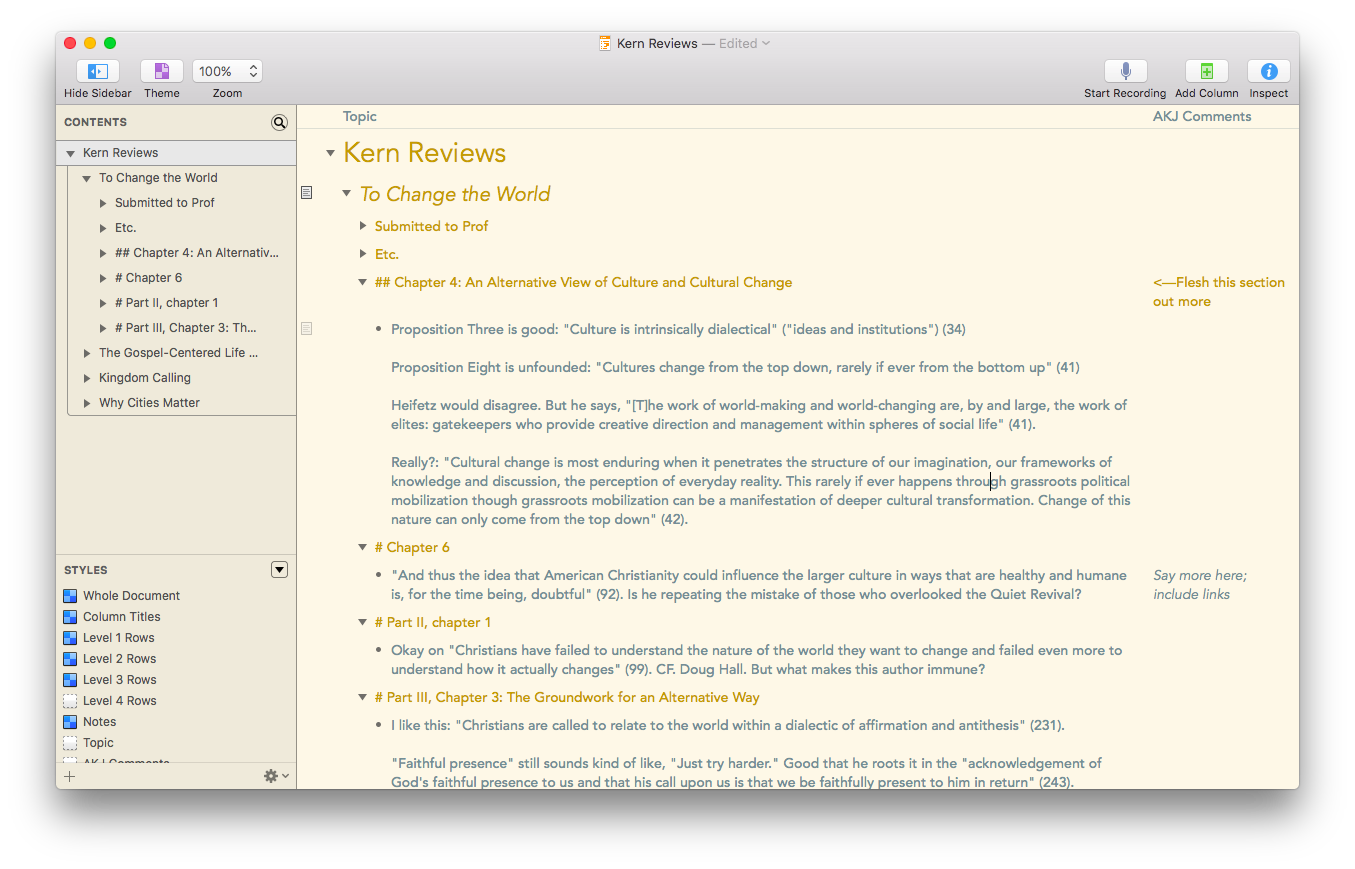
Perhaps the most helpful feature to me has been the ability to add notes to content, which you can then either hide or show. In this simple outline, I’ve set the note at the top to display (in grey), while the one toward the bottom remains hidden.
You can show the sidebar, which allows you to move back and forth between a lot of content in one outline. When preaching on David’s odious sin against Bathsheba and her husband, I utilized an outline that included both my sermon structure and accompanying research. You can see that reflected in the sidebar, at left, even while my Topic column could remain focused on a smaller portion.
You can add media (audio recordings and video) to your outline. Your files would be huge, but if you wanted to use OmniOutliner for classroom notes, you could also add a live recording of the session, straight into your outline.
And then there is the styling. My goodness. You can tweak every aspect imaginable of your outline.
I found this feature set to be impressive but overwhelming. For my purposes, I didn’t need to do a whole lot by way of formatting, but the options are there should you need them.
To that end, the help files for OmniOutliner are incredible. So is their support team! There are user manuals you can download in multiple formats, and they are outstanding. In a couple of sittings, I read some 100 pages of the iBook version of the OmniOutliner for iOS manual. Yes, it was that interesting! Other app developers should take notes.
OmniOutliner is also available as a universal iOS app, working on both iPhone and iPad. You can sync across devices using Omni’s own server or your own.
The keyboard shortcuts available for iPad make OmniOutliner a serious contender for best writing app for those who are trying to make a serious go of it on iPad instead of computer. Omni Group’s Ken Case announced the shortcuts last November.
This means that the iOS OmniOutliner app is close to parity with the Mac app. This rarely seems to be the case with other apps, where iOS versions tend to lag behind their desktop counterparts.
OmniOutliner has had Split View and Slide Over in iOS for just about as long as iOS 9 has been released.
One other really cool thing: you can import the OPML file format from a mind map to move from mind mapping straight into OmniOutliner.
If that workflow interests you, read more about it here.
What’s Lacking
A few things are lacking in OmniOutliner:
I’ve experienced a couple of crashes when exporting my outline to other formats
The precision and plethora of styling options makes the app feel wooden and clunky at times, especially when you want to just sit down and write
If I want constant access to, say, a section of text in the second half of my outline, while I work on the first half, there is no way to split the screen or freeze a section so I can see easily disparate parts of my outline at once
There is no word count feature (!). Omni has indicated this could come in 2016, but not having it has kept me from making OmniOutliner my go-to writing app
(Note: if you have OmniOutliner Pro for Mac (twice the price of the regular OO), you can go to the forums for an AppleScript that will help you with word count, but this is more than the average user should be expected to do.)
More Info
Byte for byte, OmniOutliner is worth your considering as your primary writing app. If you don’t need to be as structured with your writing, it may not be your top choice. Its integration across iOS and OS X, though, make it a possible go-to repository for collecting and organizing information.
You can find out more about OmniOutliner here and here.
Thanks to the fine folks at The Omni Group, the makers of OmniOutliner, for giving me downloads for the Mac (OmniOutliner Pro) and iOS apps for this review. See my other AppTastic Tuesday reviews here.