
I enjoy my writing medium more than ever before, now that I’m writing daily in Ulysses.
I started to review the app here; now I conclude my review of Ulysses for Mac.
3. Getting Text Out of Ulysses
You need to know a little bit about Markdown to fully utilize Ulysses. This is from their help manual, which takes the form of a series of interactive Sheets in the app:
“Ulysses uses so-called minimal markup to define, not format or style, text passages. The full list of available definitions is accessible via
⌘9, and it should have you covered left to right. From headlines to lists, to images and footnotes, you simply assign meaning to text passages by entering some easy to remember shortcuts.”
(P.S. I just used that keyboard shortcut and drop-down menu to make the above a block quote… or I could have just typed in “>” before the quotation.)
It’s taken me a little time to learn Markdown (though there’s really not that much to it), but once you have, you can take advantage of Ulysses’s export options.
Again, from the help files:
“Now for the fun part: Ulysses can output your writing to a host of standard formats, such as Plain Text, RTF, HTML, ePub and even PDF. It does so by translating your plain text input based on the definition of the minimal markup. If your brain starts to hurt, here’s a simple example…”

Here’s why I could write this two-part blog post series in Ulysses (using Markdown), export it to html in WordPress, and then have you read it now as if nothing ever happened: Ulysses “will translate the emphasized passage to semantically correct <em>, and the headline will be tagged with <h2>.”
The idea here is that once you know and use Markdown, you don’t really have to do much by way of thinking about formatting.
When you’re ready to export, you can click to bring up the window at right (or type the shortcut ⌘6):

From here you can preview, copy your text to clipboard, save it to a file, or open it with various apps. (I use Nisus Writer Pro to open my Ulysses sheet as a text file.) You can see your text as RTF, PDF, HTML, plain text, or even a nicely formatted ePub so you can publish your own ebook. Ulysses automatically converts your markup to its proper formatting in the finished product.
The Quick Export function is varied and rich enough, but it takes some fussing to get your text to look how you want it. (This fussing starts to defeat the purpose, in my opinion, of the supposed simplicity of using Markdown.) You can go to Preferences and add your own Styles, so can customize how your text exports, if you need more than just the default Styles Ulysses gives you.

But this is more effort than unaccustomed writers may appreciate having to make.
There is a Style Exchange where users post their own formatted style sheets, which you can download to your own Ulysses.
And if you do decide to go all in with Ulysses (I’m there), there is a reference guide you can work through to figure out how to make your own Styles to export just how you want.
(See also here for a succinct overview on Ulysses’s blog about exporting.)
4. Ulysses as a Writing Experience
I love writing in Ulysses. Required export efforts and occasional iCloud syncing frustrations notwithstanding, it is a beautiful app in which to put down and rearrange words. It’s smooth and visually appealing. And Ulysses really does accomplish the dual goal of the developers to be (a) distraction-free in its layout yet (b) still give you easy access to any feature a writer would need.
You can keep notes and goals aligned to a given Sheet (i.e., document), and view them from the Attachments pane, or detach them and see them as their own free-floating windows. This really enhances the experience of writing in Ulysses. You can also bookmark paragraphs and favorite Sheets, so navigating through stacks of writing is easier than you’d expect.
I’ve used Ulysses to help inspire me to finish a couple of mid-sized pieces of writing recently—pieces that I was interested in but lacking some motivation for at the time of having to produce them. I told myself I could use Ulysses to write, and the prospect of using that environment made a big difference!
I know this may be silly, but if you have some emails you need to compose that you have been putting off, writing them from Ulysses can be like a spoonful of sugar.
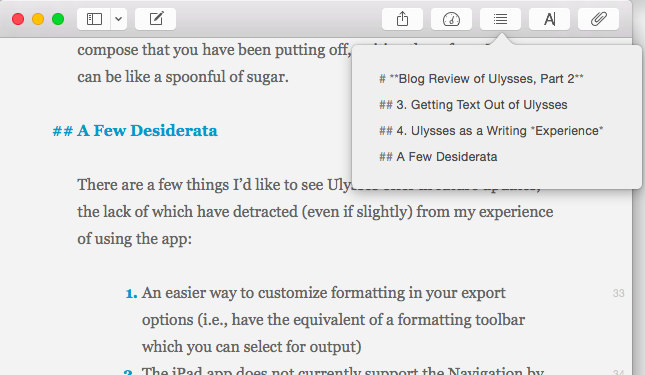
A Few Desiderata
There are a few things I’d like to see Ulysses offer in future updates, the lack of which have detracted (even if slightly) from my experience of using the app:
- I would love there to be an easier way to adjust formatting in the Quick Export options (i.e., having something like the equivalent of a formatting toolbar which you can select for output, rather than having to do it through Styles). Also, I haven’t found a way to easily adjust image sizing (from Ulysses) when exporting a Sheet to a blog post–a process itself which could stand to be more fully automated.
- The iPad app does not currently support the Navigation by headings feature I so appreciate in Mac. In fact, the same icon/button is present in iPad, but does something totally different.

Navigating by Headings I do hasten to add, however, that the Ulysses for iPad app is stellar, easily one of the best apps in the App Store and my current favorite app for iPad.
- It would be lovely if there were a way to include the word count as part of the Editor screen. It’s easy enough to find it in the Statistics or Goals portion of the Attachment pane (and both of these pop-ups can be torn off and left free-floating), but a simple word count bar at the top or bottom of the Editor would be nice. The iPad app does offer something along these lines.
- I believe this is mostly the fault of the iPad’s lack of support for .rtf, but getting writing from Ulysses on iPad into a format that is .rtf-ready (not to mention .rtf itself) is just about impossible. If you can hop over to Ulysses on a computer, it’s doable, but iPad alone won’t really work for moving your content to rich text.
By the way, my love for Scrivener has not changed, and it’s still a fuller-featured environment for getting lots of research and snippets organized—and has its own really nice distraction-free writing mode.
But Ulysses is on iPad now, too (Scrivener: not yet, but close-ish), and it’s beautiful on the Mac, so when I’m doing long periods of writing, I primarily use Ulysses at as many points along the way as I can.
You can download a free demo trial of Ulysses for Mac here. More about the iPad app is here. Check it out, and play around with it for a bit. It’s helped me really rediscover my love of writing.
Thanks to The Soulmen Gbr, developers of Ulysses, for giving me a download for the review. See my other AppTastic Tuesday reviews (yes, this one is a few days early) here.


excellent review – many thanks
You’re welcome! Thanks for the encouragement.