Todoist (Premium): Reviewed and Considered

I’m pretty tied to the Apple ecosphere of apps when it comes to productivity: OmniFocus, Drafts, MindNode, Ulysses, etc. Three major exceptions are Scrivener, Evernote, and Accordance. But otherwise–whether this has happened consciously or not–most of the apps I use regularly are Mac-only.

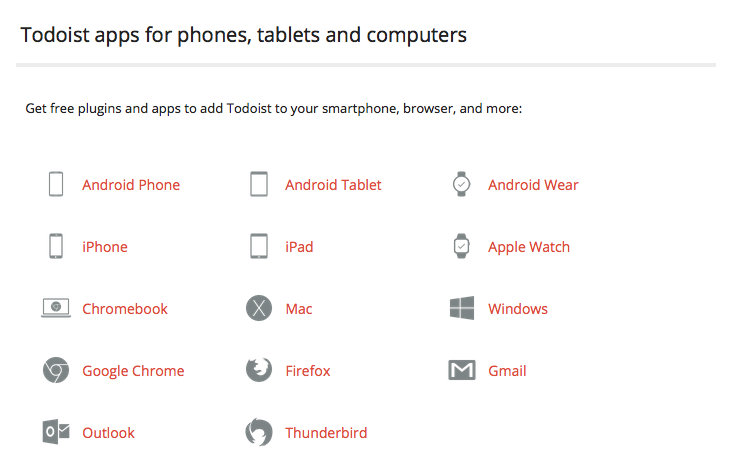
Todoist is the rare task management app that is available on every platform. And I mean every platform. It even has a Web-based interface, if you don’t want to have to fire up the app on your computer:


Universal Todoist


Not only that, it integrates with just about everything. This itself is reason to consider Todoist as a primary task management app.

In this post, I review Todoist Premium, considering at the end whether it could, for me, replace OmniFocus.

Here’s a short video from the makers of Todoist, which offers a quick overview:


What’s Awesome about Todoist


First, what’s awesome about Todoist.

 
1. It looks good. Really good.
 

Here it is in landscape mode on an iPad mini:


iPad Layout


At first I thought it was overly simple, sort of blasé. But the more I’ve used Todoist, the more I appreciate the layout. No clutter, easy to read, pleasing to the eyes. (And you can tweak the color scheme, too.)

 
2. The sync: It Just Works.
 

Todoist’s sync across devices is natural and fast. It’s much more like Things than (previous versions of) OmniFocus. I don’t even really think about it, which is what you hope would be true. No manual anything required.

 
3. Todoist is everywhere (almost).
 

It’s the most ubiquitous and app-integrated task management app on the market. Look, it’s even in my Firefox browser!


Firefox Plugin
Click to enlarge image


There’s a Gmail plug-in, too. This, unfortunately, is only available with Chrome–which is too much of a CPU hog for me. But it looks good.

Todoist doesn’t offer a Mac Mail plug-in, but as you’ll see below, you can email a task right into a Todoist project, so that’s not a big deal.

 
4. Labels and Filters
 

I don’t know Todoist like I know OmniFocus, but Labels and Filters would appear to be the app’s heart and soul. Sure, there’s an Inbox you can use for GTD-style capture (from anywhere). Yeah, you can set up different Projects for organizing your tasks. But Labels allow you to assign contexts and anything else you like to your tasks (expected task duration?). Then you can filter your tasks by Labels or priority or any other saved search:


Priority 3


Annoying is the fact that when you create a new Label, if there are two words or more, Todoist automatically inserts an underscore. So one label of mine is now “Waiting_For.” I’m sure I’ll get used to it, but it feels a little AOL-ish.

I’m sure there are Label and Filter ninja reading this post, and there’s much more to say about them–Todoist can do quite a bit here. So check out this page and this page for more.

 
5. Easy task input
 

Todoist understands natural language, so entering tasks intuitively is no problem. It’s easy to enter tasks in rapid-fire fashion, too, so you can do a brain dump well with Todoist.

 
6. Email reminders
 

Todoist assigns an email address to a Project of your choice, so I can email tasks (or forward actionable emails) directly to my Inbox. This is a must-have for me in a task management app. You can include attachments, too.

Speaking of email… you can also have Todoist email you reminders of your tasks. At first I thought this was redundant (well… it is). But even though I’m seeing the same task twice (maybe a GTD no-no?), I have found the added reminder helpful.


What I Don’t Particularly Like about Todoist


1. The Premium, subscription-based model
 

Of course. It would be ridiculous to expect a sophisticated app with task notes, attachments, email reminders, fast sync, etc. to be free. There is a free Todoist, but it’s limited. Here’s some of what is in Premium, which is about $29/year:


Premium


But I’ve never liked subscription-based models. Sure, if you work for a big company that’s paying for it, I can see it working. But what users otherwise want to pay $150 to use the app for the next five years? Other apps with one-time purchases end up being cheaper. If you don’t have Premium, or let it expire, you can no longer add notes or attachments to your tasks–serious GTDers (and other task management obsessives) will need Premium.

 
2. The interface is not so customizable.
 

You can change your start screen, but not on iOS, that I could find. You’re pretty tied in to the layout Todoist gives you.

 
3. For GTDers: No weekly review option
 

My weekly review–a built-in feature of OmniFocus–is what allows me to set due dates sparingly, a key practice for effective project and task management. Todoist’s Karma is fun, but feels gimmicky. And their GTD page has suggestions for something like a weekly review (it would be easy enough to set up a recurring task for it, employing Filters and Labels as needed), but I have gotten so used to OmniFocus’s Review function that not having one already in the app is tough. But it won’t be a deal breaker for a lot of folks.


Concluding Evaluation

 
If I were to stop using Apple products tomorrow, I’d get Todoist up and running right away.

How does Todoist Premium rate with apps like OmniFocus and 2Do and Things? It’s right up there, and maybe—given its cross-functionality and fast sync—the best of the batch. But the subscription model is just something I can’t latch on to. Some will have no problem with this.

When I set out to write this review, I was planning to conclude it with, “Yet another app falls short of OmniFocus….” But Todoist really doesn’t. Sure, OF beats it in some regards, but Todoist outperforms OmniFocus in other key areas.

So if you’re one of those handful of disaffected OF users, or if, heaven forbid, you’re not keeping track of your commitments in writing at all–and if you have $30/year to spend–Todoist Premium might just be your new, sole task management app.


Thanks to the fine folks at Doist, the makers of Todoist, for giving me 6 months of Todoist Premium so I could write this review. See my other AppTastic Tuesday reviews here.

iOS’s Best App, Now at 30% Off

drafts4-banner-880x220


Drafts is the only app that lives in my dock on both iPad and iPhone. I was skeptical before I reviewed it. Now I use it more the Phone “app” on my phone.

Best of all is the customizable keyboard, from which you can trigger a bunch of actions to perform on the text in your draft: send as Message, Email, make into OmniFocus list, send to Evernote journal, make into a mind map, etc., etc., amen.

Here’s how part of mine looks:


If you use your iOS device (iPhone or iPad) to boost your organization and productivity, this is an essential app. You can, for example, do this amazing thing and this even more amazing thing.

Best of all, it’s now 30% off for a Back to School sale. I’ve never seen it cheaper.

Check out Drafts here.

Voice Dictate a Mind Map (MindNode+Drafts+Siri=Whoa.)

You can make a mind map with no hands in just three steps on an iPhone.

To voice dictate a mind map, you need:

  • an iPhone or iPad with Siri
  • the amazing app Drafts 4
  • mind mapping app MindNode

The Drafts action you’re going to need is “Open in….”

I’ve given this action (which comes already installed with Drafts) its own “Run Action” key on the customizable Drafts keyboard, with its own icon from the emoji keyboard. My keyboard in Drafts looks like this:


Voice MN_Keyboard


Now the amazing part, and it’s just three steps:


1. Outline the text of your mind map in Drafts.


Here’s a bit of voice-dictated text:


Voice MN_Draft


To get going, use Siri to record what will be your first node.

To get to a second node, simply say, “New line, new line” and say what your next node will be.

If you want to do sub-nodes (i.e., “children”) after you have dictated your main/parent node, say, “New line,” and then have Siri indent your sub-node with the “tab key” command. Then dictate that sub-node or child.

You can add more parent, child, and sibling topics similarly.


2. Run your “Open in…” action in Drafts.


I simply tap my “Run action” key, which automatically triggers the “Open in…” action:


VoiceMN_Open in


Select Mind Node and…


3. View your mind map in MindNode.


Voice MN_Map


Because of MindNode’s iCloud-enabled sync setup, you can now view (and modify) your mind map in iOS or OSX platforms.

Joey Lawrence put it best:


The above is an adaptation/re-posting of a previous post on voice dictating a mind map. That post used the app iThoughts, but I learned shortly after posting that even though MindNode doesn’t have the x-callback-url support that iThoughts does, Drafts’s “Open in…” feature makes the same process possible with just one extra tap. Rad.

Now You Have to Pay to Email to Evernote, But Here’s a Workaround (EverMail)

Evermail

One of Evernote‘s best features is being able to email notes directly into Evernote. They give you an email address, and if you get an email that you want to file away for reference, you can send it right to Evernote. (You can even, if you word your subject line correctly, tag it and put it in a specific notebook.)

However, Evernote recently announced that you’d have to sign up for one of their paid plans if you wanted to keep your heretofore free email address. It’s not a huge sum, but I don’t plan to upgrade–I just don’t need the larger upload storage space at this point, which also comes with the paid upgrade.

Enter EverMail.

The Mac Mail plug-in from ChungwaSoft was available long before Evernote changed their pricing structure, and I used it regularly then. Now it’s an essential part of my workflow.

Here’s how it works.


1. I get an email, the contents of which I want to file in Evernote.


An email about the Septuagint. What could be better?


Look again at the image above–at the top right you’ll see the Evernote elephant icon. That’s because I have EverMail installed in my Mac Mail app.


2. I click the EverMail icon, which gives me three options.


2_Create a Note


3a. I choose “Create quick note,” which I can select with mouse/trackpad or via keyboard shortcut.


4_Quick Save


I can quickly save my email to any notebook. The shot above doesn’t show it, but I now have it set up to default to my “Inbox” notebook in Evernote.


3b. I select “Create note” to further customize my email/note before sending to Evernote.


3_Edit Note


From here I can not only select the desired Notebook and tags, I can set a reminder, adjust the Note title, add my own notes to the link I’m saving, and even include email attachments so they save to Evernote, too.

This is actually even an improvement on emailing to Evernote, because now I don’t have to remember the right subject line syntax for adding tags and sending to a proper Notebook. I can do everything from within Mac Mail and not even have to open Evernote.

Once you install EverMail, you’ll see it in your Mail toolbar:


Mail Menu Bar


And here are the settings–EverMail puts itself right into your Mac Mail Preferences:


Settings


I mentioned free earlier. EverMail is not free, but at $13.95, you’ve got yourself a permanent email-to-Evernote solution that you don’t have to keep paying for each month.

Setup and use have both been exceedingly easy. I’m a big fan of the app. Check it out here.


Thanks to the good people of ChungwaSoft for giving me a download of EverMail for review purposes.

Lifeline for iOS: Rescuing Taylor from a Lonely Planet

Lifeline


Lifeline begins with your receiving a transmission from “Taylor,” a man or woman who is stranded (and alone…?) on a strange planet. Maybe “game” is the wrong moniker for this app–it’s really more of an interactive experience, similar to the Choose Your Own Adventure novels of days gone by.


Lifeline: The Basics


It starts like this:


IMG_4300


And away you go! From here on out, it’s as if you’re interacting with Taylor, complete with realistic overnight pauses in communication as s/he goes to sleep for the night.

Taylor’s funny, even amidst dreary circumstances:


IMG_4303


Your first choice with fairly serious consequences comes early in the game:


IMG_4304


Off Taylor goes, and you wait:


IMG_4307


One of the coolest things about the app is the on-screen notifications you get even when you’re not “playing”:


IMG_4308


You can even respond without unlocking your phone:


IMG_4329


For the most part Taylor will do what you say, though it is not uncommon to have your wisdom second-guessed. After a little banter, though, Taylor will ultimately follow the path you suggest.


Evaluation (Insignificant Spoilers Below)


I had way more fun playing Lifeline that I thought I would. And I was much more drawn into the story than I expected to be.

The pacing of the story (i.e., how often you receive notifications and the real-life waiting time overnight or while Taylor is walking somewhere) is nearly flawless. You really have to spend three to four days to get Taylor to the end. Well… unless you make bad decisions early on.

I was actually pretty happy with myself that I got Taylor safely off the planet on the first try.


IMG_4341


After you finish the story you get the option to go back again, this time with no delays, which is a really nice way to quickly try other paths.


IMG_4342


When I went back to try new scenarios, I realized that you can get him/her killed the first day pretty easily!

The phone notifications are just like any other app’s notifications, though when you’re immersed in the game they sort of feel like text messages. There is no sound with the message notification, and I couldn’t find a way to change this setting. At first I found this a bit frustrating, but was actually glad for it as the days went on, so that I wasn’t constantly interrupted by Taylor. (You can adjust notifications in the settings otherwise.)

One mildly vexing thing about the game is that it’s not uncommon that after you make a decision for Taylor, s/he confirms that it was a good (or maybe not-good) decision by giving you more detail about surroundings… detail s/he already had and that would have been very useful before offering advice! E.g.:


IMG_4315


But I can’t tell if this is a frustration with the game-writing or the character. Not a big deal either way.

Lifeline is great. It’s available in the iOS App Store right now (see here). It’s also available on other platforms, and rumor has it that Lifeline 2 is coming soon…. Check out the game in more detail here. And go here for a fascinating behind-the-scenes write-up.


Thanks to the good people of Big Fish Games for giving me a download of Lifeline for review purposes. Find my other Apptastic Tuesday reviews here.

How to Voice Dictate a Mind Map on Your iPhone

iThoughts icon
iThoughts mind mapping app


You can create a mind map with no hands in just three steps on an iPhone.

Before you voice dictate your mind map, you need:

Then head to the Drafts action directory to pick up this nice little callback url to install to Drafts. If you click this link from your iOS device, you can have it install the action right to Drafts. (More on iThoughts and x-callback-url options here.)

I’ve assigned this action its own “Run Action” key on the customizable Drafts keyboard, with the label MM. My keyboard in Drafts looks like this:


Mind Map Key


Now the fun part, and it’s just three steps:


1. Outline the text of your mind map in Drafts.


Here’s what I’ve just voice dictated:


Text in Drafts for Mind Map


To get going, use Siri to record what will be your first node (“topic” in iThoughts parlance).

To get to a second node, simply say, “New line, new line” and say what your next node/topic will be.

If you want to do sub-nodes (i.e., “children” topics) after you have dictated your main/parent topic, say, “New line,” and then have Siri indent your sub-node with the “tab key” command. Then dictate that sub-node or child topic.

You can add more parent, child, and sibling topics similarly. (iThoughts has a nice terminology overview here.)


2. Run your “iThoughts: New Map from Outline” action in Drafts.


I simply tap my “Run action” key, which automatically opens my draft in iThoughts as a mind map–and does it so quickly, I can barely catch a screenshot of the dialogue!


New Map from Outline


3. View your mind map in iThoughts.


Here it is
Here it is


Because of iThoughts’s sync setup, you can now view (and modify) your mind map in iOS or OSX platforms.

If this isn’t amazing tech, I don’t know what is.

UPDATE: I’ve just learned you can achieve this same effect with MindNode, my current go-to app. It doesn’t have as rich x-callback-url support, but you can make a mind map from voice-dictated text using the “Open in…” feature in Drafts. Very cool.


Thanks to the good people of toketaWare, for giving me a download of iThoughts for iOS and OSX for review purposes. More on that app to follow.

MindNode–>OmniOutliner: Quite a Combo!

All of a sudden I’m hooked on mind mapping. It’s been a really productive way for me to make sense of the texts I speak on each week. Here’s how I’ve made structural sense of the David and Bathsheba account:


David and Bathsheba (click to enlarge image)


(If that image doesn’t work well for you, click here to see a zoomable version.)

(Next up: trying to outline thought processes in other parts of my life using mind mapping.)

I’m not at the point of being able to write a whole sermon via mind map (and may never go that route), so my next step is exporting to text.

MindNode makes that exceedingly easy, as I mentioned here. In MindNode 2.0 for Mac, you can always view a text outline of your map right next to all those nodes, sub-nodes, and connecting lines:


Mind Map with Outline
Note outline at right


By the way–that’s a lot to look at on one screen. MindNode has a lovely “Fit to Mind Map” zoom selection, so you can have your mind map fill the application screen. For large and multi-noded apps, that’s a great setting.

Now exporting the map to multiple options is easy. Last week I exported to .rtf, dumped the text into Scrivener, and worked from there. Export options are robust in MindNode, as are import options. I could even easily import some random thoughts from Scrivener’s cousin, Scapple, right to MindNode.

This week, however, I wanted to live dangerously. I.e., I wanted to try OmniOutliner for fleshing out my outline, once I had the content figured out in MindNode. So I exported my mind map from MindNode as .opml and opened in OmniOutliner:


What my mind map looks like in OmniOutliner
What my mind map looks like in OmniOutliner (click to enlarge)


Awesome!! All right there, as it should be. All the points and sub-points are in order. The text outline that was already in MindNode is now in OmniOutliner, with everything in its right place. Even the notes popovers in MindNode (sweet new 2.0 for Mac feature) come in to OmniOutliner as notes (the grey font next to the notebook icon, in the image above).

At this point I can work from the outline in OmniOutliner. You’ll see in the image above that I’ve added a “RESEARCH” section to allow me to do just that.

OmniOutliner has similarly robust export options. I can make a couple tweaks to fine-tune the formatting in my export, and then open the finalized, annotated outline in a word processor of choice. Very nice!

I’ve been experimenting with workflow for sermon preparation lately, a little more than usual. I’ll still do my research with Accordance as my primary hub. But for the initial outlining process and the final writing process, MindNode and OmniOutliner seem to be making a great team.

One other huge bonus that both apps have in common: they are fully cross-platform across Mac, iPad, and iPhone, so I can jot down ideas wherever and whenever inspiration strikes.


Thanks to the good people of IdeasonCanvas, for giving me a download of MindNode for iOS and OSX for review purposes. And thanks to The Omni Group for OmniOutliner Pro, also for review purposes (more to come). See my other AppTastic Tuesday reviews here.

My First Time Using Mind Mapping

Some folks swear by mind mapping, a way to get ideas down on paper and visually display their interconnections beyond what just a text editing file can do.

I haven’t found it as easy a medium, but this last week I tried mind mapping my sermon outline before writing out the manuscript, and found the process really helpful. I used the app MindNode to do it, which I review today.


A Simple Mind Map of The Fifth Discipline


Here’s a simple mind map for understanding Peter Senge’s five disciplines in The Fifth Discipline:


5 Disciplines on an iPhone


What’s really cool is what you can do with this mind map in MindNode (iOS) once you have it. You can see a text-based outline, which can expand or collapse levels:


iOS Mind Map Outline


And you can export to MyMindNode, where you can view and publish your map on the Web:


Upload to MyMindNode 2


You can then share the link to your mind map


I was hoping to embed the above mind map right here in this post, but WordPress.com does not support plug-ins or a good deal of third-party embeds (dah!), so I simply can give you this hyperlink to see what it looks like.


More Complex Mind Mapping


I used MindNode to map out my sermon outline this last Sunday. When I was done it looked like this:


ScreenShot from OSX app MindNode Pro (click to enlarge)


And then I thought: oops. How I am going to get this into Scrivener without re-typing everything? At first I just dragged a .png image file into Scrivener so I could see the mind map as I worked on next steps. Then I realized I could actually export it not only as a PDF or image, but as a text file. (!!)

It looked like this:


Export to text


…which was sweet, because then I could just copy and paste to Scrivener and write my manuscript into my outline, started in MindNode.

By the time I was done writing the manuscript, I’d pared down the outline a bit. Editing in MindNode was easy, so that the final map looked like this:


Final Sermon MindMap


Nodes, Parents, Siblings, Etc.: All Easy to Use


There’s a lot more to mind mapping, not the least of which is learning some terminology (nodes, parents, siblings, children, etc.). The best place to start is the MindNode Web page here. The iOS User Guide is also a great way to get to know the app; that is here.

MindNode offers iCloud and Dropbox support. iCloud has its issues (sync hanging), but MindNode has the best and most succinct troubleshooting guide I’ve seen.

Styles, fonts, and colors are all customizable. And it seems a rare treat for a writing app to exist (and be well-designed and executed) on iPhone, iPad, and Mac. Of course, for a large mind map one will probably choose Mac (or iPad) over iPhone, but moving between devices is easy. There is no Apple device on which you cannot access and edit your mind map. There’s even an accompanying Apple Watch app.

There are some other really nice touches, too, like being able to “fold and unfold” nodes, the equivalent to expand/collapse in a table of contents, for example. You can hide all of a nodes’ children if you need to clear up some screen real estate, and just as easily unhide them. You can also add notes to a node for storing even more information without having to display it.

Perhaps the best thing about MindNode is how easy it was for me to make both of the above mind maps before reading any of the support material. Moving nodes, connecting them, disconnecting them, changing fonts, dragging things around, exporting, and more… all of this was really intuitive and easy to come by both on OSX and iOS.

So… I’ll keep trying mind mapping for the outlining stage of writing. MindNode has much more still to uncover, and I’m looking forward to future use. A brilliantly executed app.


Thanks to the good people of IdeasonCanvas, for giving me a download of MindNode for iOS and OSX for the review. Check out the app’s iOS page here and the Mac app (MindNode Pro) here. Note that MindNode Pro for OSX has now been updated to MindNode2. See my other AppTastic Tuesday reviews here.

HoursTracker Pro for iOS, Reviewed

HoursTracker Pro App Icon


HoursTracker has seen more than 1 million downloads from the App Store since its 2009 release. I’ve been using HoursTracker Pro for a couple months now, so report back to you here, with a look at some key features.


Clocking in and out

 
This is the main job of any time-tracking app (obvs), and it’s executed nicely here.


Clocking in
Clocking in


Clocking out
Clocking out


It’s easy to add a break, or just pause the timer. You hold the “Clock Out Now” button for more options to appear:


Take a Break


Tag and filter your work

 
Tags and filters offer a sophisticated way to manage and pare down the data you see. You can toggle various filters on and off, as desired.

See some of what’s possible here:


Get notifications that you’ve worked a set number of hours

 
This is particularly cool. You can decide you want to work two hours on a certain job, then the app will track it for you.


Set time per day


Then it will let you know when two hours is up, even giving you warnings beforehand:


Notification of Time


Notification of Time 2


I think this has been my favorite part of the app.


Invoicing?


Although HoursTracker Pro allows you to track work done for specific clients at whatever rates you like, it does not include an invoicing feature. You can export your timesheet data, but the app could be even more of a one-stop shop–especially for consultants–if it were to add automatic invoicing options in a future release.


Export options are really good


Data export options are really good. With just a few taps (and within seconds), you can have an email in your inbox with all your timesheet data as a .csv file that includes duration, break times, notes you entered for a given job, tags, and more.


It’s customizable


HoursTracker is quite customizable–taking notes and using tags and filters make this a sophisticated app. Here’s what the Settings section looks like:


HTP Settings


In conclusion


If you want to try before you buy (the Pro app is $9, here,) HoursTracker is free here.

The Pro version is probably more than someone would want to sink into an app, if they were only tracking a job or two. But if…

  • you are tracking multiple jobs or projects, and
  • you want a way to tag and customize your data, and
  • you want to be able to access a clean and robust export

…you’ll want to check out HoursTracker. Spend some time with the free version, and then you can decide whether you want to pay for the full Pro version.

Happy time tracking! If you are a time logger, HoursTracker gives you an aesthetically pleasing environment for recording time, as well as has enough features for you to get it to do just about anything you need.


Thanks to the good people of HoursTracker, for giving me a download of HoursTracker Pro for the review. Check out the app’s iOS page here (Pro) and here (free). See my other AppTastic Tuesday reviews here.

2Do Task Management App: Free This Week in App Store

2do-128The exquisitely designed 2Do app is Apple’s App of the Week in the iOS App Store. It’s usually $15 but is now free. The accompanying Mac app is 50% off, too.

I’ve reviewed Things and OmniFocus, and will soon review 2Do.

For now I can simply say: this is one of the most robust and beautifully designed apps I’ve seen on iPhone or iPad. The developers have–with their imagination and execution–far exceeded what one sees in a typical iOS app.

Read all about the iOS features here. Download it free (for a few more days) here.