Drafts is the only app that lives in my dock on both iPad and iPhone. I was skeptical before I reviewed it. Now I use it more the Phone “app” on my phone.
Best of all is the customizable keyboard, from which you can trigger a bunch of actions to perform on the text in your draft: send as Message, Email, make into OmniFocus list, send to Evernote journal, make into a mind map, etc., etc., amen.
Here’s how part of mine looks:
If you use your iOS device (iPhone or iPad) to boost your organization and productivity, this is an essential app. You can, for example, do this amazing thing and this even more amazing thing.
Best of all, it’s now 30% off for a Back to School sale. I’ve never seen it cheaper.
The Drafts action you’re going to need is “Open in….”
I’ve given this action (which comes already installed with Drafts) its own “Run Action” key on the customizable Drafts keyboard, with its own icon from the emoji keyboard. My keyboard in Drafts looks like this:
Now the amazing part, and it’s just three steps:
1. Outline the text of your mind map in Drafts.
Here’s a bit of voice-dictated text:
To get going, use Siri to record what will be your first node.
To get to a second node, simply say, “New line, new line” and say what your next node will be.
If you want to do sub-nodes (i.e., “children”) after you have dictated your main/parent node, say, “New line,” and then have Siri indent your sub-node with the “tab key” command. Then dictate that sub-node or child.
You can add more parent, child, and sibling topics similarly.
2. Run your “Open in…” action in Drafts.
I simply tap my “Run action” key, which automatically triggers the “Open in…” action:
Select Mind Node and…
3. View your mind map in MindNode.
Because of MindNode’s iCloud-enabled sync setup, you can now view (and modify) your mind map in iOS or OSX platforms.
Joey Lawrence put it best:
The above is an adaptation/re-posting of a previous post on voice dictating a mind map. That post used the app iThoughts, but I learned shortly after posting that even though MindNode doesn’t have the x-callback-url support that iThoughts does, Drafts’s “Open in…” feature makes the same process possible with just one extra tap. Rad.
One of Evernote‘s best features is being able to email notes directly into Evernote. They give you an email address, and if you get an email that you want to file away for reference, you can send it right to Evernote. (You can even, if you word your subject line correctly, tag it and put it in a specific notebook.)
However, Evernote recently announced that you’d have to sign up for one of their paid plans if you wanted to keep your heretofore free email address. It’s not a huge sum, but I don’t plan to upgrade–I just don’t need the larger upload storage space at this point, which also comes with the paid upgrade.
The Mac Mail plug-in from ChungwaSoft was available long before Evernote changed their pricing structure, and I used it regularly then. Now it’s an essential part of my workflow.
Here’s how it works.
1. I get an email, the contents of which I want to file in Evernote.
An email about the Septuagint. What could be better?
Look again at the image above–at the top right you’ll see the Evernote elephant icon. That’s because I have EverMail installed in my Mac Mail app.
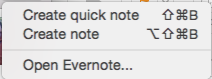
2. I click the EverMail icon, which gives me three options.
3a. I choose “Create quick note,” which I can select with mouse/trackpad or via keyboard shortcut.
I can quickly save my email to any notebook. The shot above doesn’t show it, but I now have it set up to default to my “Inbox” notebook in Evernote.
3b. I select “Create note” to further customize my email/note before sending to Evernote.
From here I can not only select the desired Notebook and tags, I can set a reminder, adjust the Note title, add my own notes to the link I’m saving, and even include email attachments so they save to Evernote, too.
This is actually even an improvement on emailing to Evernote, because now I don’t have to remember the right subject line syntax for adding tags and sending to a proper Notebook. I can do everything from within Mac Mail and not even have to open Evernote.
Once you install EverMail, you’ll see it in your Mail toolbar:
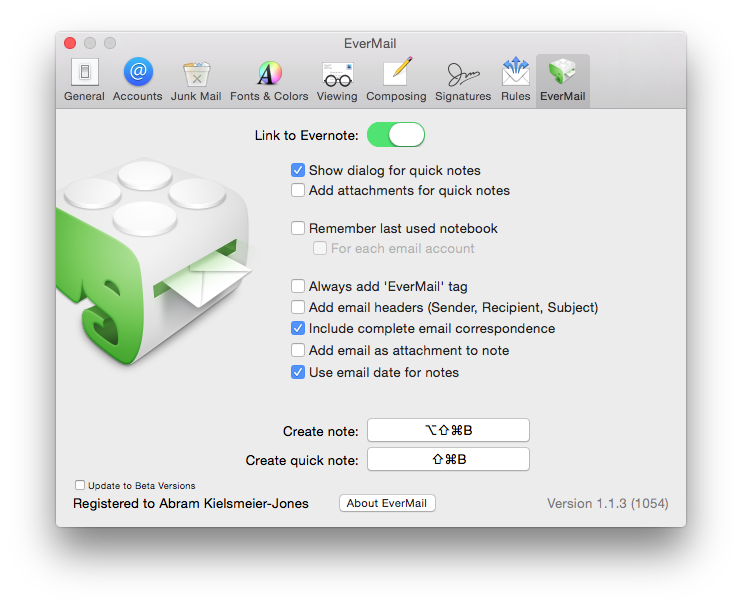
And here are the settings–EverMail puts itself right into your Mac Mail Preferences:
I mentioned free earlier. EverMail is not free, but at $13.95, you’ve got yourself a permanent email-to-Evernote solution that you don’t have to keep paying for each month.
Setup and use have both been exceedingly easy. I’m a big fan of the app. Check it out here.
Thanks to the good people of ChungwaSoft for giving me a download of EverMail for review purposes.
Lifeline begins with your receiving a transmission from “Taylor,” a man or woman who is stranded (and alone…?) on a strange planet. Maybe “game” is the wrong moniker for this app–it’s really more of an interactive experience, similar to the Choose Your Own Adventure novels of days gone by.
Lifeline: The Basics
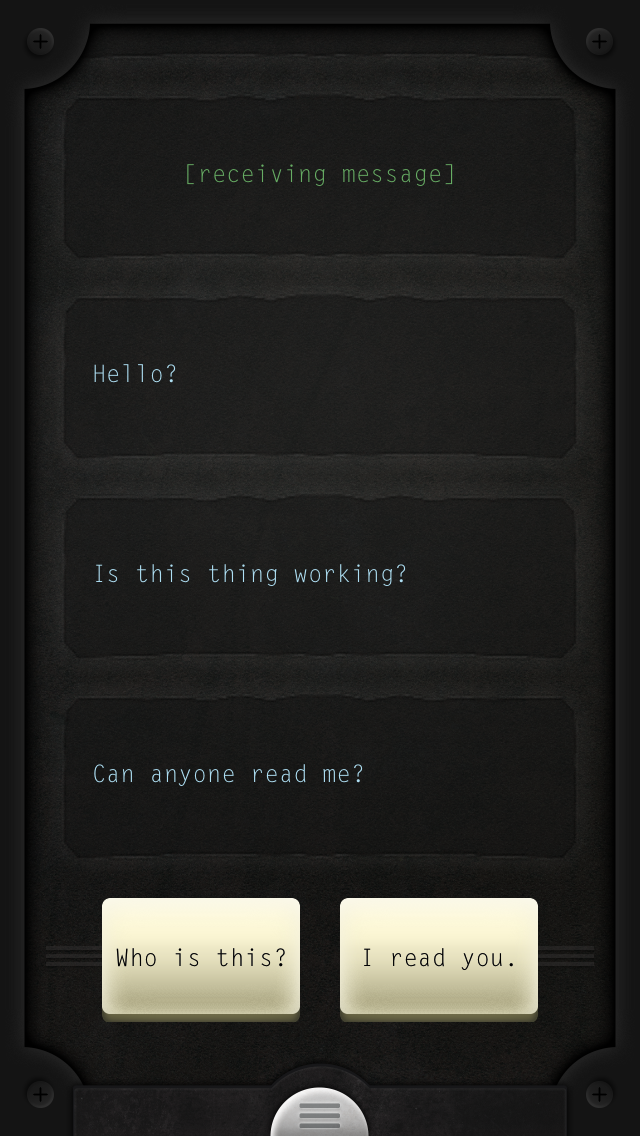
It starts like this:
And away you go! From here on out, it’s as if you’re interacting with Taylor, complete with realistic overnight pauses in communication as s/he goes to sleep for the night.
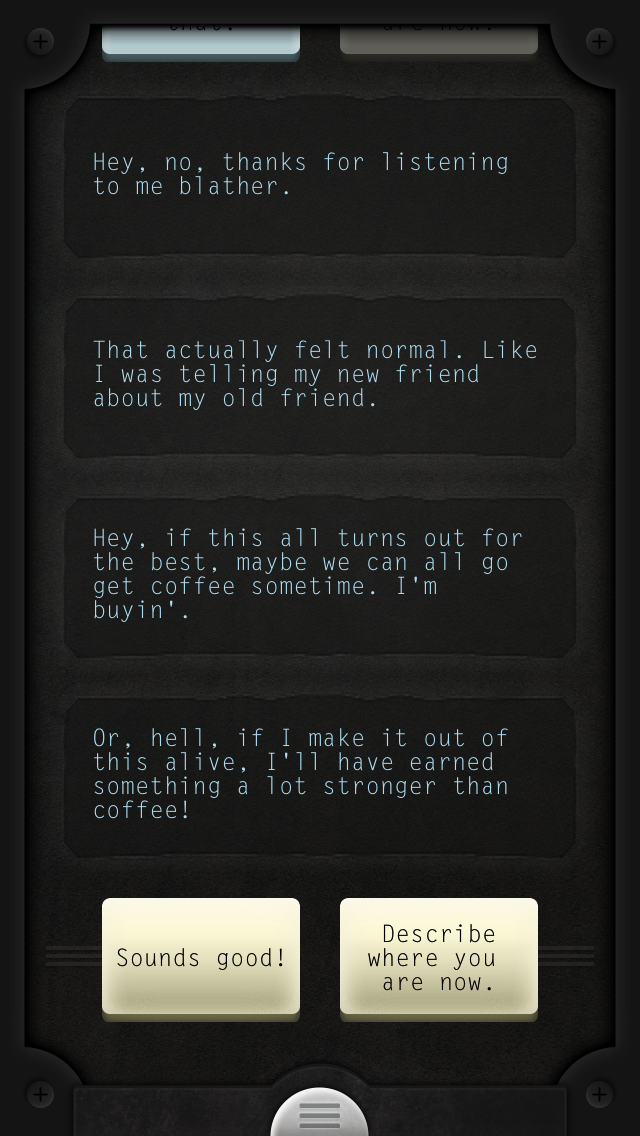
Taylor’s funny, even amidst dreary circumstances:
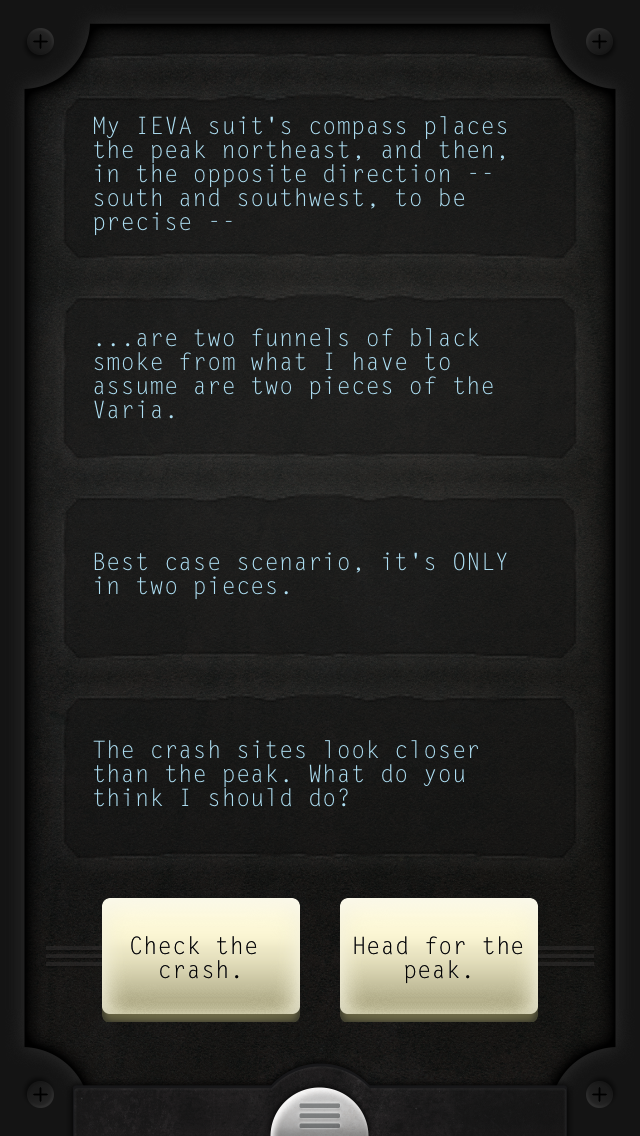
Your first choice with fairly serious consequences comes early in the game:
Off Taylor goes, and you wait:
One of the coolest things about the app is the on-screen notifications you get even when you’re not “playing”:
You can even respond without unlocking your phone:
For the most part Taylor will do what you say, though it is not uncommon to have your wisdom second-guessed. After a little banter, though, Taylor will ultimately follow the path you suggest.
Evaluation (Insignificant Spoilers Below)
I had way more fun playing Lifeline that I thought I would. And I was much more drawn into the story than I expected to be.
The pacing of the story (i.e., how often you receive notifications and the real-life waiting time overnight or while Taylor is walking somewhere) is nearly flawless. You really have to spend three to four days to get Taylor to the end. Well… unless you make bad decisions early on.
I was actually pretty happy with myself that I got Taylor safely off the planet on the first try.
After you finish the story you get the option to go back again, this time with no delays, which is a really nice way to quickly try other paths.
When I went back to try new scenarios, I realized that you can get him/her killed the first day pretty easily!
The phone notifications are just like any other app’s notifications, though when you’re immersed in the game they sort of feel like text messages. There is no sound with the message notification, and I couldn’t find a way to change this setting. At first I found this a bit frustrating, but was actually glad for it as the days went on, so that I wasn’t constantly interrupted by Taylor. (You can adjust notifications in the settings otherwise.)
One mildly vexing thing about the game is that it’s not uncommon that after you make a decision for Taylor, s/he confirms that it was a good (or maybe not-good) decision by giving you more detail about surroundings… detail s/he already had and that would have been very useful before offering advice! E.g.:
But I can’t tell if this is a frustration with the game-writing or the character. Not a big deal either way.
Lifeline is great. It’s available in the iOS App Store right now (see here). It’s also available on other platforms, and rumor has it that Lifeline 2 is coming soon…. Check out the game in more detail here. And go here for a fascinating behind-the-scenes write-up.
Thanks to the good people of Big Fish Games for giving me a download of Lifeline for review purposes. Find my other Apptastic Tuesday reviews here.
Then head to the Drafts action directory to pick up this nice little callback url to install to Drafts. If you click this link from your iOS device, you can have it install the action right to Drafts. (More on iThoughts and x-callback-url options here.)
I’ve assigned this action its own “Run Action” key on the customizable Drafts keyboard, with the label MM. My keyboard in Drafts looks like this:
Now the fun part, and it’s just three steps:
1. Outline the text of your mind map in Drafts.
Here’s what I’ve just voice dictated:
To get going, use Siri to record what will be your first node (“topic” in iThoughts parlance).
To get to a second node, simply say, “New line, new line” and say what your next node/topic will be.
If you want to do sub-nodes (i.e., “children” topics) after you have dictated your main/parent topic, say, “New line,” and then have Siri indent your sub-node with the “tab key” command. Then dictate that sub-node or child topic.
You can add more parent, child, and sibling topics similarly. (iThoughts has a nice terminology overview here.)
2. Run your “iThoughts: New Map from Outline” action in Drafts.
I simply tap my “Run action” key, which automatically opens my draft in iThoughts as a mind map–and does it so quickly, I can barely catch a screenshot of the dialogue!
3. View your mind map in iThoughts.
Here it is
Because of iThoughts’s sync setup, you can now view (and modify) your mind map in iOS or OSX platforms.
If this isn’t amazing tech, I don’t know what is.
UPDATE: I’ve just learned you can achieve this same effect with MindNode, my current go-to app. It doesn’t have as rich x-callback-url support, but you can make a mind map from voice-dictated text using the “Open in…” feature in Drafts. Very cool.
Thanks to the good people of toketaWare, for giving me a download of iThoughts for iOS and OSX for review purposes. More on that app to follow.
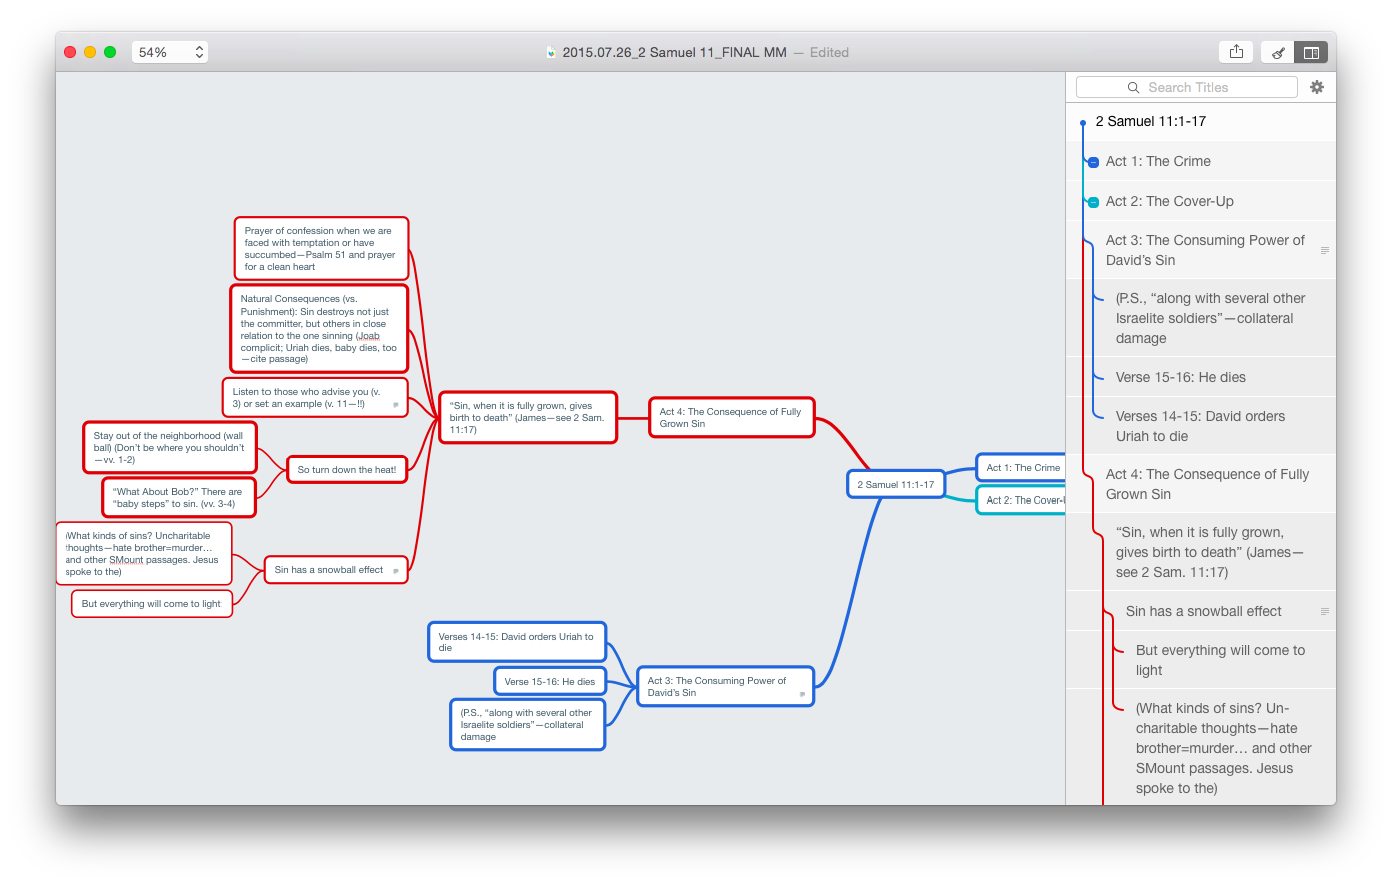
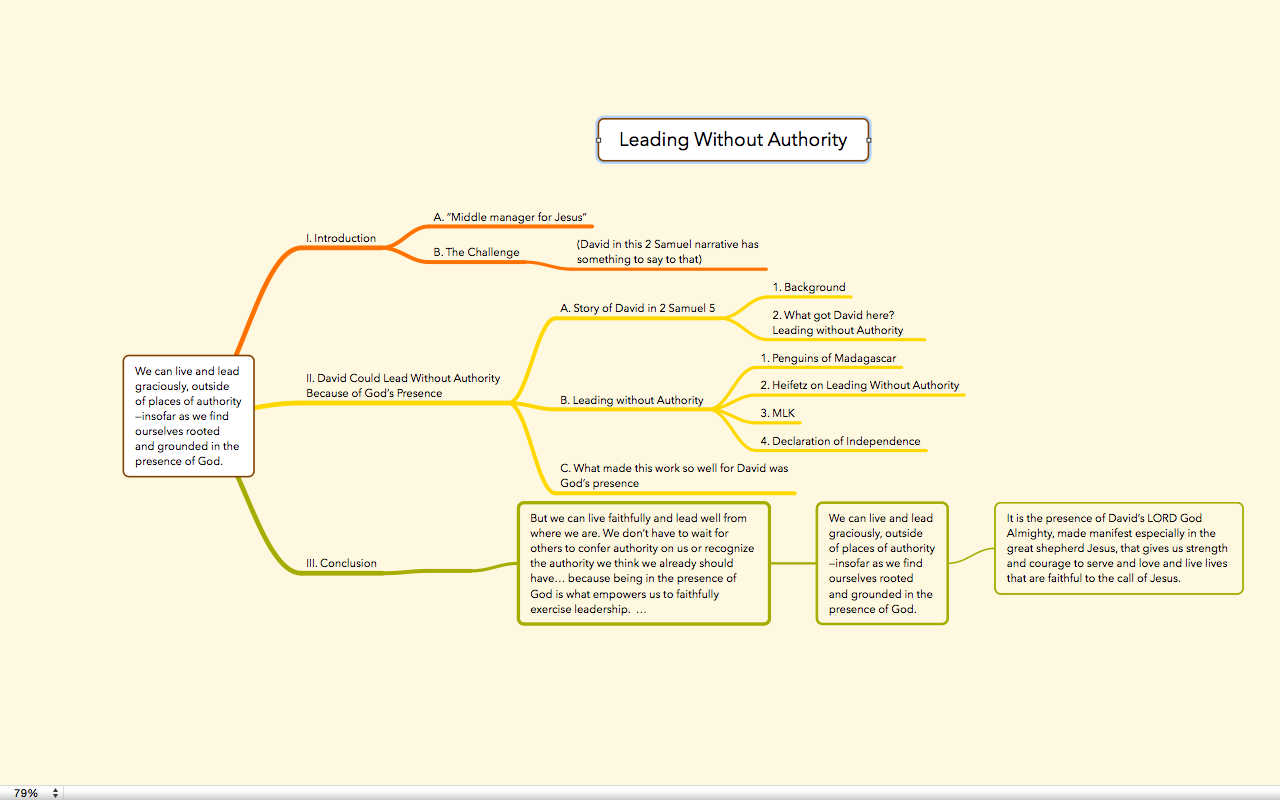
All of a sudden I’m hooked on mind mapping. It’s been a really productive way for me to make sense of the texts I speak on each week. Here’s how I’ve made structural sense of the David and Bathsheba account:
David and Bathsheba (click to enlarge image)
(If that image doesn’t work well for you, click here to see a zoomable version.)
(Next up: trying to outline thought processes in other parts of my life using mind mapping.)
I’m not at the point of being able to write a whole sermon via mind map (and may never go that route), so my next step is exporting to text.
MindNode makes that exceedingly easy, as I mentioned here. In MindNode 2.0 for Mac, you can always view a text outline of your map right next to all those nodes, sub-nodes, and connecting lines:
Note outline at right
By the way–that’s a lot to look at on one screen. MindNode has a lovely “Fit to Mind Map” zoom selection, so you can have your mind map fill the application screen. For large and multi-noded apps, that’s a great setting.
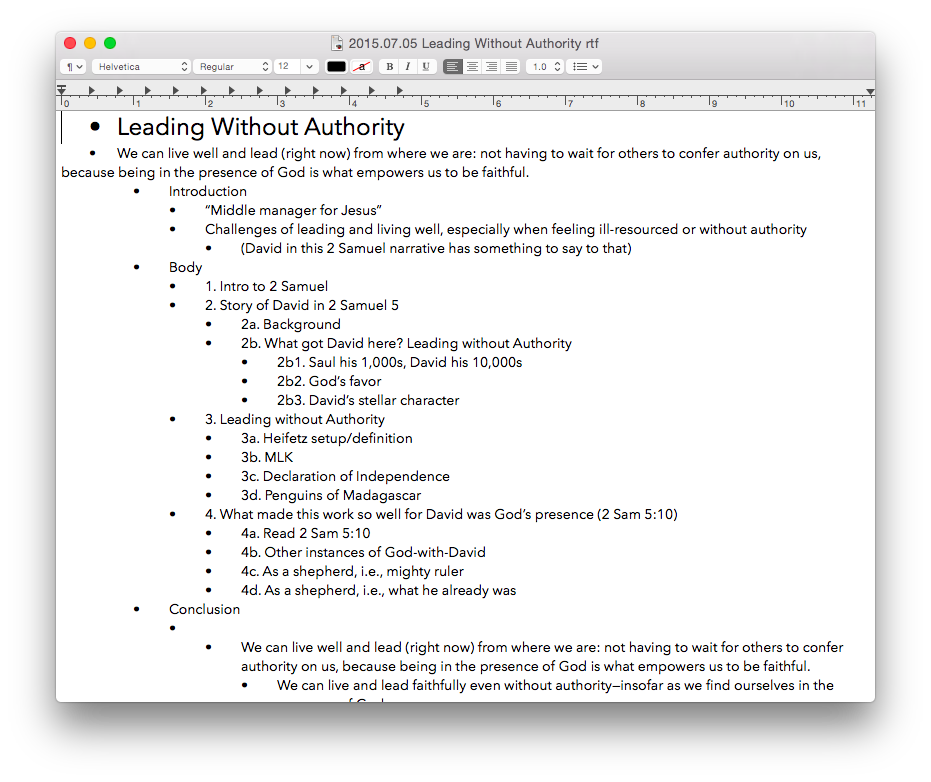
Now exporting the map to multiple options is easy. Last week I exported to .rtf, dumped the text into Scrivener, and worked from there. Export options are robust in MindNode, as are import options. I could even easily import some random thoughts from Scrivener’s cousin, Scapple, right to MindNode.
This week, however, I wanted to live dangerously. I.e., I wanted to try OmniOutliner for fleshing out my outline, once I had the content figured out in MindNode. So I exported my mind map from MindNode as .opml and opened in OmniOutliner:
What my mind map looks like in OmniOutliner (click to enlarge)
Awesome!! All right there, as it should be. All the points and sub-points are in order. The text outline that was already in MindNode is now in OmniOutliner, with everything in its right place. Even the notes popovers in MindNode (sweet new 2.0 for Mac feature) come in to OmniOutliner as notes (the grey font next to the notebook icon, in the image above).
At this point I can work from the outline in OmniOutliner. You’ll see in the image above that I’ve added a “RESEARCH” section to allow me to do just that.
OmniOutliner has similarly robust export options. I can make a couple tweaks to fine-tune the formatting in my export, and then open the finalized, annotated outline in a word processor of choice. Very nice!
I’ve been experimenting with workflow for sermon preparation lately, a little more than usual. I’ll still do my research with Accordance as my primary hub. But for the initial outlining process and the final writing process, MindNode and OmniOutliner seem to be making a great team.
One other huge bonus that both apps have in common: they are fully cross-platform across Mac, iPad, and iPhone, so I can jot down ideas wherever and whenever inspiration strikes.
Thanks to the good people of IdeasonCanvas, for giving me a download of MindNode for iOS and OSX for review purposes. And thanks to The Omni Group for OmniOutliner Pro, also for review purposes (more to come). See my other AppTastic Tuesday reviews here.
Writing Goals on iPad (Image Via Ulysses/The Soulmen)
Ability to export to Pages–this .docx export ability is great (and includes Word), but unfortunately instead of offering it alongside .rtf export, that latter option has been eliminated now (leaving Nisus Writer Pro behind)
2.1 does not add to iPad the Mac functionality where you can navigate your sheet by headings, so users will have to hope for that in future updates.
All the same, this is a worthy update. If you can live with .docx export replacing .rtf export, Ulysses users will want to update right away.
Find Ulysses for iPad here, for Mac here. I reviewed Ulysses in two parts here and here, where you can see more screenshots and read more about its features.
Ulysses offers a free trial of its Mac version here.
Accordance is offering a 20% discount on all their Collections:
Get in gear with our Back to School Sale. We are kicking off seven week of savings with a 20% off sale on Accordance Collections. Collections are the best way to build one’s Accordance Library. If you are new to Accordance, you will want to select the Collection that is best suited to your work. If you are a longtime Accordance user, consider upgrading to the next Collection level using Accordance’s new Custom Upgrades.
You can compare what’s available at the chart here.
See also my review of Accordance 11 here. It’s a top-notch program.
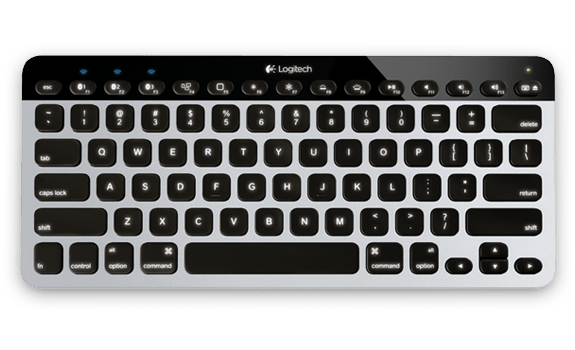
There is a proliferation of external keyboards for iPads and iPhones. Logitech’s Bluetooth Easy-Switch Keyboard K811 is by far the best.
Here is a short video of the keyboard in action:
This is no foldable, plastic, tag-along keyboard. It looks and feels like something native to an aluminum-body Mac Laptop.
This is what’s great about the keyboard:
It’s backlit. You can use it in the dark and make out all of the keys easily.
It’s got three keyboard shortcuts for toggling between three Apple devices at a time. So once you’ve paired it with, say, a computer, an iPhone, and an iPad, you can switch between any device the keyboard is paired with… with just one press of a button. You don’t have to pair, un-pair, re-pair, etc.
That backlit keyboard? It’s smart. The keyboard has sensors that allow it to adjust the illumination level based on the light in the room. Amazing. (You can also manually adjust the keyboard brightness via its F5 and F6 keys.)
The battery life is long. It’s rechargeable via an (included) USB cable. And there’s an on/off switch, of course, so you don’t drain the battery between uses.
There’s no lag. The Bluetooth connection is fast, so there’s really no lag between the time you type and see a character on the screen, regardless of the device you’re using.
It is a full keyboard. Nothing is missing–the command key, volume up/down keys, the escape key… all here.
It’s got “hand proximity detection.” From the product page: “A motion sensor detects your hands as they approach the keyboard and turns the backlight on/off to help you save power when you are not typing.” From what I can tell, this feature also helps to preserve and prolong the battery life.
Setup couldn’t have been any simpler. I probably could have figured it out without the manual, but the manual succinctly and clearly explained how to pair with devices.
Having easy access to up/down and left-right arrow keys for iPad and iPhone is really cool.
And here is what I really like about the keyboard:
If feels better than any other keyboard (portable or otherwise) I’ve typed on. Very smooth, and just the right amount of resistance on the keys.
You can use keyboard shortcuts with iPad as easily as you would on a desktop computer. The app Drafts and this Logitech keyboard make for a great combo. I started this blog post in Drafts, for example, and then with a single key stroke had sent the draft to Evernote for backup and future work across devices.
This is a little thing, but there is a keyboard key (on the actual keyboard) that lets you toggle your iPad on-screen keyboard on and off. Unlike other external keyboards, you can even have your native iPad on-screen keyboard up at the same time as using this physical one.
As for drawbacks? Nothing significant, that’s for sure. It’s not foldable, so of course it’s less portable than other external keyboards, but that is the (small) price one pays for its durability and full-size feel. I don’t mind that it can’t be folded up. It would be nice if the keyboard came with a carrying case or simple sleeve, though–you’ll have to figure that one out on your own.
The keyboard isn’t inexpensive, but it’s the best external keyboard on the market, easily. Find out more at the product page here, or via Amazon here.
Thanks to Logitech for the product review sample, given to me for purposes of review, but with no expectations or influence on the review’s content.
Some folks swear by mind mapping, a way to get ideas down on paper and visually display their interconnections beyond what just a text editing file can do.
I haven’t found it as easy a medium, but this last week I tried mind mapping my sermon outline before writing out the manuscript, and found the process really helpful. I used the app MindNode to do it, which I review today.
A Simple Mind Map of The Fifth Discipline
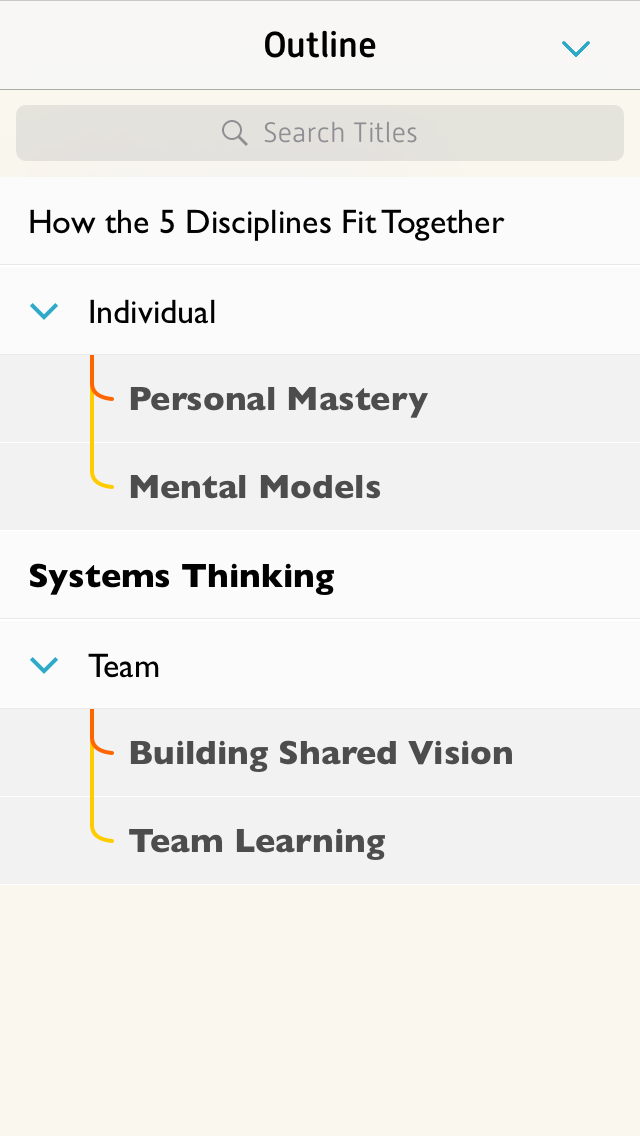
Here’s a simple mind map for understanding Peter Senge’s five disciplines in The Fifth Discipline:
5 Disciplines on an iPhone
What’s really cool is what you can do with this mind map in MindNode (iOS) once you have it. You can see a text-based outline, which can expand or collapse levels:
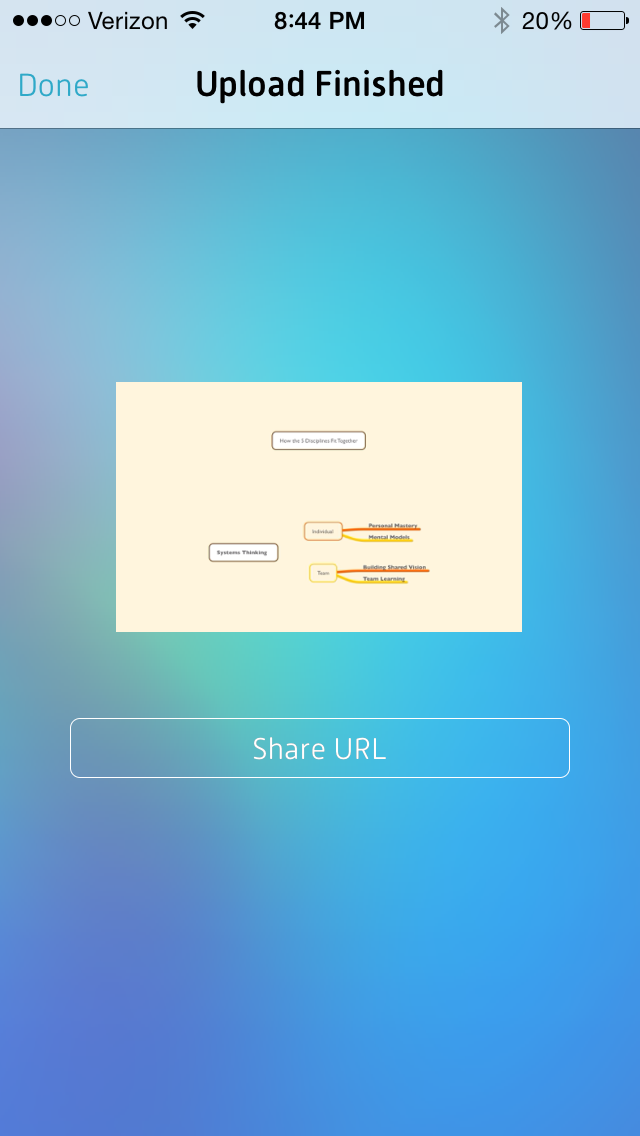
And you can export to MyMindNode, where you can view and publish your map on the Web:
You can then share the link to your mind map
I was hoping to embed the above mind map right here in this post, but WordPress.com does not support plug-ins or a good deal of third-party embeds (dah!), so I simply can give you this hyperlink to see what it looks like.
More Complex Mind Mapping
I used MindNode to map out my sermon outline this last Sunday. When I was done it looked like this:
ScreenShot from OSX app MindNode Pro (click to enlarge)
And then I thought: oops. How I am going to get this into Scrivener without re-typing everything? At first I just dragged a .png image file into Scrivener so I could see the mind map as I worked on next steps. Then I realized I could actually export it not only as a PDF or image, but as a text file. (!!)
It looked like this:
…which was sweet, because then I could just copy and paste to Scrivener and write my manuscript into my outline, started in MindNode.
By the time I was done writing the manuscript, I’d pared down the outline a bit. Editing in MindNode was easy, so that the final map looked like this:
Nodes, Parents, Siblings, Etc.: All Easy to Use
There’s a lot more to mind mapping, not the least of which is learning some terminology (nodes, parents, siblings, children, etc.). The best place to start is the MindNode Web page here. The iOS User Guide is also a great way to get to know the app; that is here.
Styles, fonts, and colors are all customizable. And it seems a rare treat for a writing app to exist (and be well-designed and executed) on iPhone, iPad, and Mac. Of course, for a large mind map one will probably choose Mac (or iPad) over iPhone, but moving between devices is easy. There is no Apple device on which you cannot access and edit your mind map. There’s even an accompanying Apple Watch app.
There are some other really nice touches, too, like being able to “fold and unfold” nodes, the equivalent to expand/collapse in a table of contents, for example. You can hide all of a nodes’ children if you need to clear up some screen real estate, and just as easily unhide them. You can also add notes to a node for storing even more information without having to display it.
Perhaps the best thing about MindNode is how easy it was for me to make both of the above mind maps before reading any of the support material. Moving nodes, connecting them, disconnecting them, changing fonts, dragging things around, exporting, and more… all of this was really intuitive and easy to come by both on OSX and iOS.
So… I’ll keep trying mind mapping for the outlining stage of writing. MindNode has much more still to uncover, and I’m looking forward to future use. A brilliantly executed app.
Thanks to the good people of IdeasonCanvas, for giving me a download of MindNode for iOS and OSX for the review. Check out the app’s iOS page here and the Mac app (MindNode Pro) here. Note that MindNode Pro for OSX has now been updated to MindNode2. See my other AppTastic Tuesday reviews here.