
Congrats to Daniel Saunders, the winner of the Scrivener iOS giveaway! Enjoy the app, Daniel–it’s a good one.
Here‘s my mini-review of the app, if you want to see what the hype is about. Thanks for all who entered! You can get the app here.
Congrats to Daniel Saunders, the winner of the Scrivener iOS giveaway! Enjoy the app, Daniel–it’s a good one.
Here‘s my mini-review of the app, if you want to see what the hype is about. Thanks for all who entered! You can get the app here.
![]()
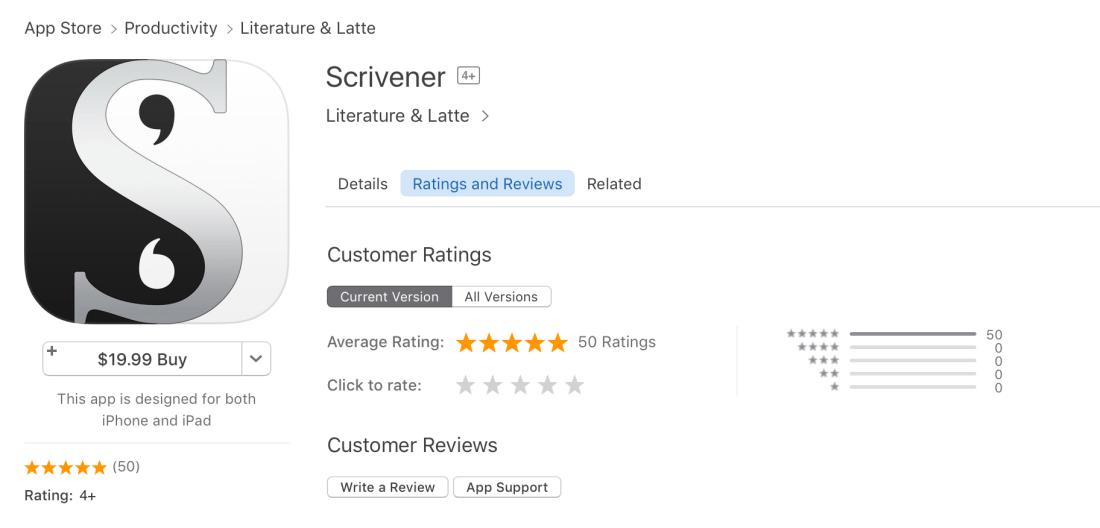
Scrivener for iOS continues to receive rave reviews in the App Store. For good reason. Here‘s my mini-review of the app, if you want to see what the hype is about.
Today I’m posting just to say I’ve got a free download code to give away to one lucky reader.
To enter to win, leave a comment with what you’re writing about now. If you share a link to this post on Facebook and/or Twitter, you get a second entry. (Make sure you let me know you shared, and leave the link in the comments.)
A week is a long time to wait for giveaway results, so this one is quick–I’ll announce the winner Friday at 5:00 p.m. EST.
![]()
Scrivener is so good a writing program, I used its iOS app in beta as my primary place for writing at a recent week away. (For the record, I found no bugs.)
It’s easily the best writing app there is for Mac and Windows. (See here and here.) But its iOS companion has languished in development like a half-finished manuscript.
Until today. Scrivener for iOS (iPad and iPhone) is in the App Store right now. Here it is, worth more than its $19.99 price.
This post was going to highlight my five most used features in Scrivener for iOS; it’s grown to eight, though there is even more than the below to appreciate about the app.
1. Goodbye, Markdown–Rich Text is Back!
No offense to Markdown (Ulysses and 1Writer are still fabulous apps), but I’m happy to have a full-bodied, rich text app on iPad, at long last. Pages is fine, but Scrivener can do so much more, since it organizes your research, supporting documents, and drafts–all in once place.
2. Pinch to Zoom Text
No need to tap through a settings screen. Just pinch (zoom) in or out to adjust the text size you’re seeing as you write. Scrivener does a great job in this way of taking advantage of the iOS platform.
3. Sync via Dropbox to the Desktop Apps
Truth be told, this is probably my #1 favorite feature–you can start working on a laptop, finish up a draft on iPad, and edit on your iPhone. This is what the many users of Scrivener have been waiting for. Ahhhhh.
4. Research: Have Your PDFs Right There
Not only can you save your research in your project you’re working on (for easy access), Scrivener remembers your place in the PDF you were viewing.


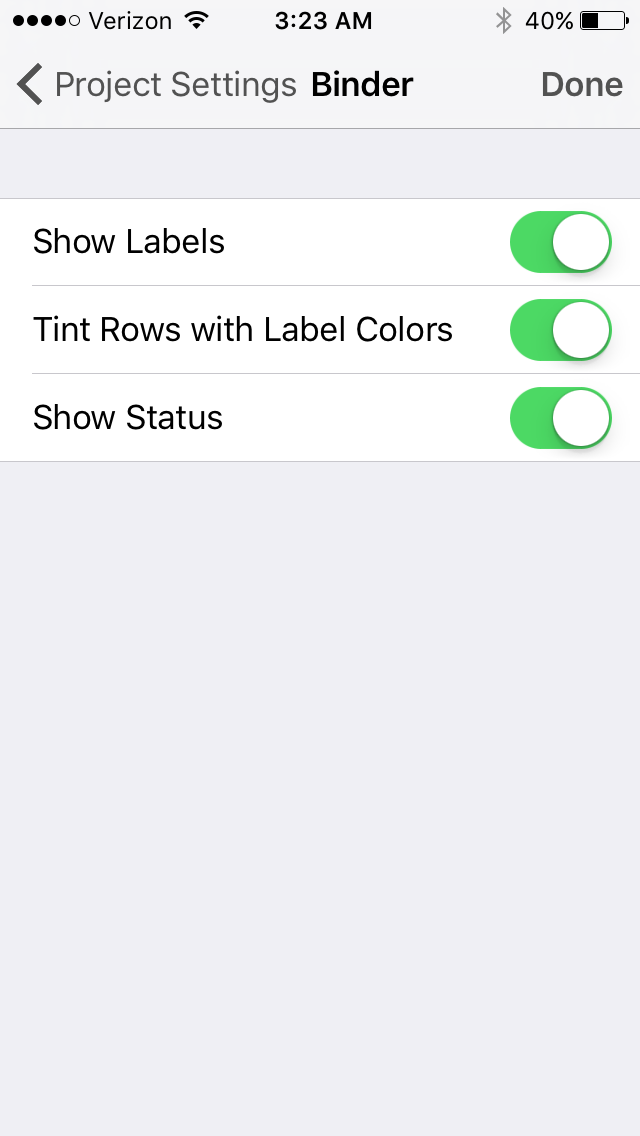
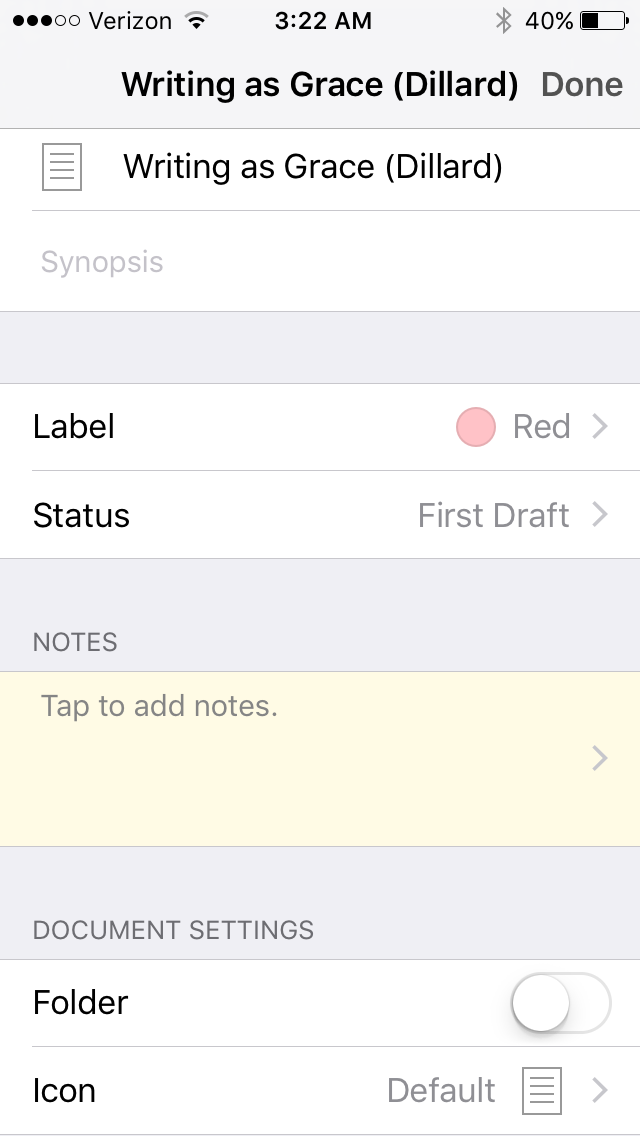
5. Set Label, Status, Icon for anything in the Binder
This will mostly appeal to Scrivener nerds, but you can label and color code your way to great visual clarity to track project progress. (I use Red to mean done (at least for now), Yellow to mean working on, and Green to mean do it!)

6. Recent and Bookmarks
Always a tap away are your recent documents and bookmarks.
![]()
7. Two Panes at Once on iPad in Landscape
The iPad app comes out of the box with Split View and Slide Over, but you can also see two panes at once when you’re using Scrivener in landscape mode. This is especially helpful if you want to write, for example, from an outline.
8. Word Count
Word and character counts are easy to access, too.
Once again, here it is in the App Store.
And if you want to desktop version, here are the links for purchasing Scrivener:
You can also try Scrivener on Mac or Windows free for 30 days if you want to see what you think.
Thanks to Scrivener for allowing me to beta test this excellent app, and best wishes to their team on launch day!

This week Accordance Bible Software has put their five-volume Ancient Christian Doctrine (IVP) on sale for $129 (normally $199). Ancient Christian Doctrine is a full-blown compendium of early church commentary on the Nicene Creed. I write more about the resource here.
If you’re teaching or preaching on the Creed, this is possibly the best resource to start with. (And, of course, it’s likely available for free in print at your local theological library.)
The related Ancient Christian Commentary on Scripture (covering the entire OT and NT) is also included in the sale.
Here‘s the link to find Ancient Christian Doctrine at Accordance.
This week’s blog sponsor is MailButler, the feature set you always wished your Mac Mail had (and that I’m glad mine does). Find out more about it here or download and try it free here.
I’m pleased to announce that this week Words on the Word is sponsored by the MailButler app from Feingeist.
I reviewed Feingeist’s Evermail app here. It’s an Evernote add-on for Mac Mail. I still use it on my work computer every day that I’m on email.
MailButler includes that add-email-to-Evernote functionality, but also offers a much more robust feature set. Here’s some of how it enhances the Mac Mail program:
This is the full product description from Feingeist:
MailButler is the productivity boosting add-on for Apple Mail. It helps you organize and optimize your email correspondence, and saves you lots of common and annoying mistakes. With MailButler you have to worry about nothing, because it has your back while you’re working with Apple Mail.
Among the great options that MailButler offers is the ability to schedule, track, and undo emails, upload email attachments regardless of size, convert emails to notes, create amazing signatures, and many more. To get access to all of those features, you just need to download and install MailButler, and register a free MailButler account.
The MailButler homepage is here. You can download it directly here. Installation is free, so you can try it out with some of the actions to see what you think. If you scroll down to the bottom of the product page, you’ll see the subscription options.
![]() Word count is by no means the best measure of effective writing, but it’s a useful metric for tracking your progress.
Word count is by no means the best measure of effective writing, but it’s a useful metric for tracking your progress.
The Mac Word Counter app by Christian Tietze lives in the menu bar and automatically tracks your word count across apps. This is especially helpful for us writers who can’t seem to settle on a single app for writing.
Even when Word Counter is out of site, you can have its menu bar icon display your running word count for the day:

You can specify which apps you want Word Counter to track:


Once you’ve added your apps, just click on the menu bar icon to see a breakdown:

Hovering over the bars gives you an hour-by-hour, app-by-app breakdown of your progress. Very cool!
You can look at your day-by-day word count history, which is also impressively sub-divided into hours and apps:
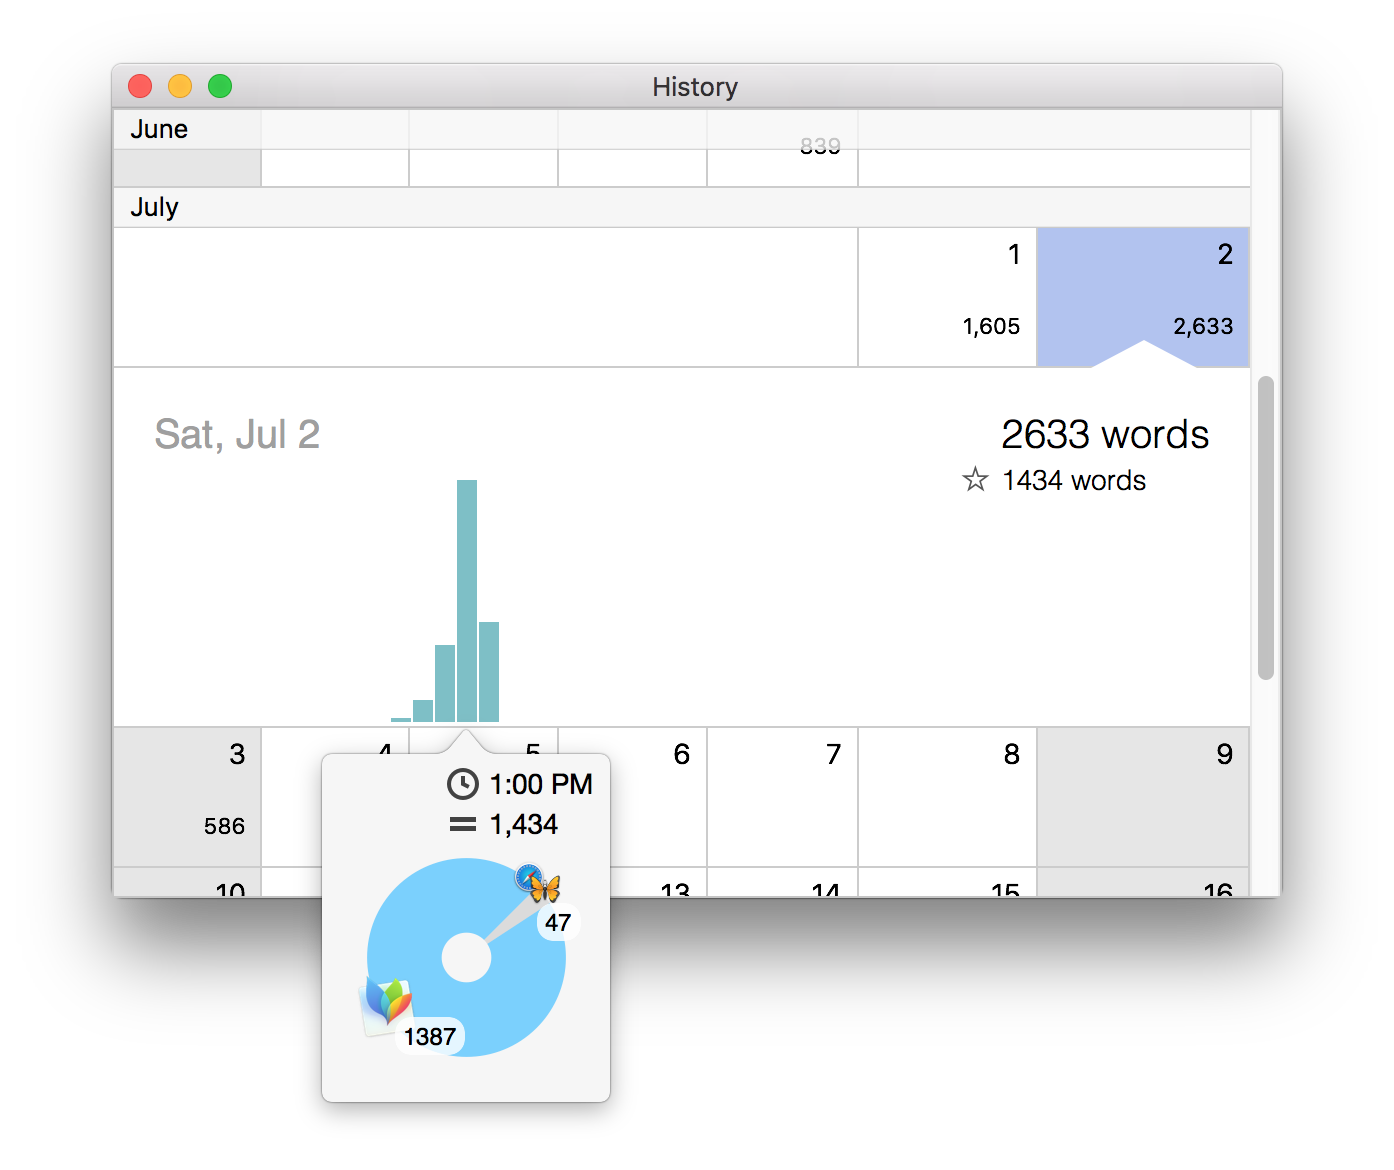
And that’s honestly probably enough for most of us–a detailed word counting tool that is easy to access, updates automatically, and tracks multiple apps.
But there is also a nice additional feature of being able to track word counts on individual files. This comes in handy especially for a file you’re working on via Dropbox across multiple machines. Word Counter will track the word count for you via Dropbox, no matter what device you typed the words on.
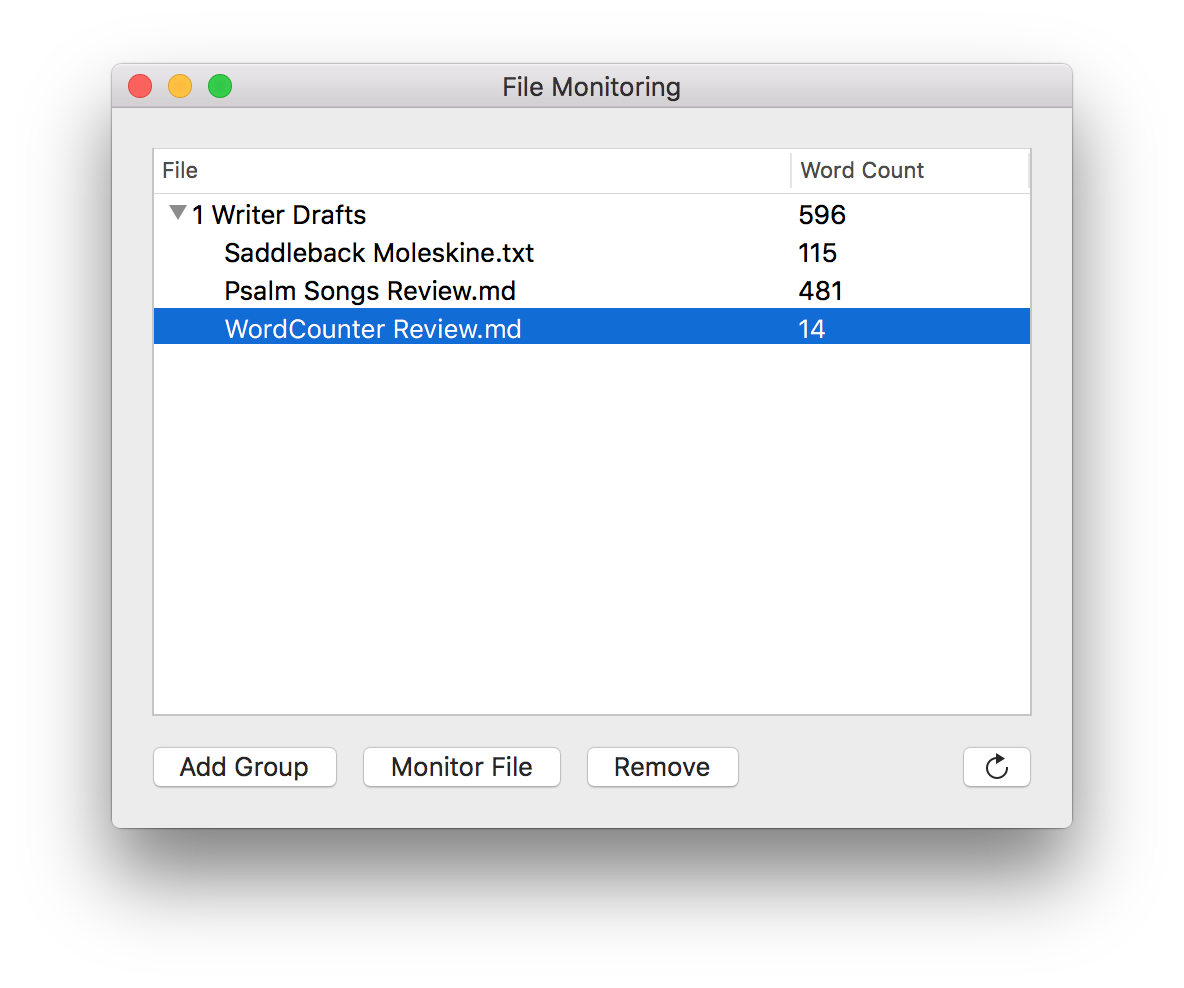
The only downside to this feature is you have to manually refresh (icon at bottom right hand corner in the image above) to get the word count to update. (UPDATE: I’ve just learned it does refresh on its own every few minutes.)
Word Counter does provide a solution to the as-of-yet-non-existent word count feature in OmniOutliner.
The only other possible area for improvement is that when you add a file for tracking from the File Monitoring window, you have to select “Monitor File” and go find it in Finder, rather than being able to just drag and drop a file from an already-open Finder window. This would be a nice feature for a future update.
The app is easily worth its $9.99, and there’s a free 14-day trial so you can test it out. Find it here.
Thanks to the dev at Word Counter for the promo code so I could review the app.
I’ve got a sweet Logos–>Drafts 4 workflow I’ve been using on the iPad for a few months now. (I find Logos’s iOS app to be significantly zippier than its Mac counterpart.) Allow me to demonstrate, using Harold W. Hoehner’s excellent Ephesians commentary.
1. Open up Logos in iOS.
Here’s Hoehner’s lovely commentary.
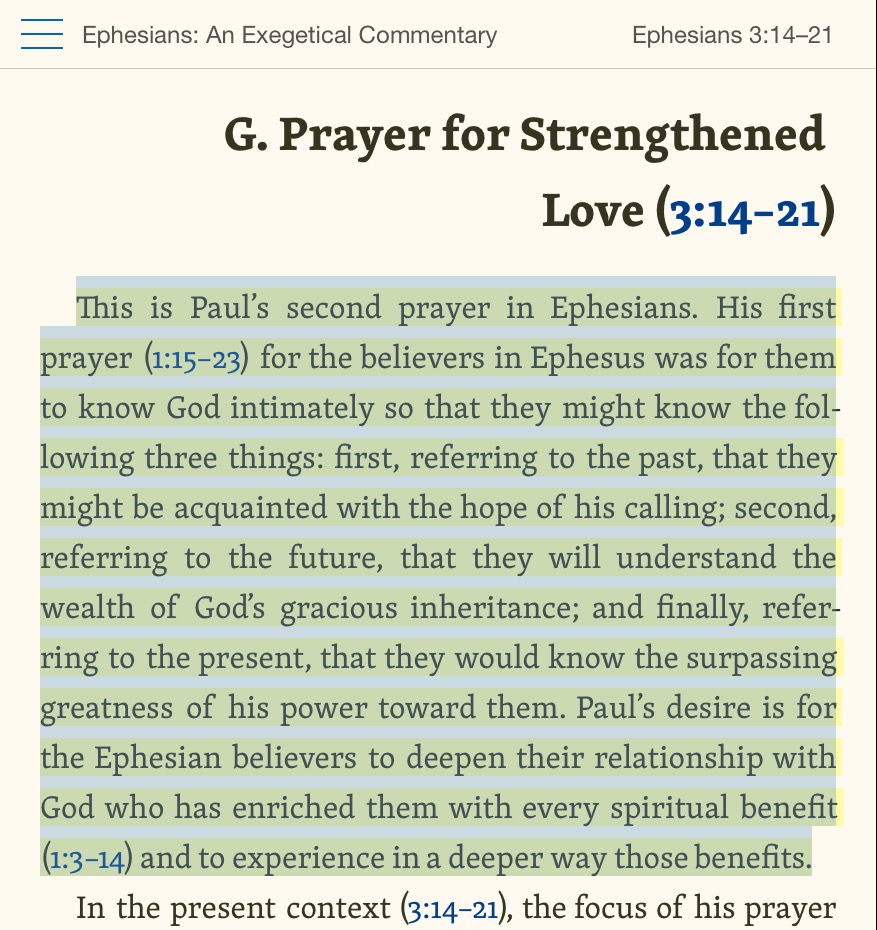
2. Tap selected text to bring up highlighting and share options.
I’ve got Drafts open with Logos in Split View, just so you can see them together. All these steps work with Drafts not visible, however.

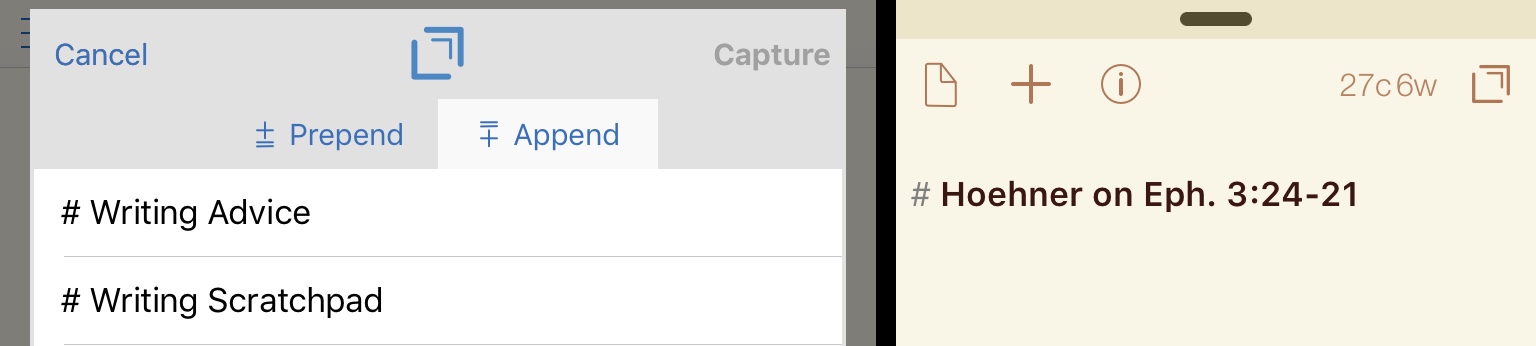
3. Select Drafts in the share option.

4. Now you can “Capture” to send the selected text right to Drafts OR prepend (add to the beginning) or append (add to the end) to an existing draft. (!)

If you do Prepend or Append, Drafts comes up to let you choose where to put your text.
5. When you’re done repeating this process for as much text as you want to copy, you can merge individual drafts, if needed.


You can even choose your own text or symbol to separate merged drafts:

From here it’s easy export from a single draft to Ulysses or MindNode, and on goes my sermon preparation! Drafts4 has been the most indispensable app in my attempt to do as much sermon preparation as possible on the iPad.
Thanks to Logos for the Hoehner commentary so I could write up the workflow–review of the commentary itself to follow. The Logos mobile apps are free, available here: iOS / Google Play.
![]()
Alfred can be an intimidating Mac app, but its capabilities are pretty unparalleled when it comes to automating workflows. They’ve just announced the release of Alfred 3:
After months of intense development, polishing and testing, Alfred 3 is here and ready for you!
It’s been a thrill to add new features to Alfred, and improve existing ones. We already can’t live without these new features, which add so much to our workday productivity; Amazingly flexible workflows, snippet expansion, multimedia clipboard and more.
You can download Alfred 3 to get started right away.
We’ve highlighted a few of the new features below. We also published a post answering some of the commonly asked questions for Alfred 3; upgrading your Powerpack, migrating your preferences and more, so take a look for details.
The download of the app itself is free, and then you can pay for an upgrade to get the full set of features.
The snippet expansion is perhaps the most exciting feature to me. Much as I and others owe TextExpander a dept of gratitude, its new monthly subscription model suffered from a hasty (and probably overpriced) roll-out. Alfred, at any rate, can expand keyboard shortcuts and much more.
Find out more here.
Agile Tortoise (Greg Pierce) is probably the best iOS developer there is. I use his Drafts 4 app all the time–an amazing combination of text editor simplicity and power user export options.
He’s just made a $0.99 game called Diced.

From Agile Tortoise’s blog announcement:
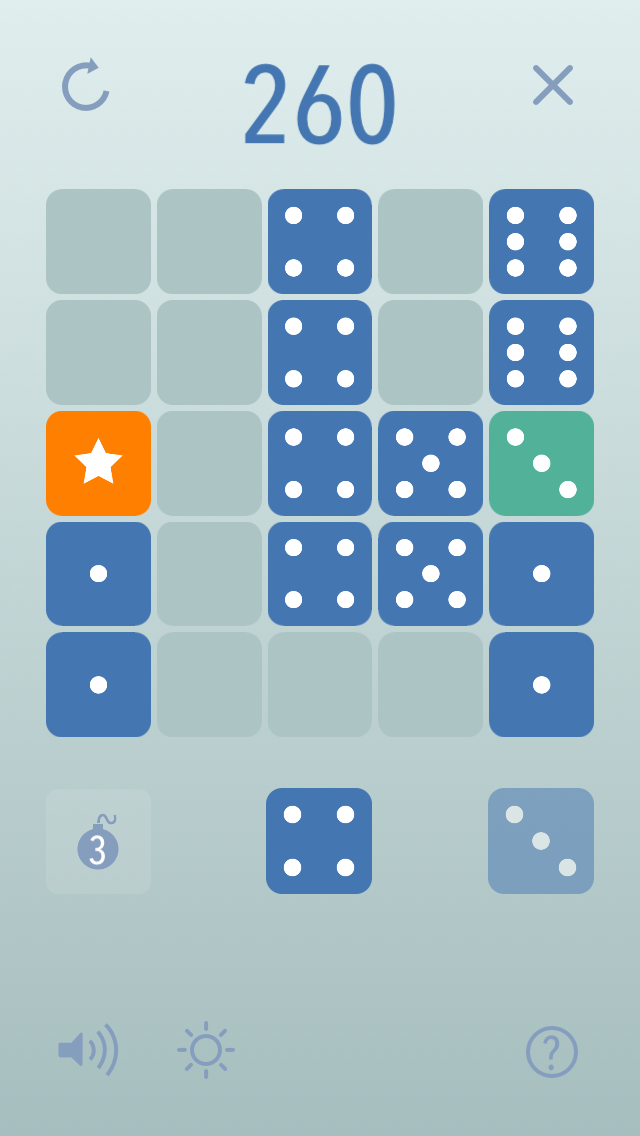
Diced is a simple puzzle game. Place dice on a grid to make five of a kind or five in a row (straight) combinations to score points and clear the die. Score as many points as you can before the grid fills up and the game ends. Some game play features:
- Quick launch and game restore. Easy to leave and come back where you left off.
- Wild die.
- Bombs.
- Random blocks to add difficulty as the game progresses.
- Game Center support with leaderboards and achievements
There are no ads, no in-app purchases, and it works perfectly. It’s universal, so you can play on iPhone and iPad, where Split View is also supported. (This guy thinks of everything.)
It’s not quite like poker–a full house combination won’t clear a row for you. But between the five of a kind and five straight goals, you’ve got enough ways to clear the board (the bombs help, too). Also cool is the dark mode, which you can toggle off and on.
Check out the app here.
 The rise of the brilliant app 2Do notwithstanding, I continue to utilize OmniFocus as my task management hub. I was eager, then, to try out The Omni Group’s outlining app, OmniOutliner.
Think of OmniOutliner as a thought structuring app, suitable for both creating and organizing content. You can use it for any of the following scenarios:
There are multiple other uses for the app–I’ve made good use of it in sermon preparation, as you’ll see below. Right away the Mac and iOS apps take you to a templates screen so you can get started without delay:

Getting content into OmniOutliner is fairly easy. It’s not as intuitive as just opening a blank Word document and typing, but it’s simple enough to open an outline and start writing.
Once you’ve gotten your outline going, being able to fold and unfold (collapse and expand) entire parts of the outline is a huge asset. If I’ve broken a book review down into parts, for example, I can just collapse the sections I don’t want to see at the moment:
Then there is the organizing power of OmniOutliner: you can take any node and indent or outdent it. You can drag sections of the outline around to quickly re-order them. And you can make batch edits when selecting multiple parts of your outline.
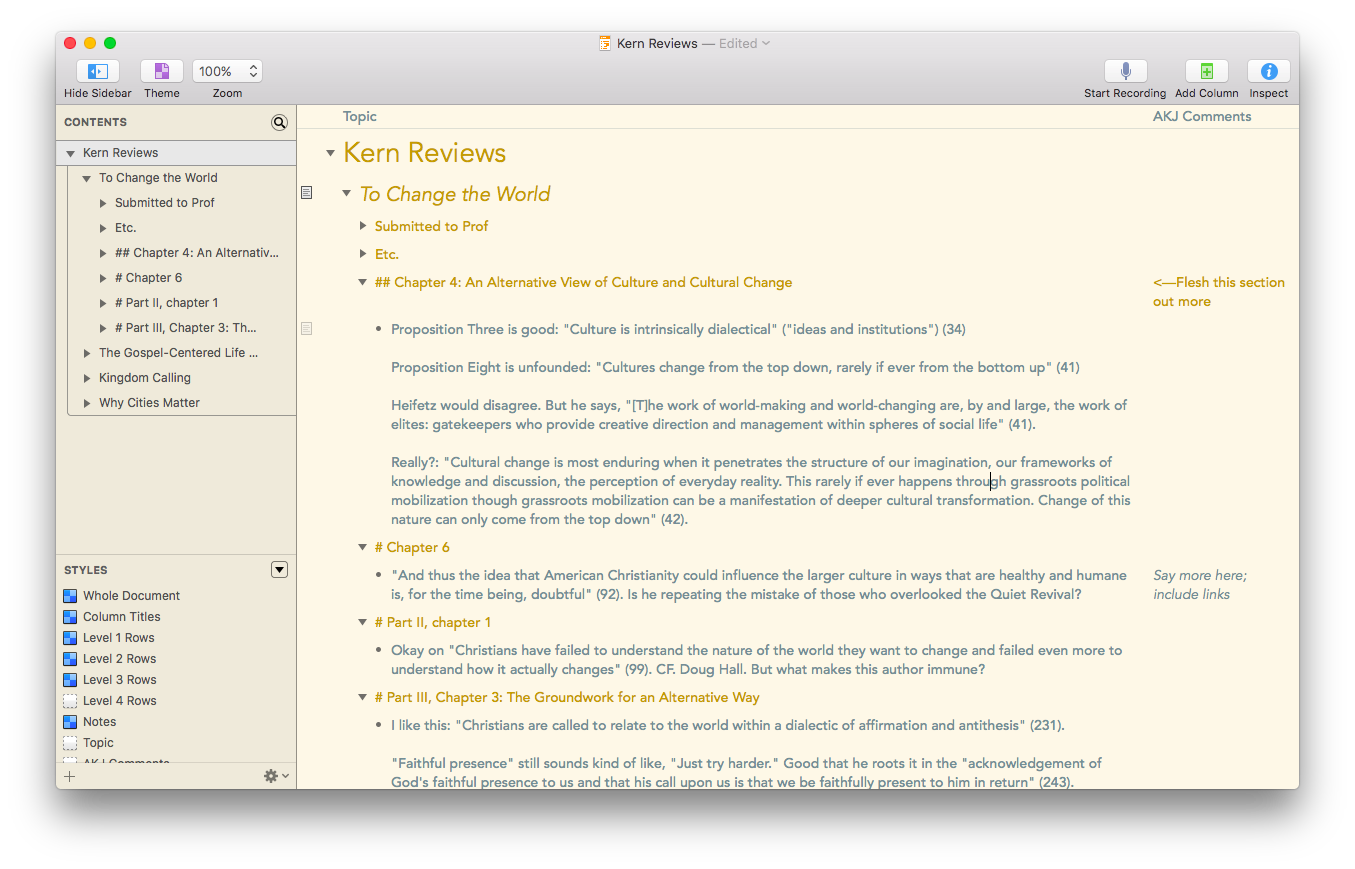
Perhaps the most helpful feature to me has been the ability to add notes to content, which you can then either hide or show. In this simple outline, I’ve set the note at the top to display (in grey), while the one toward the bottom remains hidden.

You can show the sidebar, which allows you to move back and forth between a lot of content in one outline. When preaching on David’s odious sin against Bathsheba and her husband, I utilized an outline that included both my sermon structure and accompanying research. You can see that reflected in the sidebar, at left, even while my Topic column could remain focused on a smaller portion.

You can add media (audio recordings and video) to your outline. Your files would be huge, but if you wanted to use OmniOutliner for classroom notes, you could also add a live recording of the session, straight into your outline.
And then there is the styling. My goodness. You can tweak every aspect imaginable of your outline.
 I found this feature set to be impressive but overwhelming. For my purposes, I didn’t need to do a whole lot by way of formatting, but the options are there should you need them.
To that end, the help files for OmniOutliner are incredible. So is their support team! There are user manuals you can download in multiple formats, and they are outstanding. In a couple of sittings, I read some 100 pages of the iBook version of the OmniOutliner for iOS manual. Yes, it was that interesting! Other app developers should take notes.
OmniOutliner is also available as a universal iOS app, working on both iPhone and iPad. You can sync across devices using Omni’s own server or your own.
The keyboard shortcuts available for iPad make OmniOutliner a serious contender for best writing app for those who are trying to make a serious go of it on iPad instead of computer. Omni Group’s Ken Case announced the shortcuts last November.
This means that the iOS OmniOutliner app is close to parity with the Mac app. This rarely seems to be the case with other apps, where iOS versions tend to lag behind their desktop counterparts.
OmniOutliner has had Split View and Slide Over in iOS for just about as long as iOS 9 has been released.
One other really cool thing: you can import the OPML file format from a mind map to move from mind mapping straight into OmniOutliner.

If that workflow interests you, read more about it here.
A few things are lacking in OmniOutliner:
Byte for byte, OmniOutliner is worth your considering as your primary writing app. If you don’t need to be as structured with your writing, it may not be your top choice. Its integration across iOS and OS X, though, make it a possible go-to repository for collecting and organizing information.
You can find out more about OmniOutliner here and here.
OmniOutliner for iOS (Universal) is $29.99.
OmniOutliner for OS X is $49.99. OmniOutliner Pro includes a few more features and is $99.99.
You can get a free trial of Mac app here.
Thanks to the fine folks at The Omni Group, the makers of OmniOutliner, for giving me downloads for the Mac (OmniOutliner Pro) and iOS apps for this review. See my other AppTastic Tuesday reviews here.


